I am beyond excited to share a dining room progress report with you today, as it’s turning out even better than I had ever dreamed! Last week I shared how my initial vision for the dining room did not pan out as I originally planned, but I trusted the process and kept designing until I felt one of my mood boards “stick” so to speak.
While part of this installation happened quite some time ago, I want to go back in time and walk you through the process of some of my decisions along the way. My hope is that by sharing my journey with this space, you’ll be armed with some things to consider for your next room flip.
Wallpaper
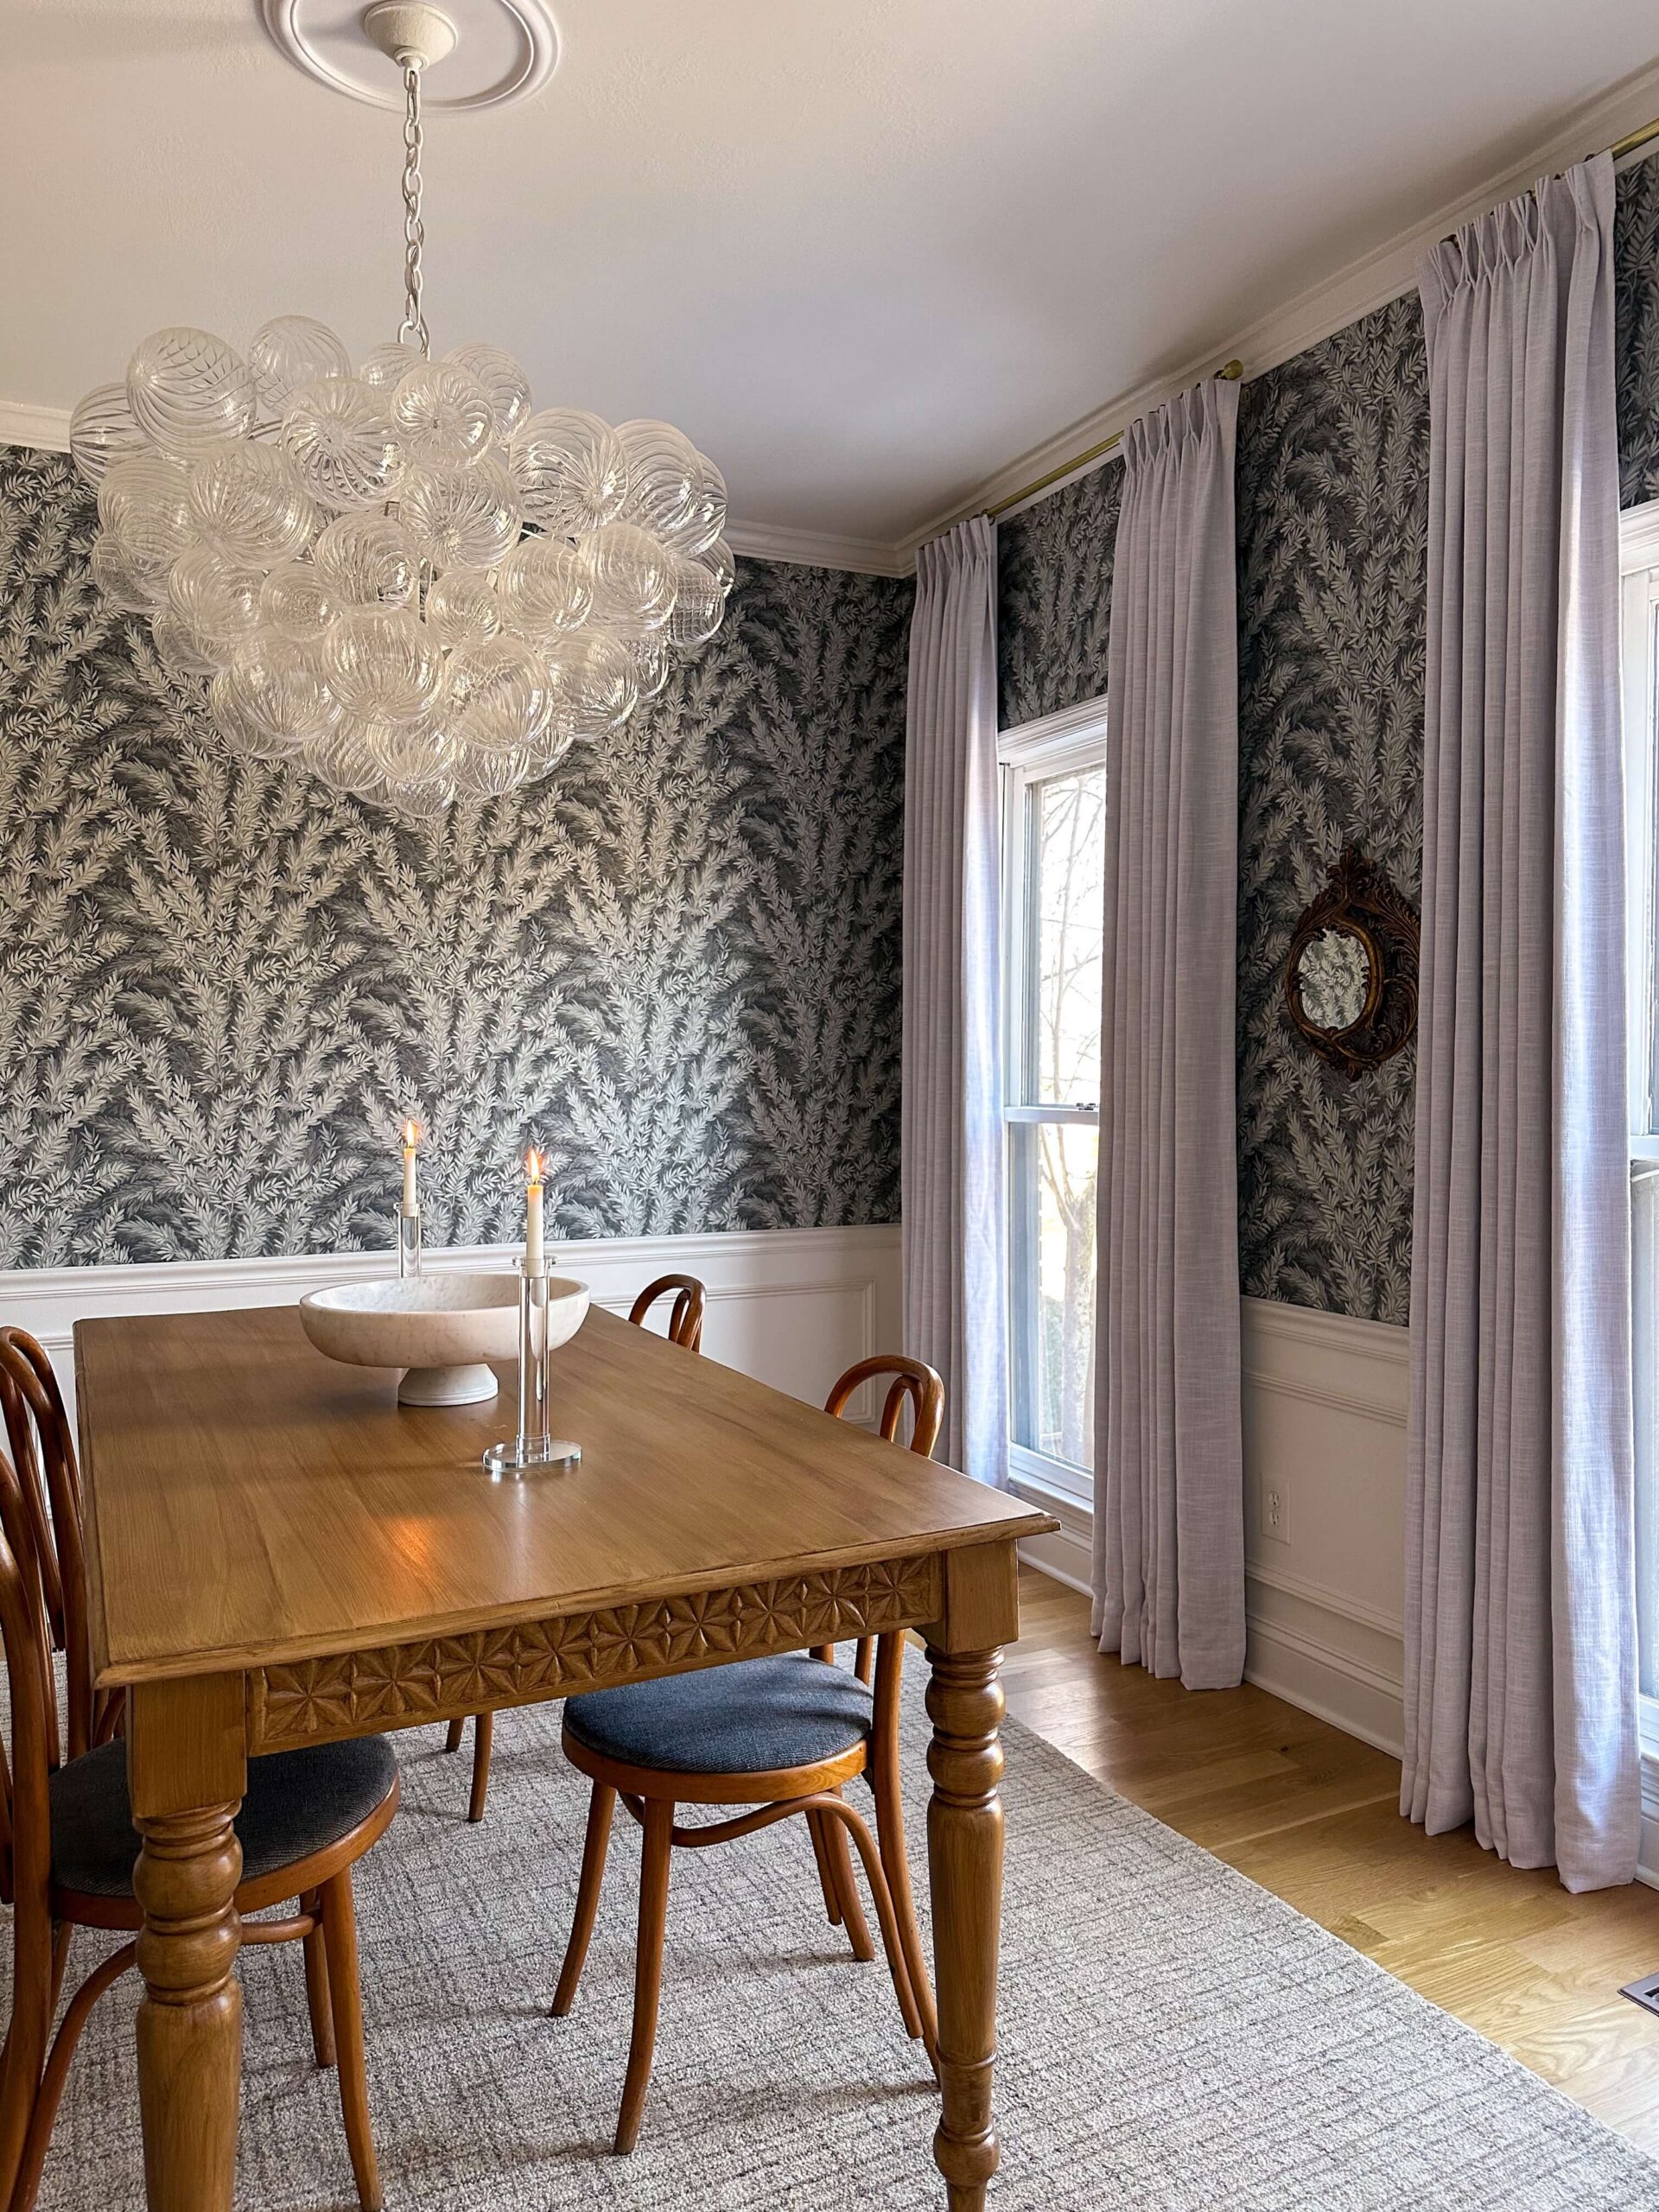
Wallpaper can be a tricky thing. All too many times, I’ve fallen in love with a pattern online, only to be disappointed with how it translated in person. What we all hope for, is it will match up fairly well from onscreen to real life. In a rare case, the opposite will happen, and the wallpaper will be even more beautiful in person than on the screen. This was one of those moments.
The minute I pulled the first roll of this Cole & Son wallpaper out of the box, I was mesmerized. The print has texture to it, and almost appears like painting brush strokes, and the quality of the paper is simply beyond. I was already excited about the choice, but seeing and holding it in person just took everything to another level.

While I am a true DIYer at heart, I made the executive decision to hire this job out. I know, I know. While this isn’t the norm for me, I was able to find a wallpaper installer in my area that had amazing reviews and charged an incredibly reasonable rate. Weighing the cost of this particular wallpaper (it was expensive!!!), and the fact I waited a bit longer for it to arrive from London, I decided it was worth the extra expense to ensure it was installed perfectly. Looking back, I’m so happy I did this.
Lighting
After I landed on the wallpaper, the lighting was the next design decision that followed. The wallpaper really feels like I’m bringing the outside in, so I wanted something that complimented that theme. The initial plan was this tiered chandelier by Visual Comfort. I loved the cascading globes, and the fact they were a frosted white would play so nicely with the palette that was currently unfolding with the wallpaper. However, I couldn’t get past the little crystals on the rod. I know it’s a tiny detail, but it’s one I would notice and likely fixate on.
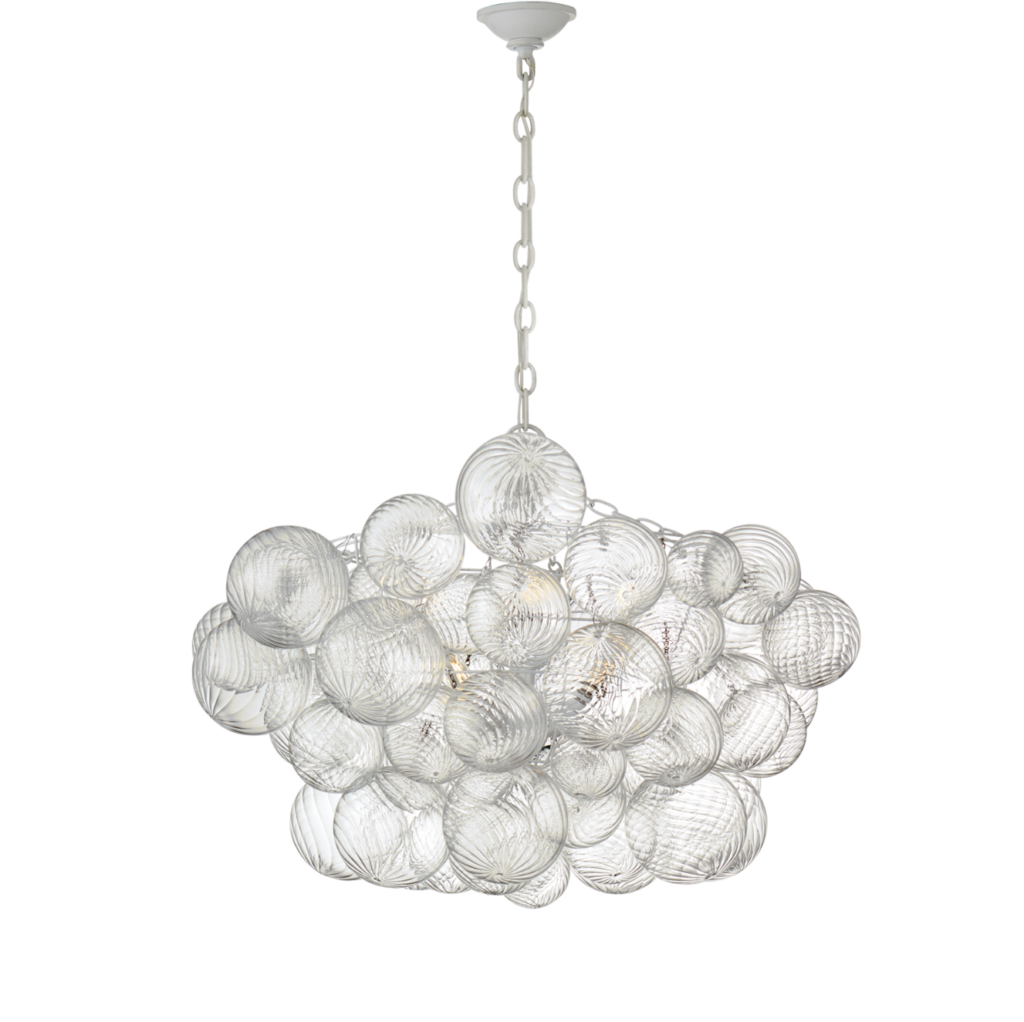
Following the same theme, I continued my hunt until I found what I knew was “the one.” The Bubble Chandelier by Visual Comfort is what dreams are made of. I truly wish I had a picture of the size of the box this was delivered in. It was MASSIVE! The globes were in protective Styrofoam all organized by size, with a chart that showed how to assemble.
Along the same theme as the wallpaper, I opted to hire an electrician to install the cage of the chandelier. While I’ve learned how to rewire lighting on my own, I wanted to be able to stand back and look at the height from the table this would be. Again, super happy I just paid the $100 for the electrician to install the frame of the light. I was in charge of assembling all of the glass globes, which was actually quite fun! I enjoyed seeing it come to life and it really is a piece of artwork.
Dining Set
You’ll remember that during my mood board designs, the furniture was the biggest hang up for me in this space. I spent quite a bit of time browsing through dining set combinations, and at the end of the day, I cannot justify ordering something brand new. Especially when most of the pieces I’ve found definitely are not real wood. On the other hand, a black dining table just isn’t going to work in this space (or any other one in this house).
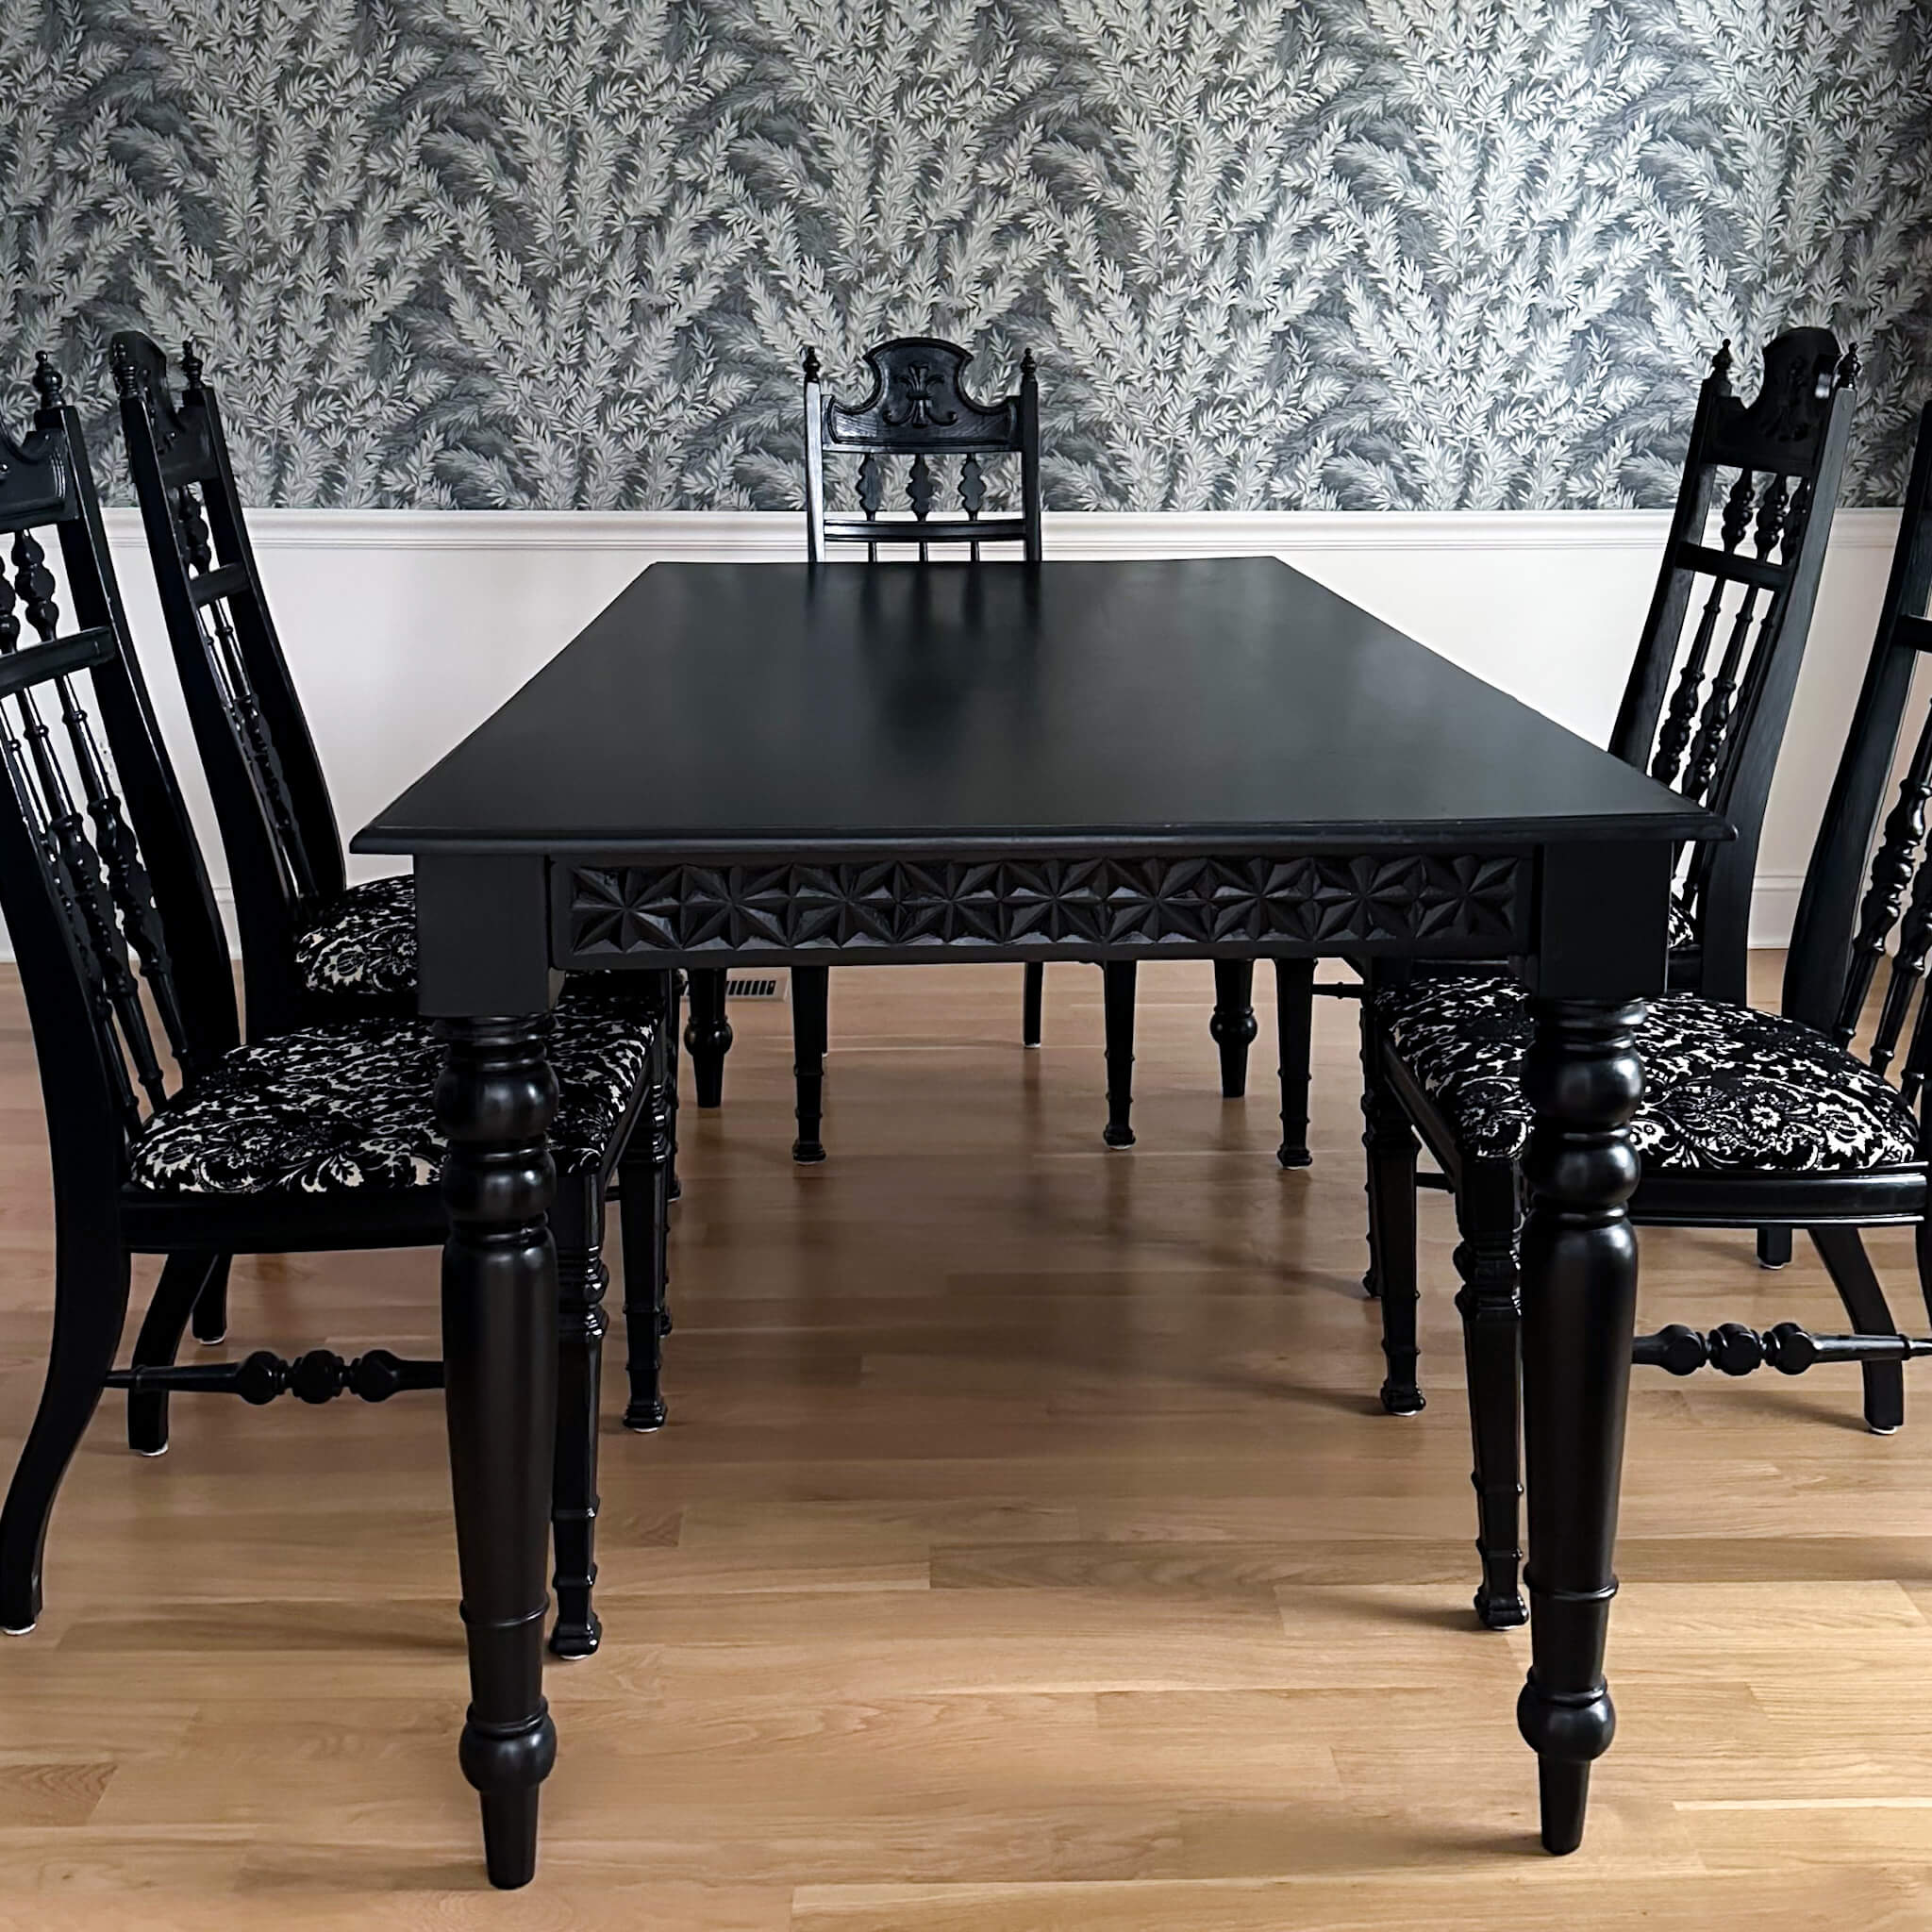
Since I really do love the actual dining table (the criss cross pattern and the shape of the legs are my favorite), I’m going to try my hand at refinishing it using Retique It. This process is currently giving me some stomach flips, as I admittedly do not know what I’m doing, but I’m deep into some YouTube tutorials and am determined to figure it out.
In the meantime, I found some adorable bentwood chairs on facebook marketplace from the 1950’s and immediately scooped them up! The upholstery is a blue that matches the wallpaper exactly! I mean, what are the odds right?! There are only four of these chairs, so I plan to find two additional chairs for each end of the table. I’m taking my time with this, as it’s not incredibly urgent at the moment.
Parting Thoughts
The dining room progress is certainly taking its own shape, and I’m really learning to love the idea of letting the design process unfold the way it should. While we still don’t know what the finished result will actually look like, I feel confident it’s going to be even better than I had originally hoped.
In the coming days, I’ll be sharing the process of flipping my dining room table which will come with the good, the bad and the ugly. But hopefully there’s no ugly to report! All in all, I’ll include an honest review of the process and finished result. Following that, we’ll be primed for a full reveal of the finished dining room, just in time for Thanksgiving!