The bathroom renovation hummed along this week and and I’m getting one step closer to finishing the custom wainscoting. This week it was all about the crown molding, as well as deciding on some of the remaining box sizes. I also dabbled in a little bit of electrical, which I’m quite proud of. Lets dive into the primary bathroom renovation week 8!
I’ve always been fascinated with crown molding and love the rich, traditional look of it, especially in houses with higher ceilings. My house has always perplexed me, as there’s crown molding in some of the rooms but not all of them (the entire second floor is missing it!). So this is a DIY skill I definitely wanted to learn, as I hope to make the house uniform eventually.
The Crown Molding
Eventually I plan to write a complete tutorial on how to install crown molding, but to keep it from taking over this entire blog post I’ll share the highlights. You need to measure crown molding upside down and backwards, and unless you’ve done it before be prepared to mess up a little bit before you get the hang of it.
Two things helped me keep my sanity and eventually perfect my cuts. First off was a cheat sheet that I carried with me from measuring my pieces in the bathroom to cutting in the garage on the saw. I’m dropping a photo of it here, but essentially there are four different kind of cuts. You need to identify your cut and then adjust the saw accordingly.
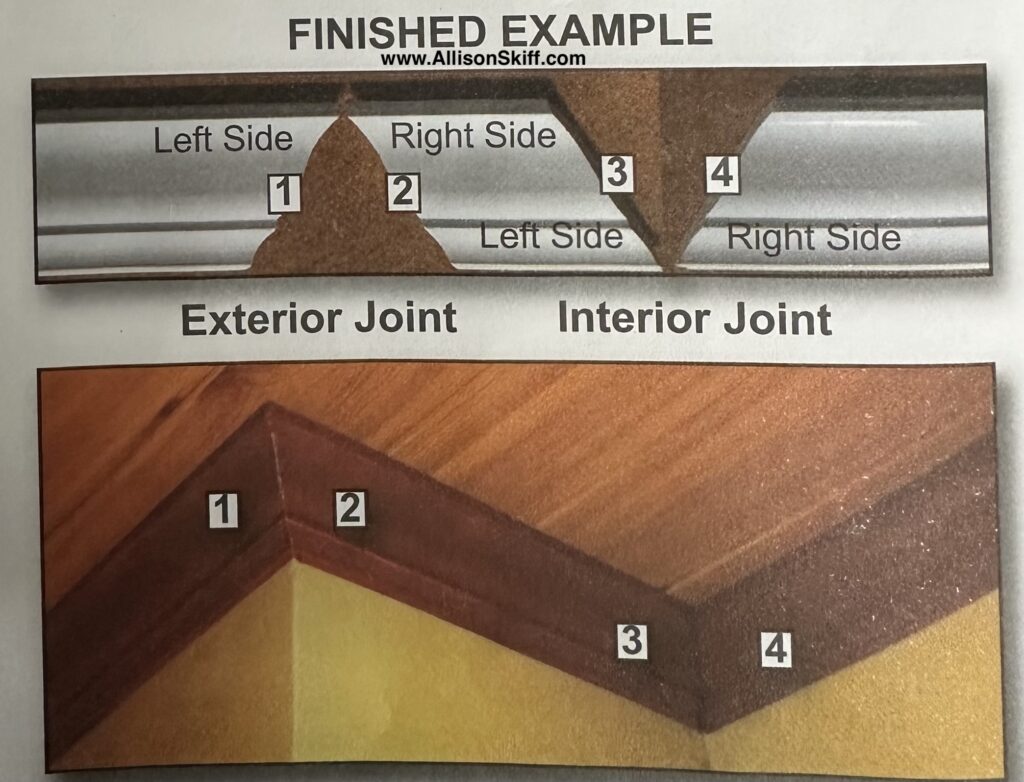
Do yourself a favor and print a couple copies of this crown molding cheat sheet!
The second little helper was this crown molding Kreg Jig. I’ll be honest, I bought a cheaper version from another brand and I immediately regretted it. Spend the $45 on this jig if you’re doing crown molding. It will save you in the materials in the long run. It allows you to hold your crown molding at the right angle while you make your cuts, which allows things to fit more precisely. If you’d like to see everything in action I’ve put together a short YouTube video linked below which walks you through it.


This Kreg Crown Molding Jig is worth the $45 spend. It allows you to hold your crown at the right angle for the cut and even comes with a little cheat sticker. This job would have been impossible without it. Shop here!
The Big Boxes
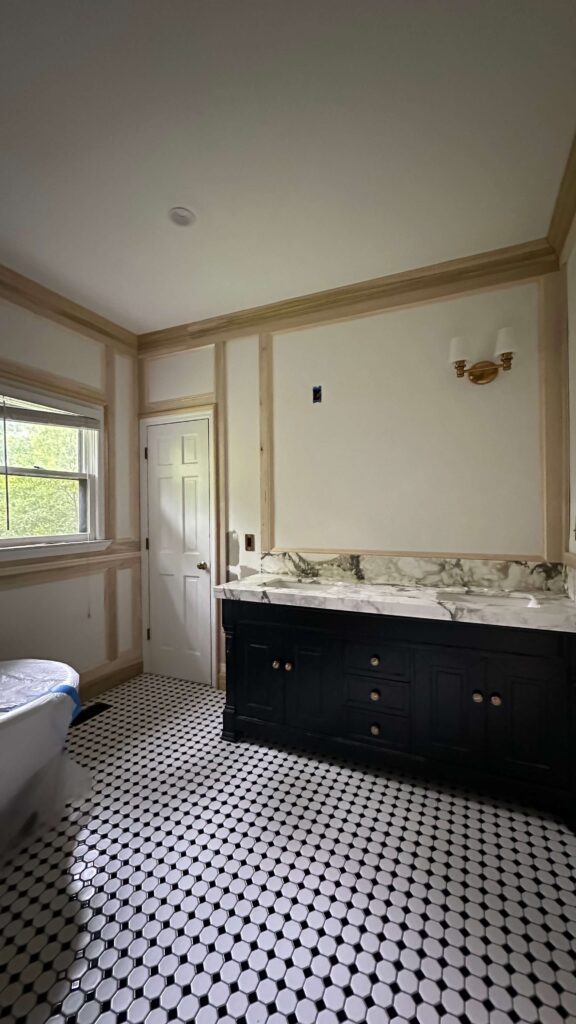
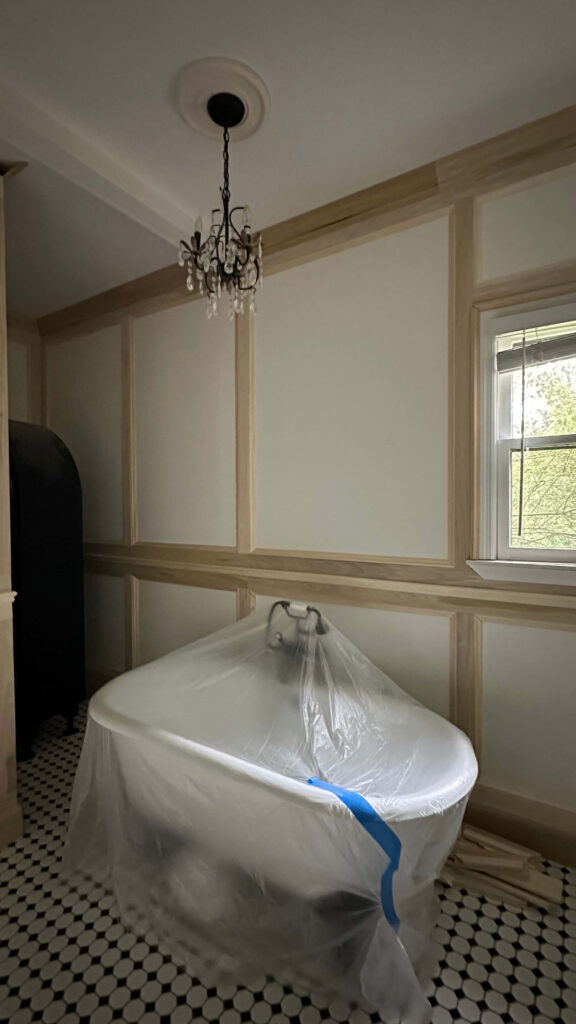
I had a couple larger decisions to make (pun intended) and those were how many boxes to make on my two large walls. For the bathtub wall I decided three boxes was the perfect amount. Four would have been too narrow and two would have been too large.
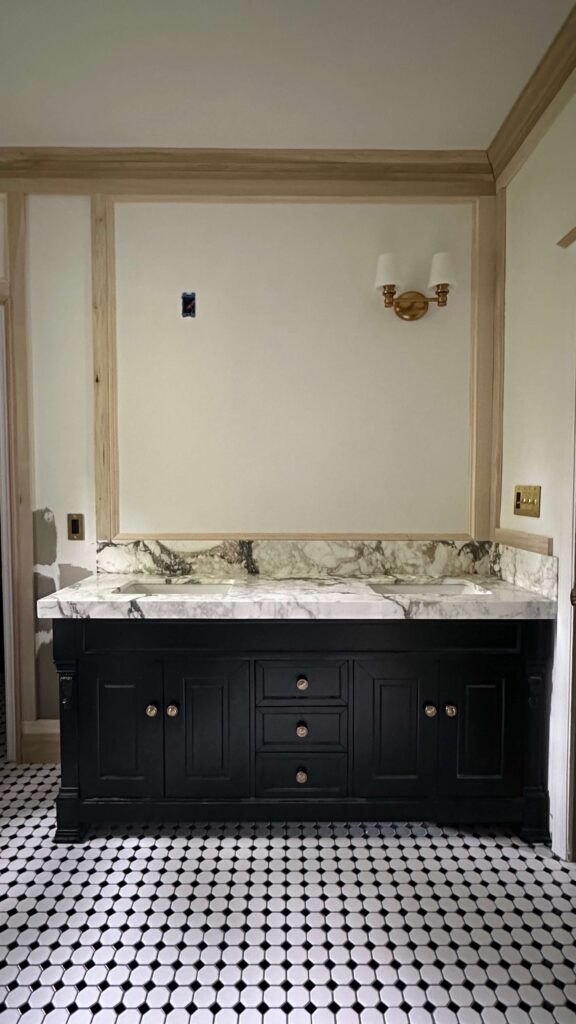
I also switched directions on the vanity wall and instead of two boxes I opted for one larger box. After having the new countertop installed, I decided I everything that happens on this wall needs to compliment it, not compete with it. After seeing the single large box, I think I made the right decision. I’m really loving how all of the woodwork is looking and am so proud of it! If you like this design, I’ve saved all the wood and profiles I’m using here.


Moving A Light Switch
The second DIY I ever taught myself how to do was changing out a light fixture. It was in 2012 and I was so proud of it. However, there’s something about light switches and outlets that have completely scared me, and I’ve never messed with them. This past week push came to shove because my electrician suddenly retired (after rescheduling three different times) so I decided I was going to finally teach myself how to do this job.
Turns out, there was nothing to be afraid of. I needed to move the light switch to allow room for the rest of the wainscoting on the wall adjacent to the door. Luckily, I knew this light switch had the wiring coming from the ceiling vs the floor, which meant I would have enough slack to move it up. That’s an important thing to note if you’re thinking about doing this. Keep in mind you may be beholden to how much wire you have to work with.
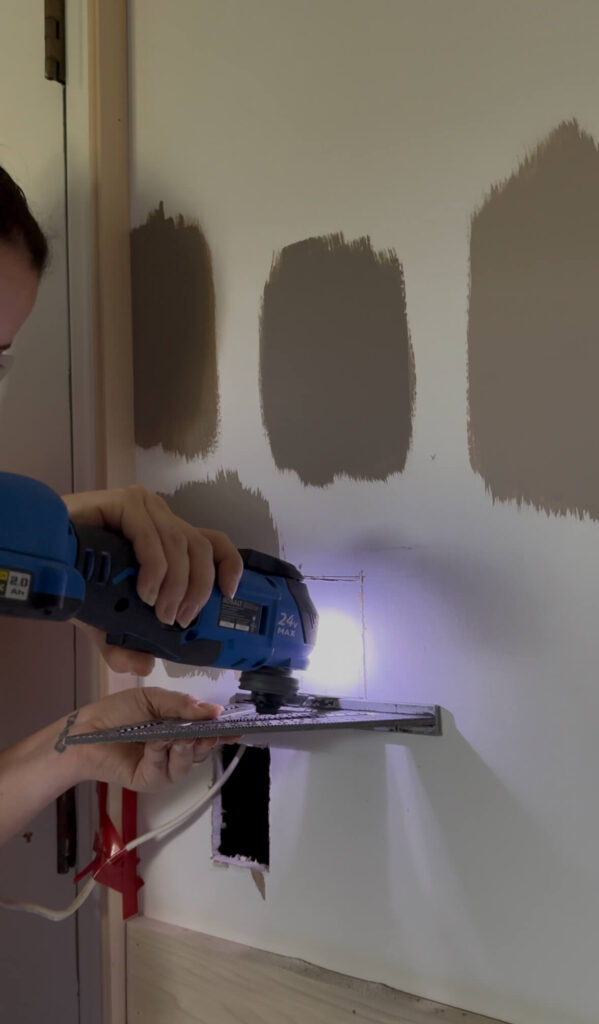
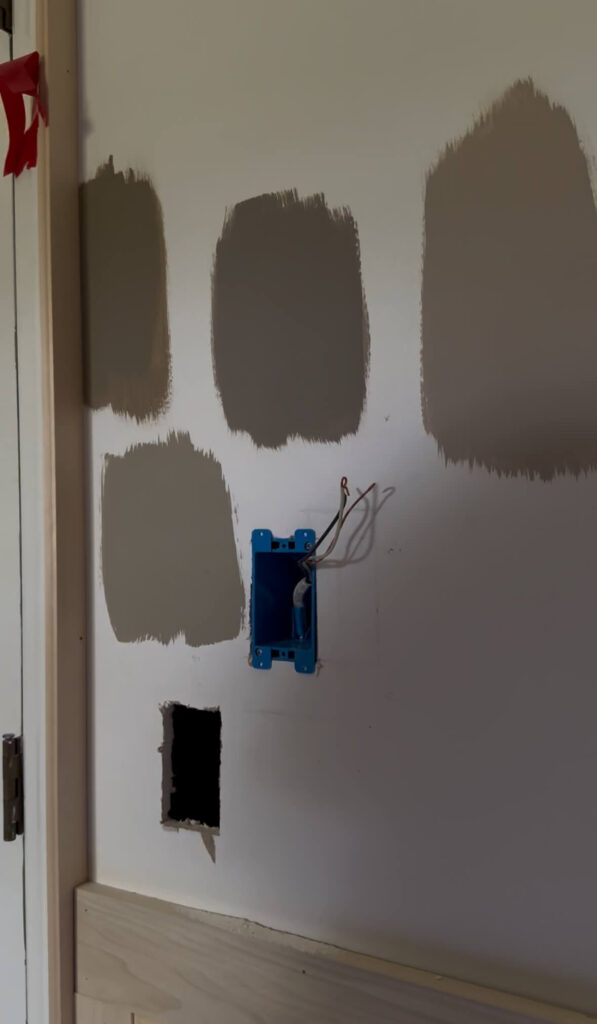
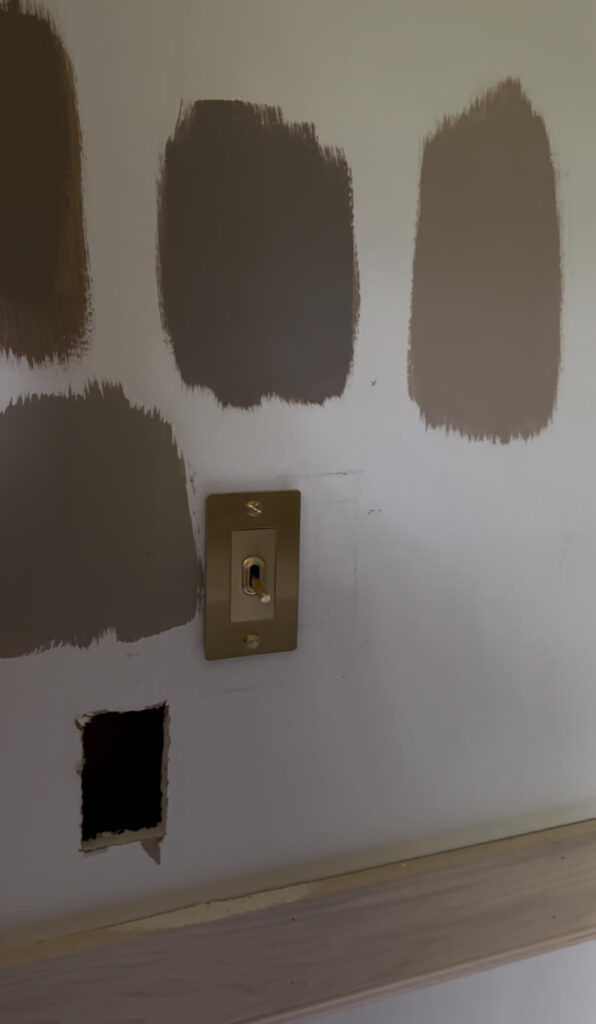
After pulling the light switch out and disconnecting everything, I used my oscillating tool to cut a new hole in the dry wall. I fed the wires back through and hooked up my new light switch, which was as simple as matching the wires to the corresponding screws and making sure everything was tight. It was so much easier than I thought and I’ll never hire out for this job again! I used another switch from Buster + Punch and they do not disappoint. There is something about flipping that toggle!
Getting Realistic About Timelines
To start, I’ll preface that I’m clearly not going to finish the One Room Challenge this week (which is reveal week). At first I was a little disappointed with myself for missing the deadline, but I also need to be honest with myself. I’m one person and I don’t know how to do most of what this bathroom project required. So I’m going a bit slower, but I’m enjoying learning new skills. And I’m definitely enjoying seeing my vision come to life! All that to say, we will finish when we finish, and in the meantime, I’ll keep pumping out updates for you to enjoy!
What’s Next?
With that said, this week the new faucets are getting installed! This is not something I’m ready to DIY yet, so my plumber is coming to hook these up for me. I decided to go with the Kohler Artifacts Collection in polished nickel and I could not be more excited about these. This faucet with these knobs are going to be incredible in the space! They were a bit more than I wanted to spend, but since I’m saving so much money by doing the work in this space myself, I decided to go ahead and splurge on the jewelry for my vanity. If these catch your eye but miss your budget, I’ve rounded up some similar looks at all price points here.
I have a small amount of trim work to complete and then we’ll be done with woodworking! In addition to the fancy crown molding return, I need to figure out a solution for the backband trim next to the countertop. Lastly, and I promise I’m serious this time, I WILL PICK A PAINT COLOR! I shared last week that I ordered some more paint samples but this time from Samplize. They’re peel and stick, and are made with real paint. They just arrived and I’m excited to show you the colors and then get to sticking them on the walls. I’m looking forward to continuing the progress on the primary bathroom and truly appreciate you following along with me as I navigate this renovation. Stay tuned, as there’s lots more to come!
Visit the One Room Challenge page to follow along with our DIY and designer community! You’ll find everything from small to large projects, at all skill levels.
Catch Up On the Spring One Room Challenge:
Spring 2025 One Room Challenge Week 1
Spring 2025 One Room Challenge Week 2
Spring 2025 One Room Challenge Week 3
Spring 2025 One Room Challenge Week 4
Spring 2025 One Room Challenge Week 5
Spring 2025 One Room Challenge Week 6 & 7