


Happy Valentine’s Day! Who doesn’t love an excuse for a sweet treat?! Whether you’re celebrating as a couple, with your best gal pals or are declaring it a party of 1, these mini molten red velvet cakes are the perfect way to be a little festive. Single servings, easy to make and beyond impressive to look at, these cuties only take 20 minutes to bake. Get ready to impress with this easy yet decadent recipe!
Serves: 4 | Prep Time: 2 hours | Bake Time: 20 minutes
Ingredients
Cakes
- 2 oz semisweet baking chocolate
- 1/4 cup heavy cream
- 1 cup flour
- 1 1/2 teaspoons unsweetened cocoa, plus more for ramekins
- 1/4 teaspoon baking soda
- 1/4 teaspoon salt
- 1 tablespoon powdered sugar
- 1/2 cup salted butter, melted
- 1/2 cup granulated sugar
- 6 tablespoons buttermilk
- 1/2 teaspoon vanilla extract
- 1/2 teaspoon apple cider vinegar
- 1 large egg yolk
- 1 1/2 teaspoon red liquid food coloring
Cream Cheese Whipped Cream
- 1 cup powdered sugar
- 1/2 teaspoon vanilla extract
- 2 Tablespoons unsalted butter
- 2 ounces cream cheese, softened
Additional Notes:
- You will need four 8oz oven safe ramekins.
- The chocolate center will need 2 hours to chill & firm up. You can make this in advance if need be.
Directions
Prepare the Chocolate Center
- Chop 2oz of semisweet bakers chocolate and place in microwave safe bowl
- Add ¼ Cup of heavy cream
- Microwave on High for 30 seconds
- Whisk until blended and smooth
- Let stand for 1 minute
- Immediate cover with seran wrap and place in fridge
- Chocolate will need a minimum of 2 hours to firm, but can be stored for up to 48 hours in advance if necessary.
Prepare the Mini Molten Red Velvet Cakes
- Preheat oven to 400°F
- Using butter, lightly grease four 8-ounce oven safe ramekins. Dust with a pinch of unsweetened cocoa then tap out excess.
- Combine wet ingredients and whisk:
- ½ Cup of Salted Butter
- ½ Cup granulated sugar
- 6 Tablespoons of Buttermilk
- 1 egg Yolk
- ½ teaspoon vanilla
- ½ teaspoon apple cider vinegar
- 1 ½ teaspoons red food dye
- Combine dry ingredients and whisk:
- 1 Cup flour
- 1 ½ teaspoons baking cocoa
- ¼ teaspoon baking soda
- ¼ teaspoon salt
- Combine wet and dry ingredients and whisk together. Divide equally across the four ramekins.
- Divide chilled chocolate into four equal sections, roll into balls and gently drop in the center of each batter filled ramekin. (as the cakes cook the chocolate will sink so just gently tap into the center for now)
- Place ramekins on a baking sheet and bake in preheated oven for 18 minutes. (cakes will be springy in the center when fully cooked)
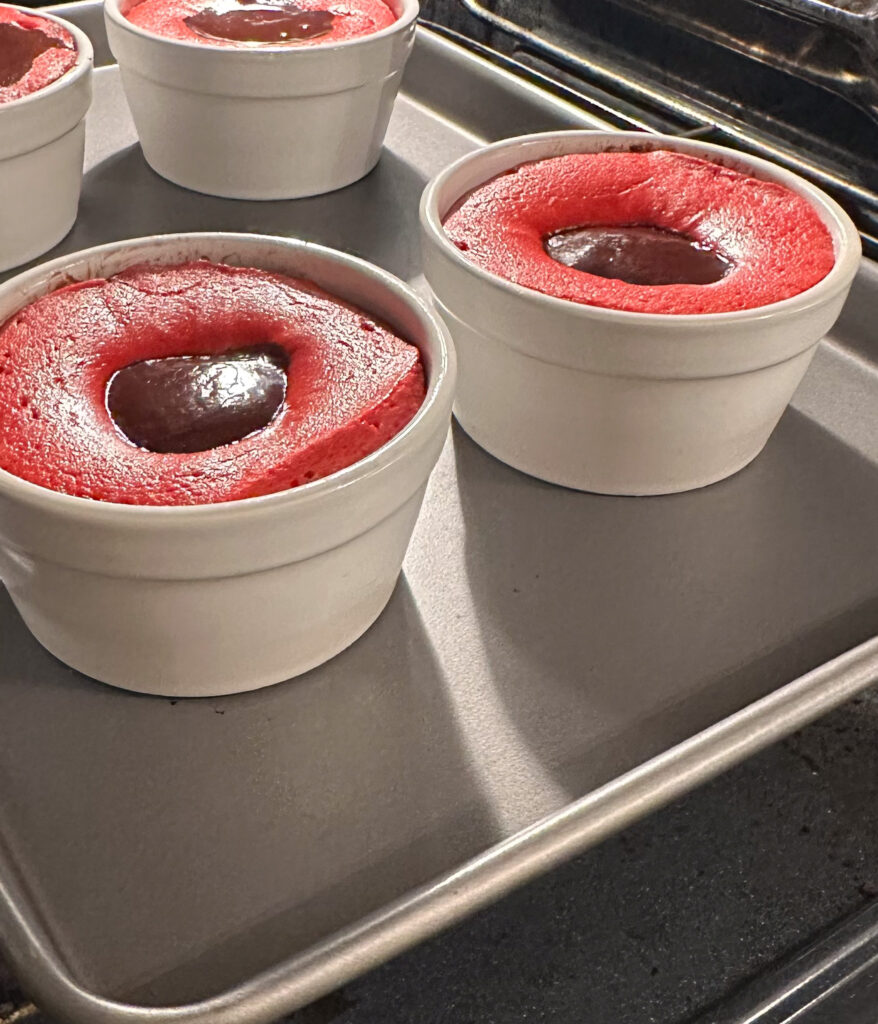
Left: Chocolate Balls Placed in cake batter | Right: Chocolate balls start to drop as cakes bake
Prepare the Cream Cheese Frosting
- Mix the following ingredients:
- 2oz softened cream cheese,2 Tablespoons unsalted butter½ teaspoon vanilla
- Add 1 Cup of powdered sugar to mixture and beat with an electric mixer on medium-high speed until blended (roughly 1 minute)
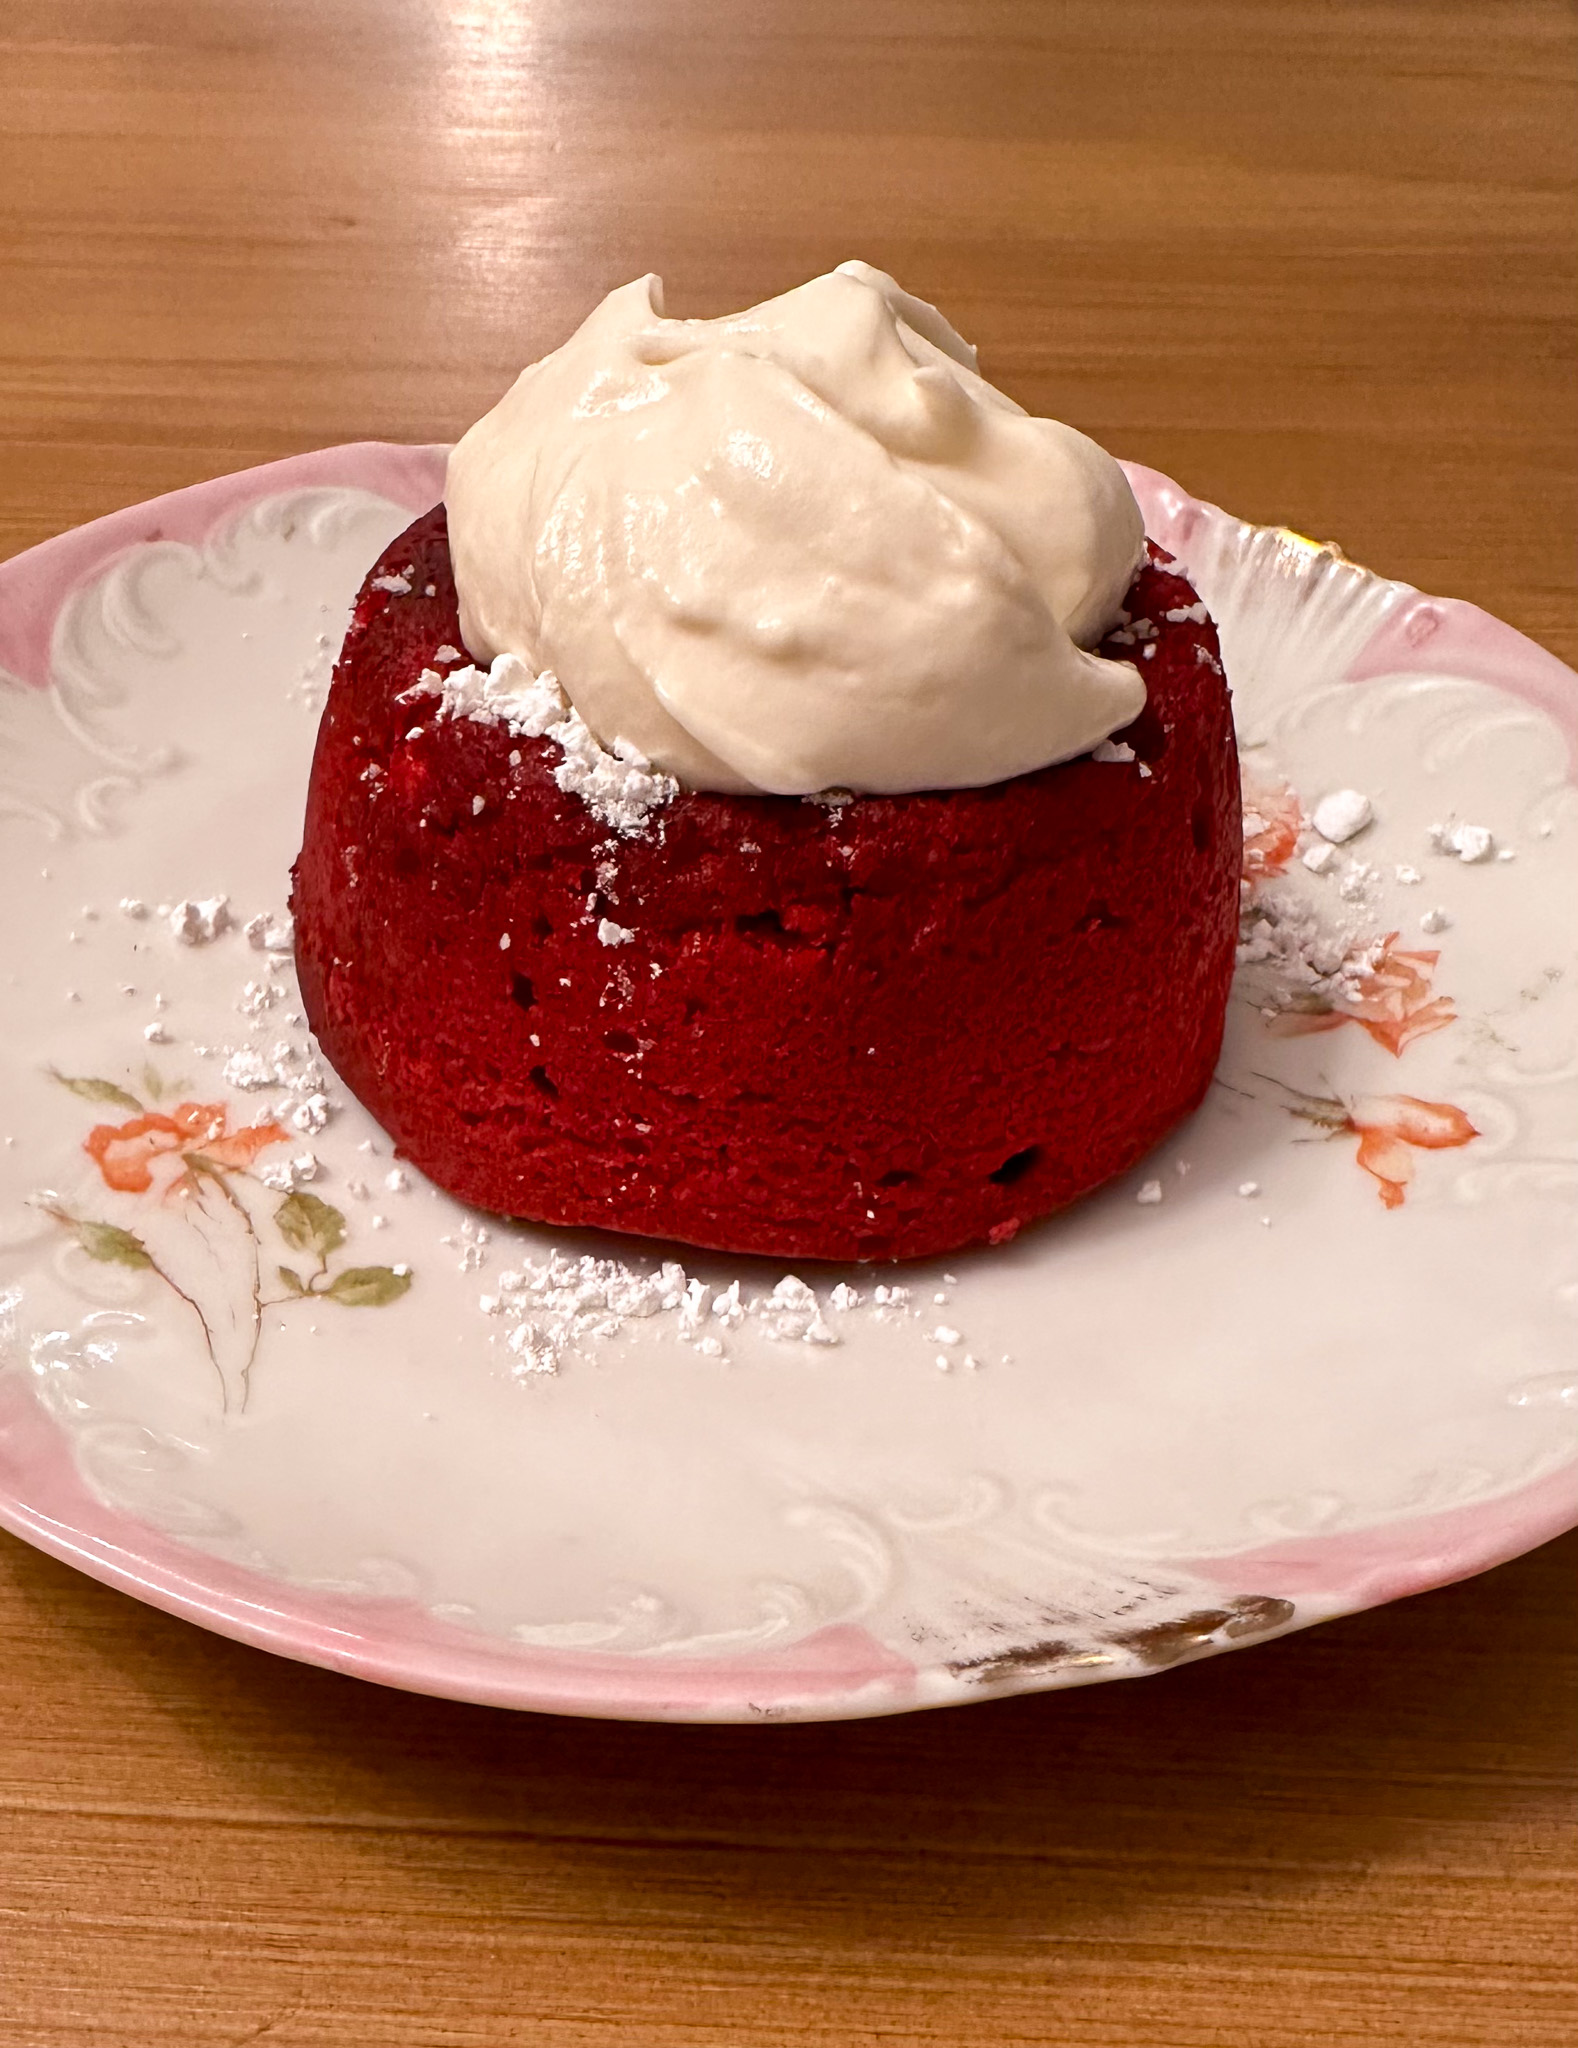
Plate the Mini Molten Red Velvet Cakes
- Immediately run a rubber spatula or thin knife around the ramekin edges to loosen cakes
- Invert each red velvet cake onto a serving plate
- Dust cakes with a sprinkle of powdered sugar
- Top each cake with Cream Cheese topping
- Serve immediately


