


A couple months ago when I installed picture frame molding in the dining room, I had a sneaking suspicion that it was going to be addicting. I just didn’t know how addicting! All of a sudden, I wanted it in every room in the house. However, I’m a firm believer that there can be too much of a good thing. After wrestling with the primary bedroom design for months, I decided it would be the perfect space for my next round of custom trim. With a blank canvas to work from and vaulted ceilings to consider, I had a lot of design decisions to make. Today I’m pulling the curtain back and sharing how I designed custom trim in my primary bedroom.
Defining the Plan
If I’m being honest, I went round and round designing the primary bedroom for months. At first I was going to do a mural with colored trim, doors and ceiling. But after ordering some samples it didn’t feel right. I couldn’t let go of the idea of wallpaper quite yet, so I thought about installing a chair rail and box molding on the lower third of the wall with wallpaper on the top two thirds (similar to the dining room). I mocked it up and that didn’t feel right either.
Enter the plan to add floor to ceiling molding and color drench the space. This finally felt right, and I felt less boxed in with the initial concept (pun intended). From this point, the decisions were if I wanted a chair rail to separate the boxes, or if I wanted to go with just boxes. If just boxes, then two stacked or three stacked. Seriously, there were a lot of decisions to make.
How I designed Custom Trim
To help narrow down the options, I took some still photos of the space and uploaded them into the design program Canva. I started on the wall with the windows first, placing boxes on top of each window. Seeing the larger space above the windows (which stretch to the floor) helped me realize this design makes the most sense with two boxes vs three. I think if my ceilings were 10 feet vs 9 feet, stacking three boxes would’ve worked.
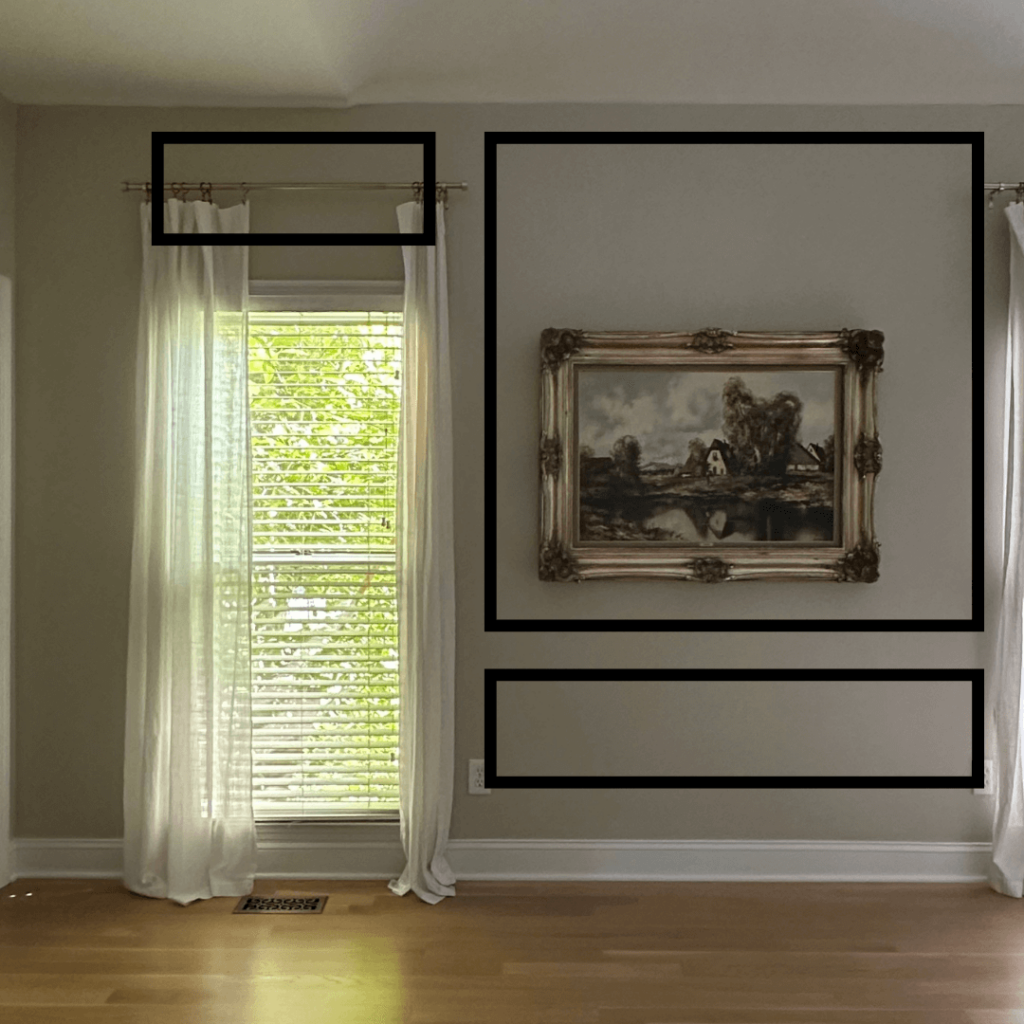
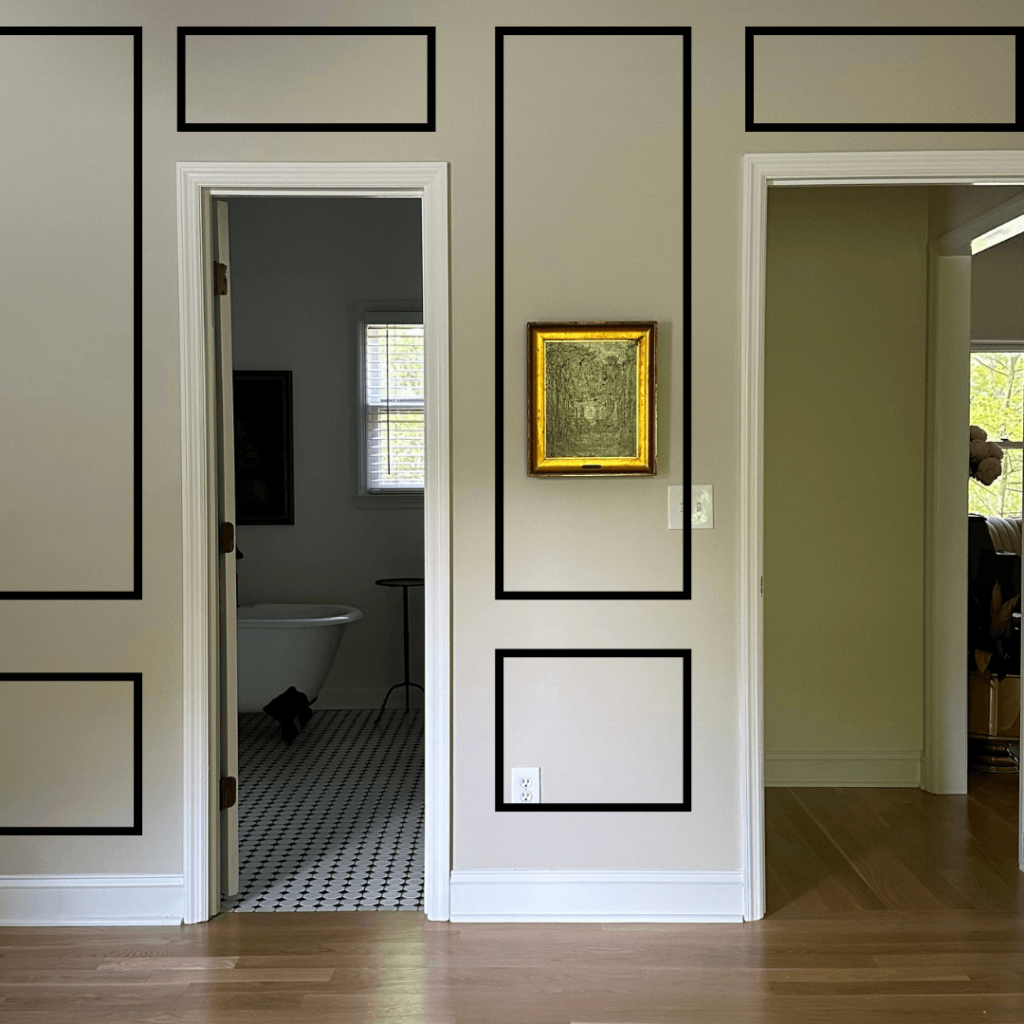
To keep things balanced, I copied the height of the boxes above the windows and mirrored that height on the bottom portion of each wall. So if there was a box above a door frame or a window, on the next windowless/doorless area, there would be the same height of box on the bottom of that wall, and then a larger box on top.
Measuring and Spacing the Custom Trim
When I designed custom trim in my dining room trim, I used a leftover piece of my white oak hardwood flooring, which measures 3.5” in width as my “spacer.” This helped simplify the measuring of the boxes because all I had to do was add this spacer in between the top, bottoms and sides of all boxes.
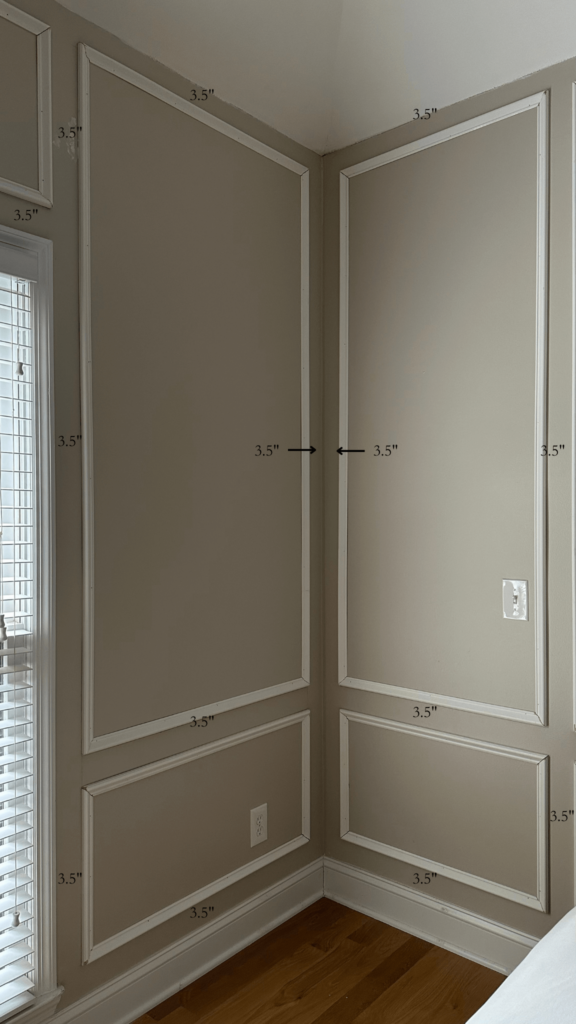
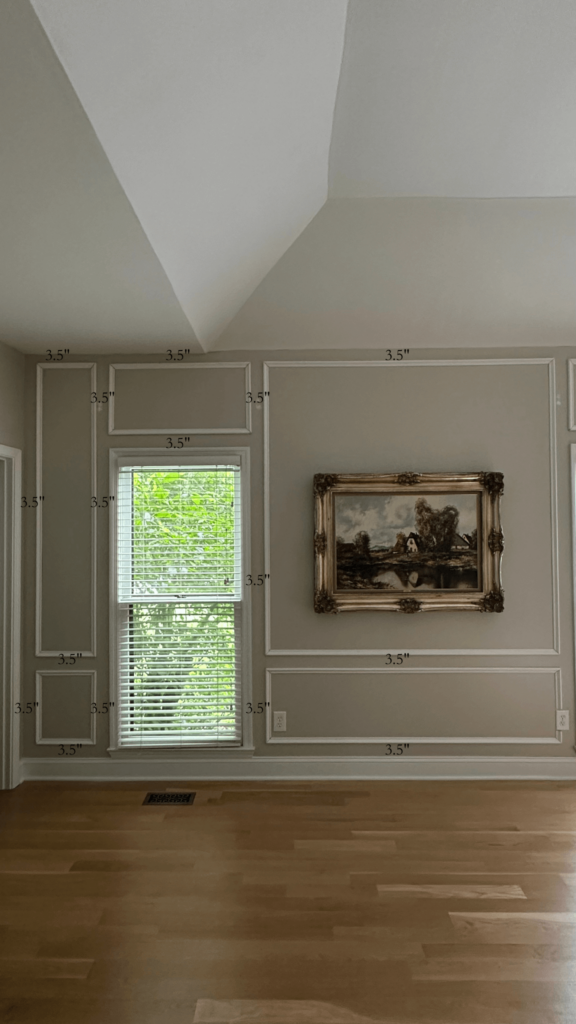
So for example, there is 3.5” in between the top of my baseboards and bottom of my picture frame trim. There’s 3.5” in between all boxes next to one another. There’s 3.5” between the top of the picture frame trim and the ceiling. The only exception is when you get to corners of the room, as there’s a total of 7” in between the trim. 3.5” from trim to corner, and another 3.5” from corner to the next piece of trim. It’s a bit easier to follow visually so you can see the measurements in the photos below!
The two biggest measuring decisions I had to make was on the wall behind the bed, as well as the wall behind the dresser. Starting with the bed, I decided I wanted the trim to frame both my nightstands and the new bed. So I started with the nightstands and measured wide enough to stretch just past my nightstands. Then used the 3.5” spacer, and the remaining middle space stretch just outside of the bed. I thought it would look a little odd to have the molding placed inside of the bed, and now seeing it after the fact I stand by this decision.
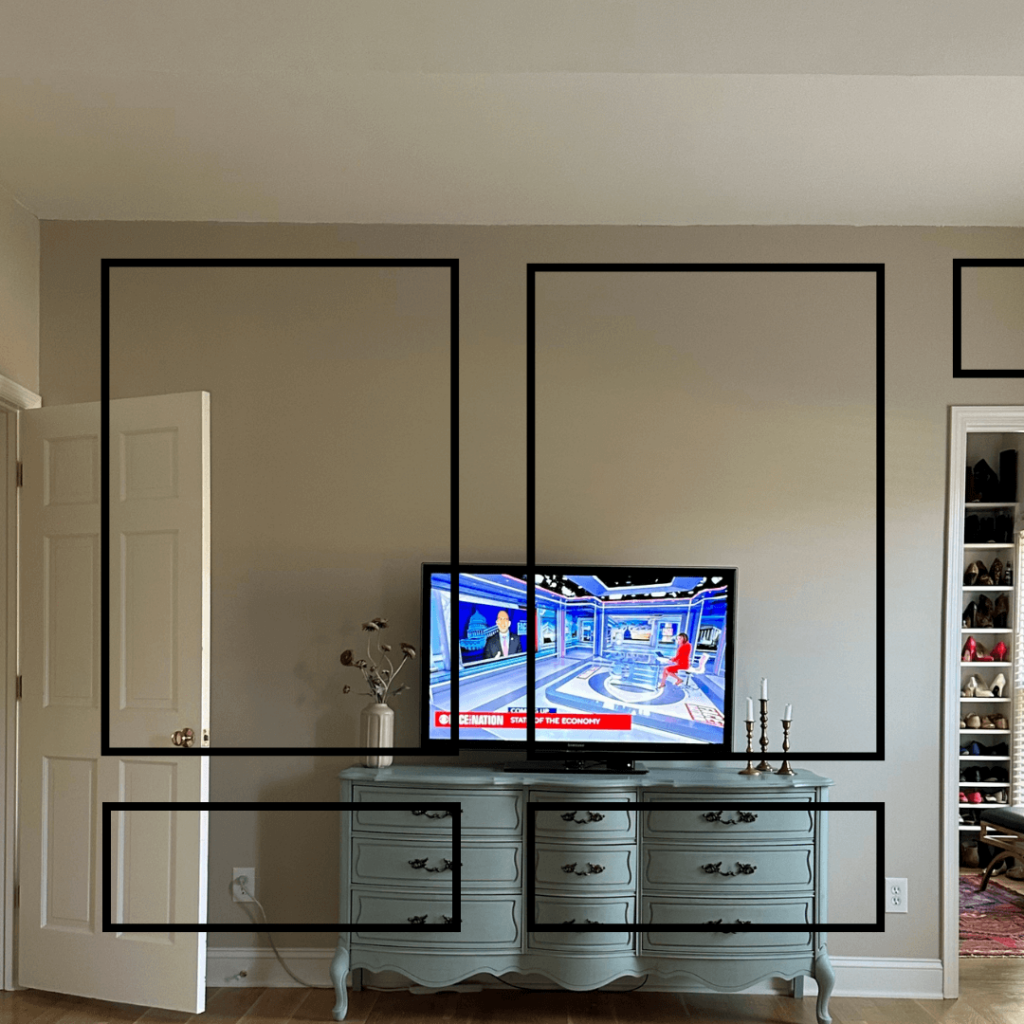
The wall behind my dresser was the biggest head scratcher, simply because the dresser is centered on the wall, however the door to my closet is also on this wall. So I had a box above the closet door and then an uneven amount of wall to play with. Ultimately, rather than do two equal sized boxes, I decided to mirror the narrow / long box with the wider box design as the wall behind the bed. The door to the closet serves as it’s own version of the third narrow box.
Installing the Custom Trim
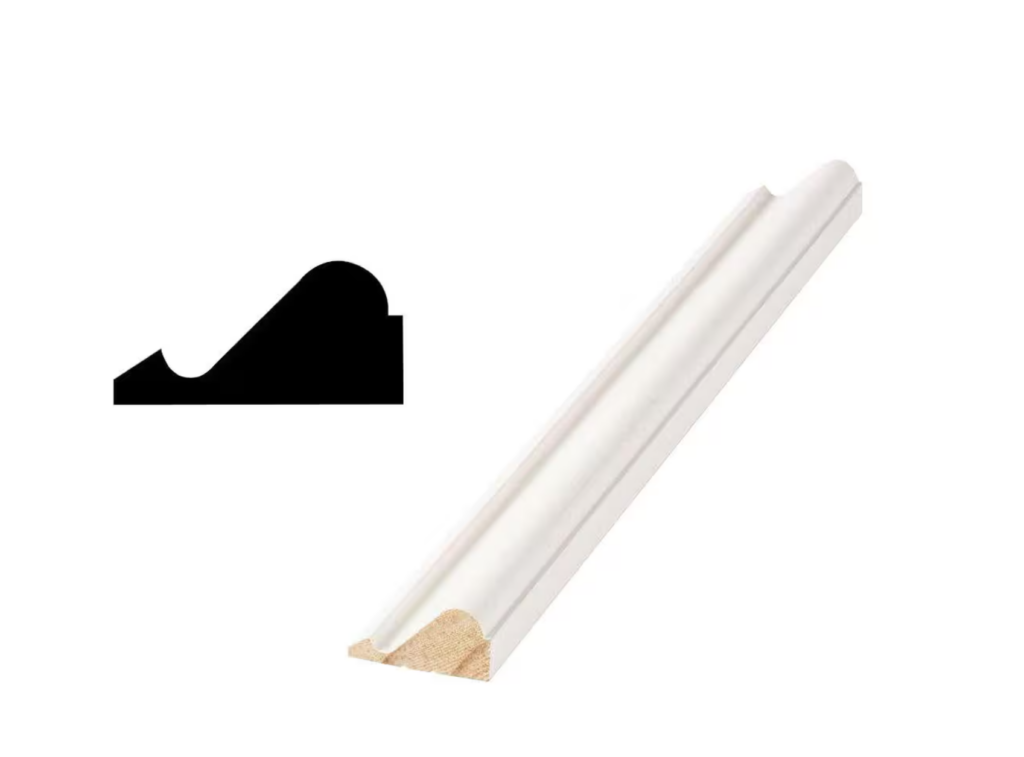
For me, the profile of trim really makes or breaks it from a design perspective. I want something visually interesting, especially in such a large space like this bedroom. I found this primed trim at Home Depot and love the profile of it, and the price was on point as well!
After I measured the boxes, I drew them onto the wall in pencil just to be sure. This also helped me measure twice so I could cut once. I used the same miter saw I purchased for the dining room project (this is truly a great beginner tool if you’re in the market!) and cut my trim to length.
Using my brad nailer and 2” brad nails, I nailed each piece into place, one box at a time. Even though I had lines drawn on the wall, I made sure to use both my wood spacer as well as a level just to make sure everything lined up. Sometimes the nails don’t always go all the way in, so this handy nail tap set will help you make sure they’re flush. These come in three sizes and thanks to a small bevel on the tip, they stay on the brad nail head while you tap in with your hammer.
I filled all nail holes with wood filler, caulked inside & outside each box, and then sanded until everything was smooth. I’ll admit, this is not the most exciting part of the process, but it’s so essential for achieving that high end look.
Next Steps
The next steps will be color drenching! We’ll prep the entire space by filling all nail holes in the walls and sanding to make sure everything is smooth. From there we’ll wash the walls, trim and ceiling to ensure there won’t be any dust in the paint, and then we’ll be ready to prime everything. And then it’s the fun part: color drenching the entire room! The space is 18′ x 14′ with a vaulted ceiling, so it will certainly be a process, but I know it will be worth it. Make sure you’re following along on socials to watch everything unfold!
If you’re interested in giving this project a try, here is everything I used to DIY my own. I stand by each of these products and would highly recommend them!

Ryobi Brad Nailer (make sure you get the battery and charger too if you don’t already have one!)


It looks great! Can’t wait to see the finished product!!
We are hoping to do this in our entryway and up our stairs. Would you make your trim rectangles or “frames” different sizes to fit each wall? Or should they be same sizes? One wall of my hallway has a door in the middle. The other hallway wall does not. Can the sizes be different on each side of the hallway. I’m at a loss of how the spacing should work.
Hello! I understand it can be a little overwhelming to figure out if walls should match based on existing features like doors and windows. I always like to design my trim for the wall itself and find starting the design on the wall with the features helps make things easier. I recently posted a blog post on how I’m doing this for my home office makeover utilizing Canva (which is a free design app). Check that out and let me know if it helps, or if you still have questions!
Hi, I noticed in one of your pictures that the trim would run right through the existing double light switch plate. I’m wanting to do something similar but keep running into the trim running into a light switch plate or other wall sockets. Any tips on how to make this work?
Hi Tasha! I would suggest making a picture frame box around the light switch plate if that makes sense. That way your existing trim can run right into it and remain flush. I didn’t do this on mine but if I could go back and do it over, that’s what I’d do. Otherwise I’d move the light switch over & drywall patch / paint.