


When I started renovating my kitchen, one of the biggest pain points was the dark, speckled granite countertops. They felt dated, busy, and totally out of sync with the lighter, warmer aesthetic I wanted for my home. Real marble counters have always been on my dream list—but with my square footage I was looking at roughly $20,000, and that just wasn’t in the budget. So instead of waiting, I decided to work with what I had by using this DIY marble countertops kit.
For under $200, I completely transformed my kitchen counters into a bright, faux marble finish that looks high-end, feels durable, and has given me the freedom to love my kitchen right now while I save for the real thing someday. If you’ve been wondering how to paint granite countertops to look like marble, this guide is for you.
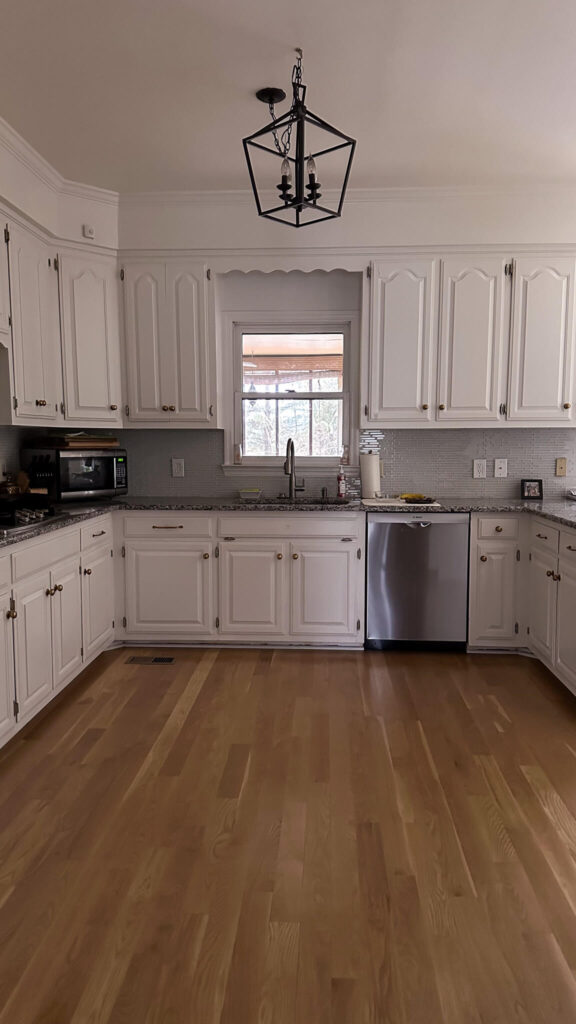
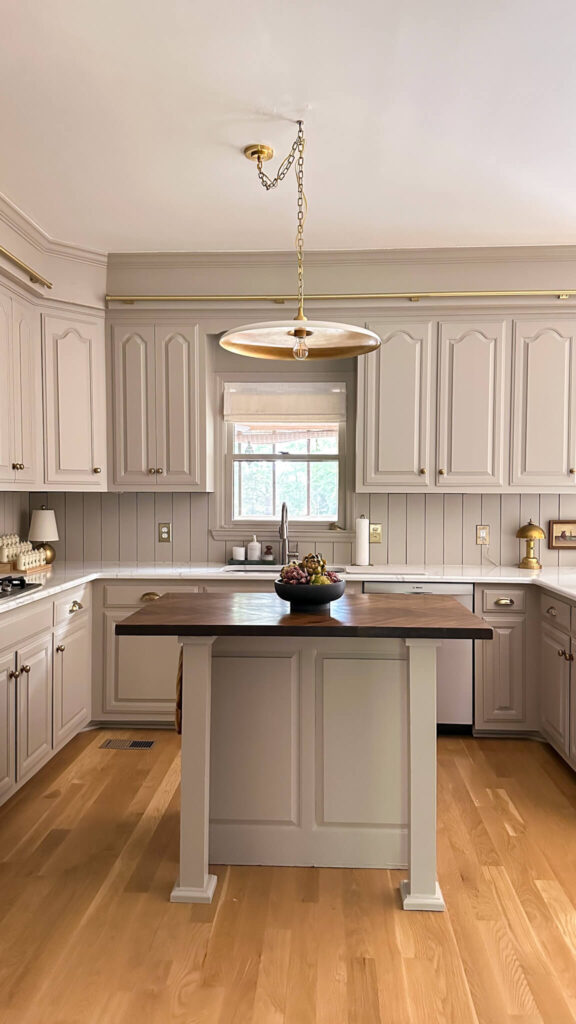
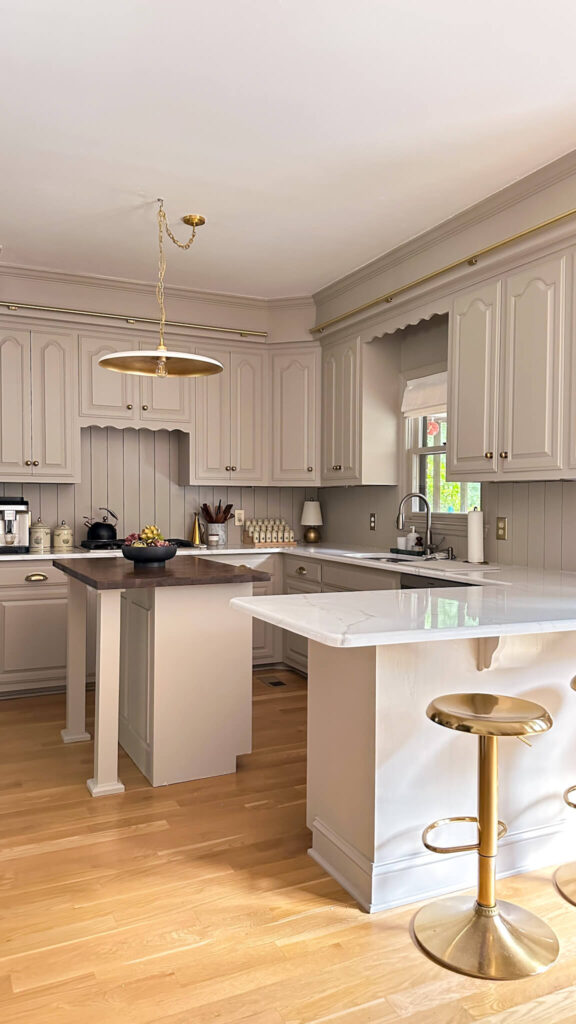
Before and After of my budget friendly kitchen renovation.
DIY Marble Countertops: Step by Step Guide
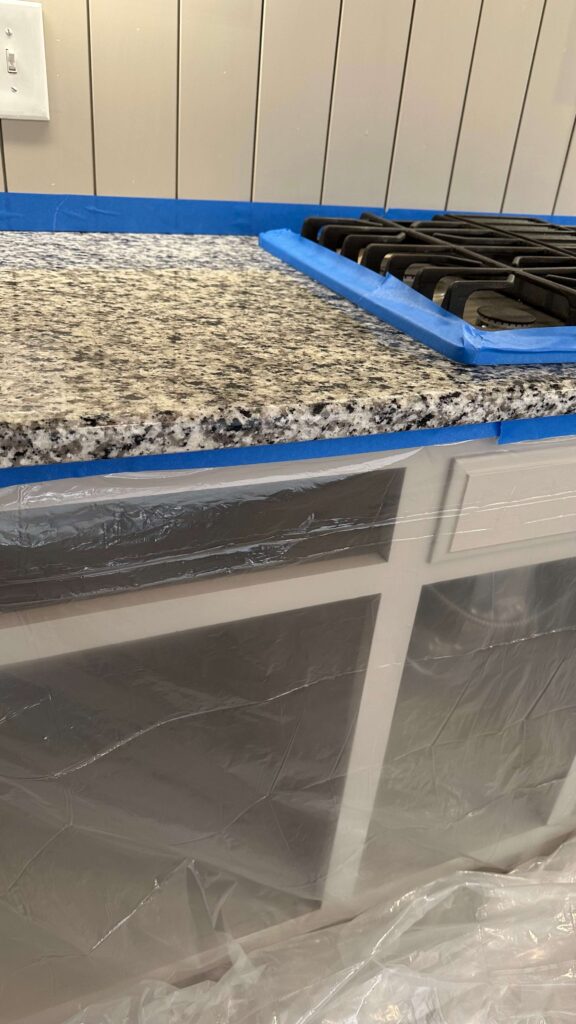
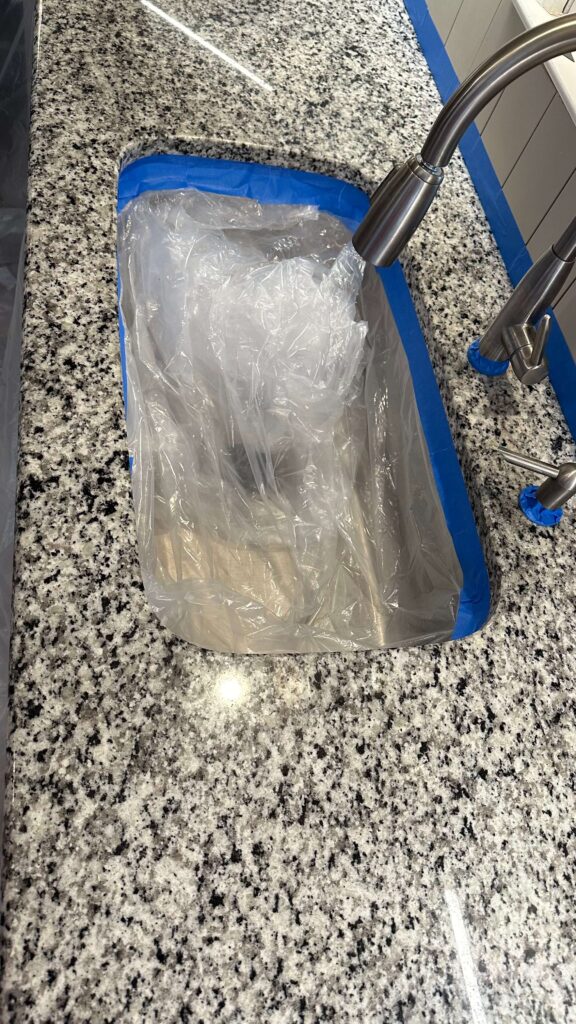
Step 1: Prep and Protect
The Giani kit comes with everything you need, but prep work is key. I started by giving my counters a deep clean with dish soap and water, then wiped everything down with lacquer thinner for extra insurance against grease or residue.
Next, I taped off the backsplash, sink, appliances, and cabinets, then draped the provided plastic sheeting over everything. Don’t skip this part—the epoxy topcoat drips as it levels, so extra drop cloths on the floor will save you cleanup stress later.

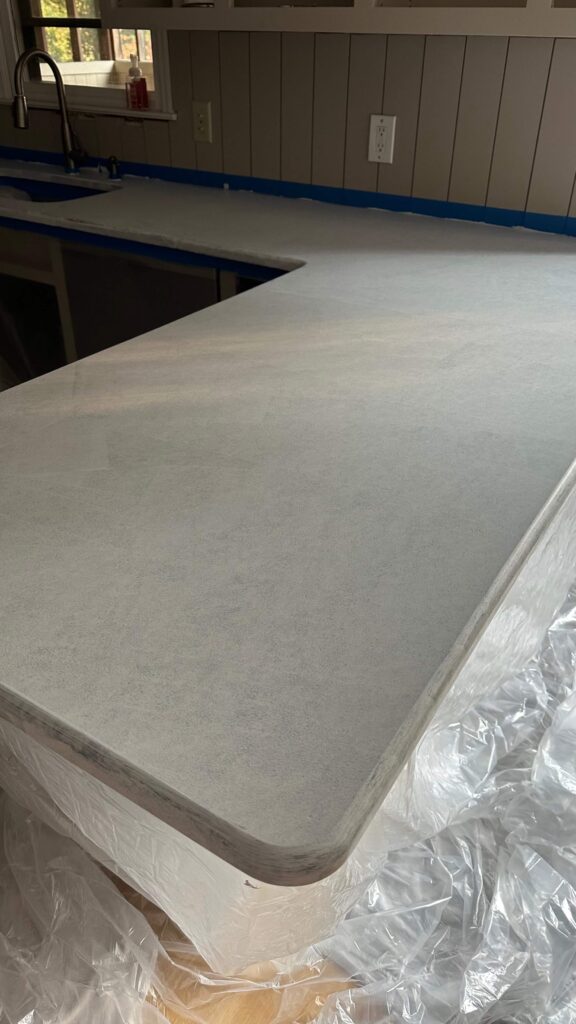
Step 2: Prime the Counters
Since I was covering dark granite with a white marble kit, it took me Four coats of primer to get full coverage. Each coat dried in about two hours, and the process went quickly. Think of this stage like painting walls—primer sets the foundation for everything else.
Pro tip: don’t forget the underside edges of your counters if they’re visible from an adjacent room.
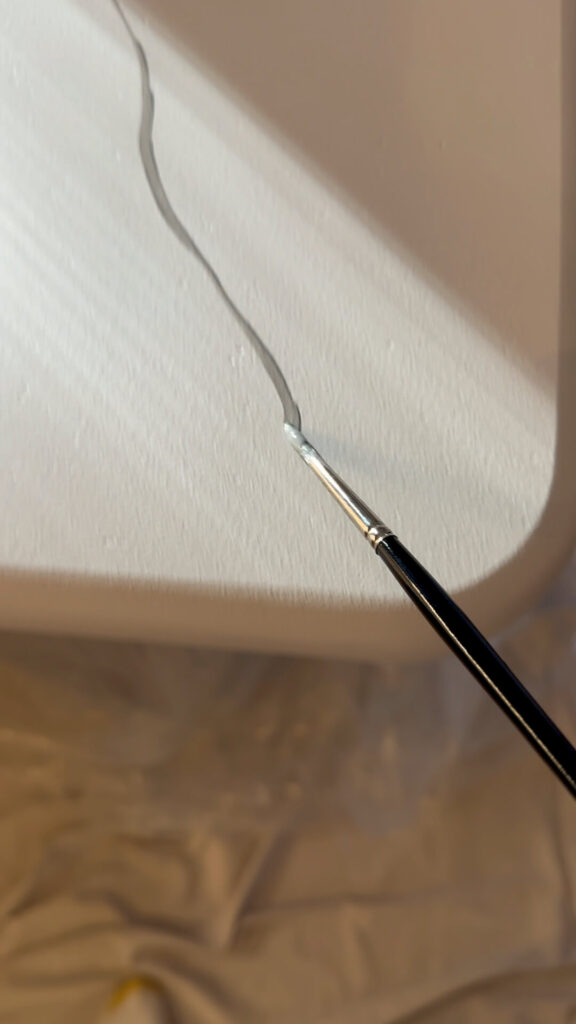
Step 3: Create the Marble Veining
This is the part that feels intimidating, but it’s also the most fun. The kit includes grey paint, a fine artist’s brush, a spray bottle, and a larger brush for blending.
To mimic real marble veins:
- Dip the artist brush in the grey paint (included in the kit)
- Lightly drag the brush across the surface while twisting it between your fingertips for natural movement.
- Mist with water to soften and feather the line.
- Tap gently with the larger brush to blend.
- Vary your vein shapes (long, crescent, or branching) to avoid repetition.
At first, I tried to replicate the exact slab of Carrara marble I’d been eyeing—and that made me overly critical. Once I let go of perfection and embraced the organic look, the process became easier and more enjoyable.
If you’re feeling extra nervous about this I can completely relate. The good news is that it’s not immediately permanent. If you hate your vein, you can spray water on it and wipe it right off (I did this a lot). And if you really hate what you did, you can re-prime over it and start over (I also did this!).

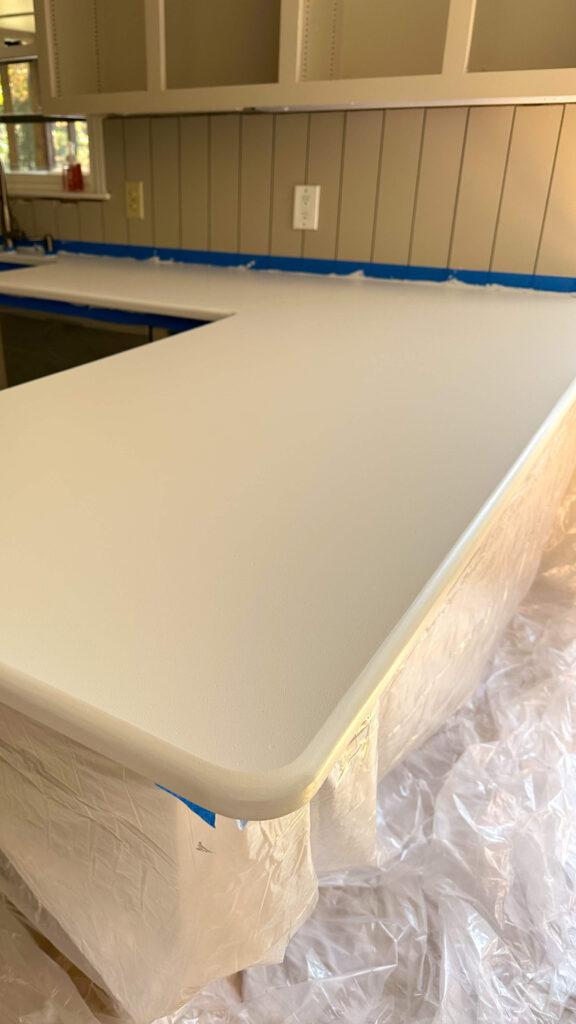
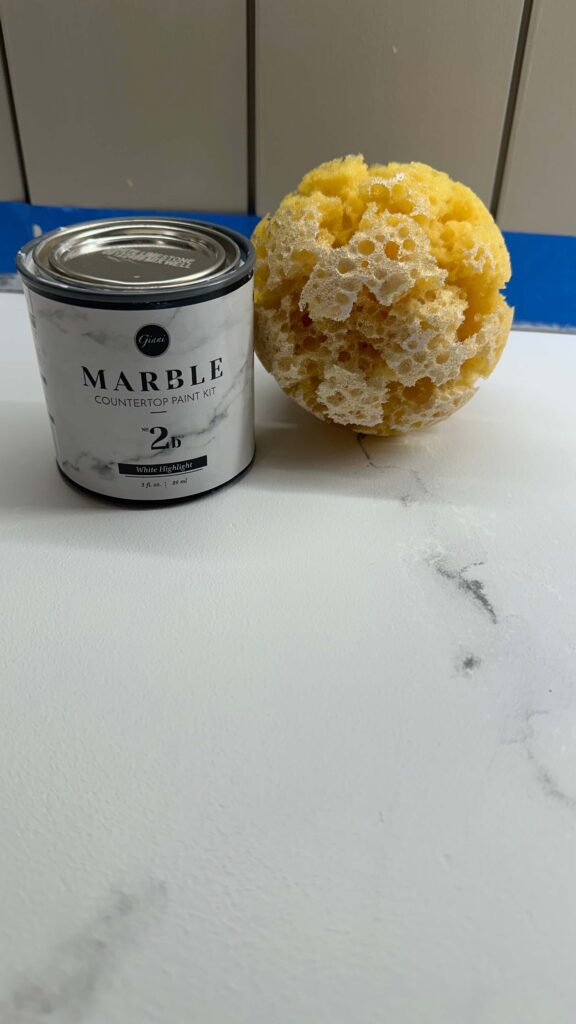
Step 4: Add Highlights
After the grey veining dried for a few hours, I used the sponge and white highlight paint included in the kit to add some dimension. Dab this sporadically over veins for added depth and dimension, which will make your DIY marble countertops look more realistic.
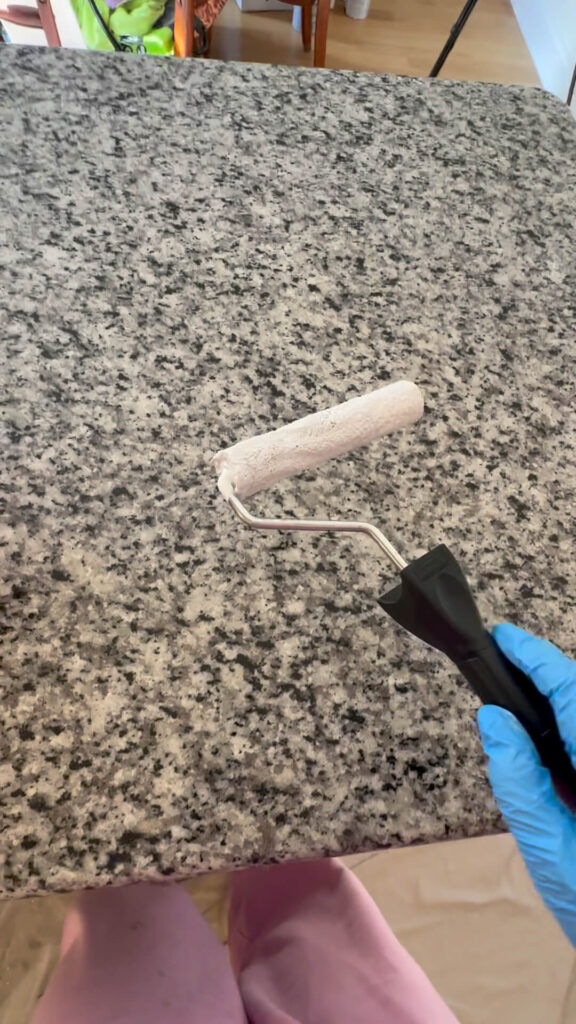
Step 5: Epoxy Topcoat
The epoxy is what seals the deal—literally. This clear, glossy topcoat gives the counters durability and a smooth stone-like feel.
Here’s what to keep in mind:
- Each can of epoxy covers 6 sq. ft., so measure ahead and plan your pours.
- Mix thoroughly with the activator before applying. The kit gives instructions for how long you need to stir the epoxy + activator. Set a timer and take it seriously.
- Pour in an S-shape, then guide the epoxy with the roller and brush.
- Continuously wipe drips along the edges for the first 1–2 hours (otherwise they’ll harden).
- Remove painter’s tape within 1–2 hours so it doesn’t get sealed in.

I let the epoxy cure for 24–48 hours before touching the surface and gave it a full week before setting appliances back in place. Keep in mind, anything the epoxy touches will turn rock hard. So paint brushes, rollers, etc will all get tossed. The kit comes with plenty of these so use what’s provided and nothing personal that you love.
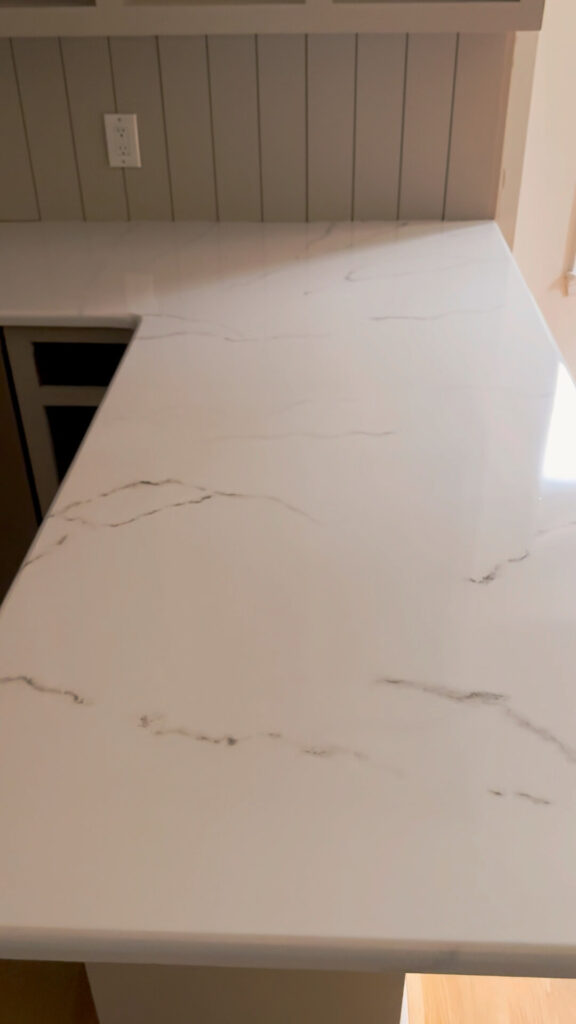
The Final Results: Your New DIY Marble Countertops
The difference is dramatic. What once were dark, speckled granite counters now look like bright, timeless Carrara marble countertops—all for under $200. This budget-friendly kitchen renovation project proves you don’t need to wait for a dream budget to achieve a dream look.
There are a few small imperfections, but overall I’m thrilled. The counters complement my new cabinet color, backsplash, and brass hardware beautifully, and I love walking into a kitchen that feels completely refreshed.
Would I Recommend DIY Marble Countertops?
Yes, with a few caveats:
- Be patient with the veining—don’t rush.
- Wipe down your counters again before epoxy to prevent dust.
- Plan for a few days of kitchen downtime.
If you’re willing to put in the time, this is one of the most transformational DIY home projects you can do on a budget.
Brass barstools | Vintage Lenox Coffee & Tea Canisters | Artichokes | Black Serving Bowl

Brass Lamp | Vintage Lenox Spice Set | Artichokes | Black Bowl | Brass Outlet Cover | Cup Pulls | Paneled Backsplash
Large Piatto Pendant | Brass Task Lamp | Walnut Butcher Block Island Top | Linen Roman Shade
Shop the Project
Want to try this in your own home? Here’s the exact kit I used:
Related Content
DIY Budget Friendly Kitchen Reveal


I loved learning about this DIY technique! It looks beautiful ☺️?
Thank you so much! I hope it was helpful!!