


After tackling three different types of wall molding projects in my home—each a little more advanced than the last— I’m excited to take on my home office. This is now my fourth time installing picture frame molding, and like all the others, I know it’s going to completely transform the space. However, I remember the first time I did this (in the dining room) I was lost at where to start. So today I want to share a few secrets I use that make how to design picture frame molding simple and less intimidating.
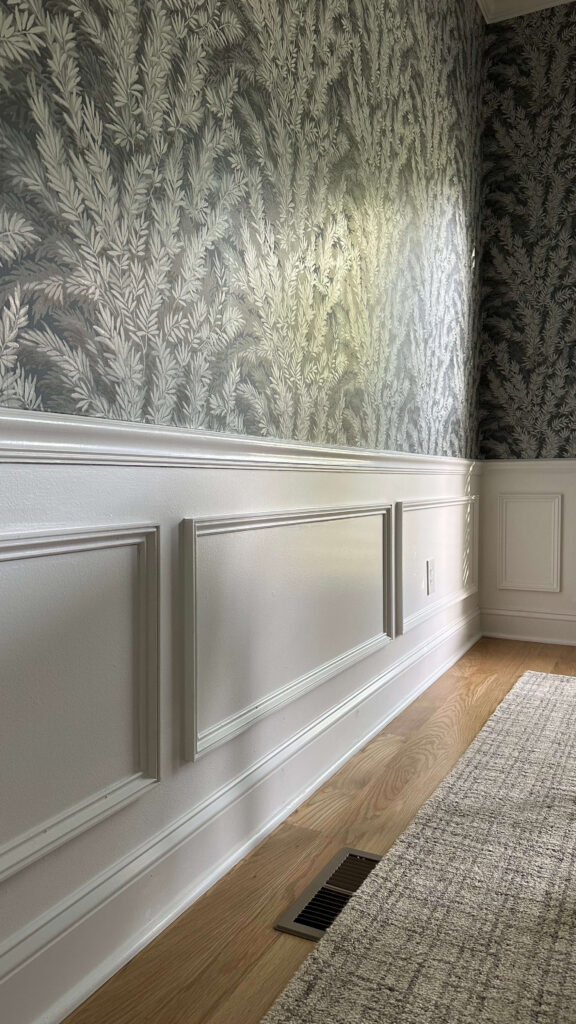
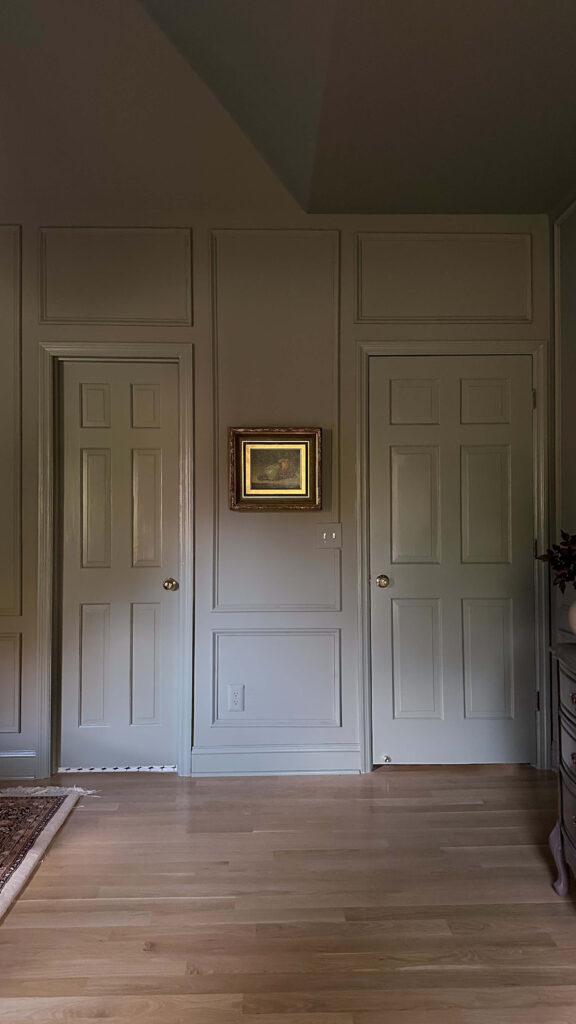
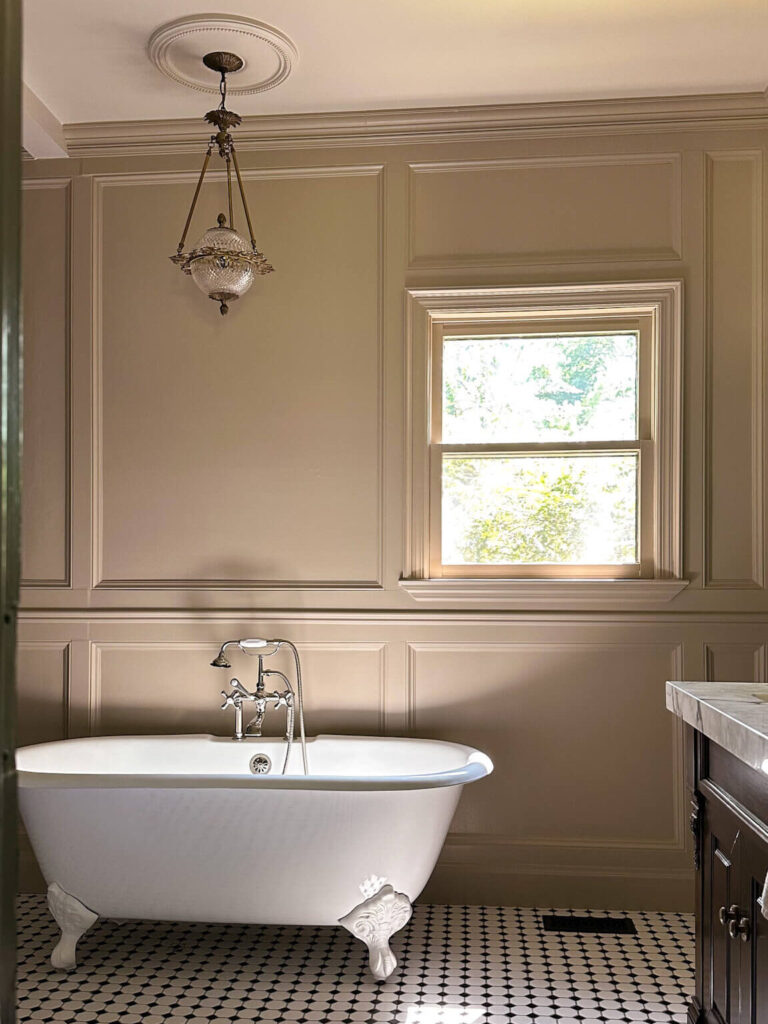
My three custom trim projects in order: the dining room, the bedroom, the primary bathroom
In my dining room, I installed picture frame boxes below an existing chair rail. In my primary bedroom, I tried stacked molding—smaller boxes on the bottom and larger ones on top. Then, in my primary bathroom renovation, I created a custom wainscoting design with multiple layers and trim types. For the home office, I’m installing a chair rail with picture frame boxes underneath, and next we’ll tackle crown molding.
Installing the Chair Rail: The Foundation of Picture Frame Molding
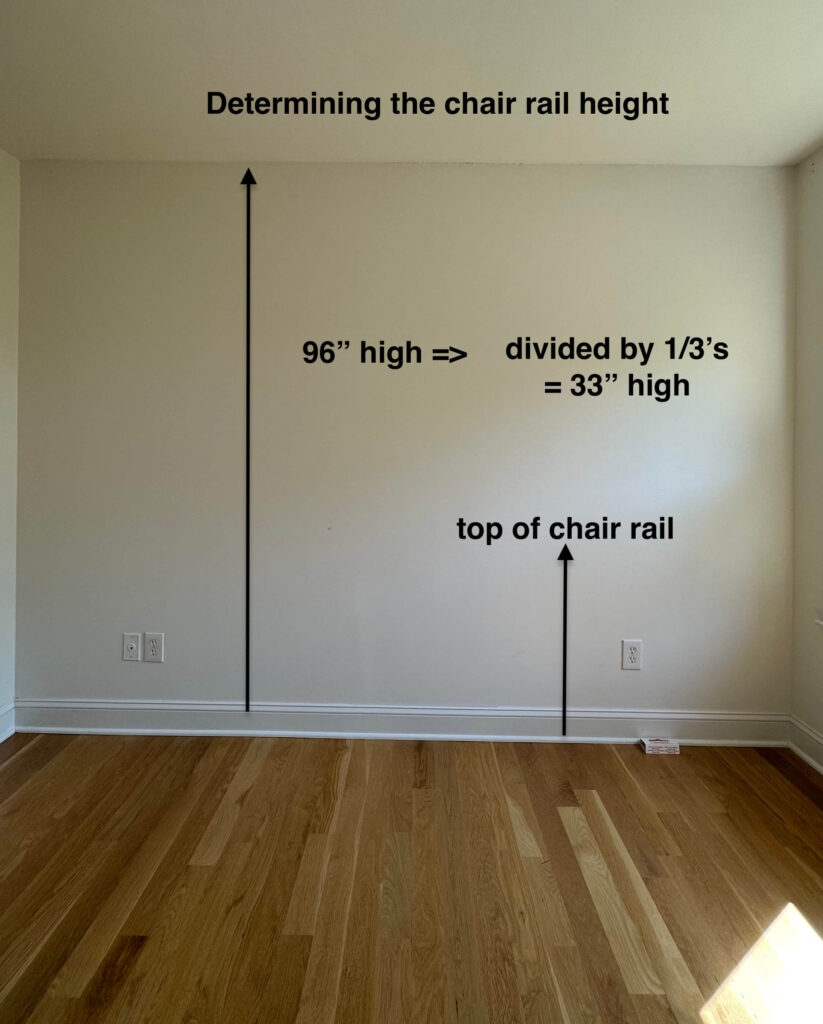
Before getting into how to design picture frame molding, I first needed to determine where my chair rail would sit. This room didn’t have any existing trim, so I started from scratch using one of my favorite design rules: the rule of thirds.
My ceilings are eight feet tall (96 inches), so I divided that by three to get 33 inches. Then, since I plan to add a chunky crown molding later, I decided to drop the chair rail one inch lower. That means the top of my chair rail sits at 32 inches from the floor, creating perfect visual balance for an 8-foot room while allowing the upper wall to have its own moment, especially since I plan to add wallpaper above the molding.
Once I had the height marked, I used my Bosch laser level to project a clean, continuous line around the room and attached the chair rail with my brad nailer and 2-inch brad nails. I chose this chair rail by Ornamental Mouldings and I’m in love with the detailing on it! I know it’s going to look amazing once I get everything painted. Now that the chair rail is installed, it’s time to move on to the real fun: designing the picture frame molding boxes.

Shop: chair rail
Designing Picture Frame Molding for Each Wall
When figuring out how to design picture frame molding, the first step is to map out the layout for each wall.
My number-one tip is to design for each wall individually, not the room as a whole. Very few rooms are perfect rectangles without windows, doors, or vents—and that’s what makes your space interesting. But it also means you’ll need to adjust your box layout wall by wall.
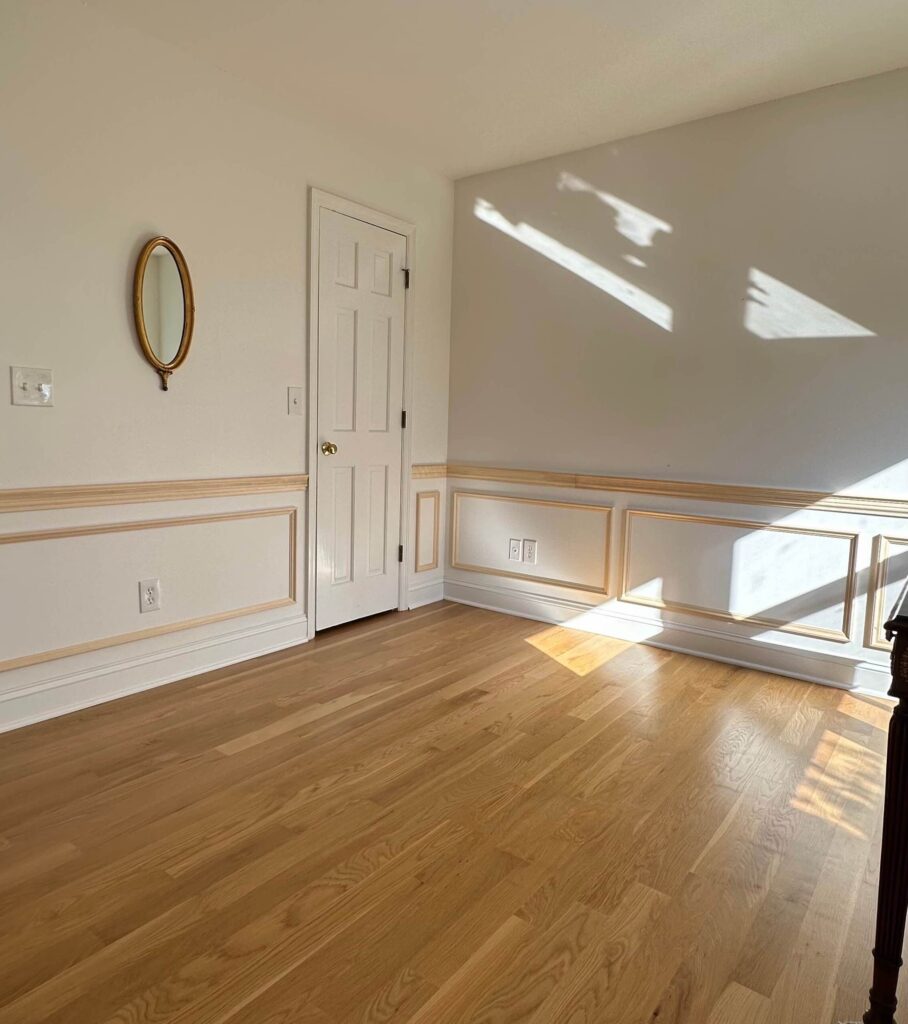
For example, in my home office:
- One wall has two doors
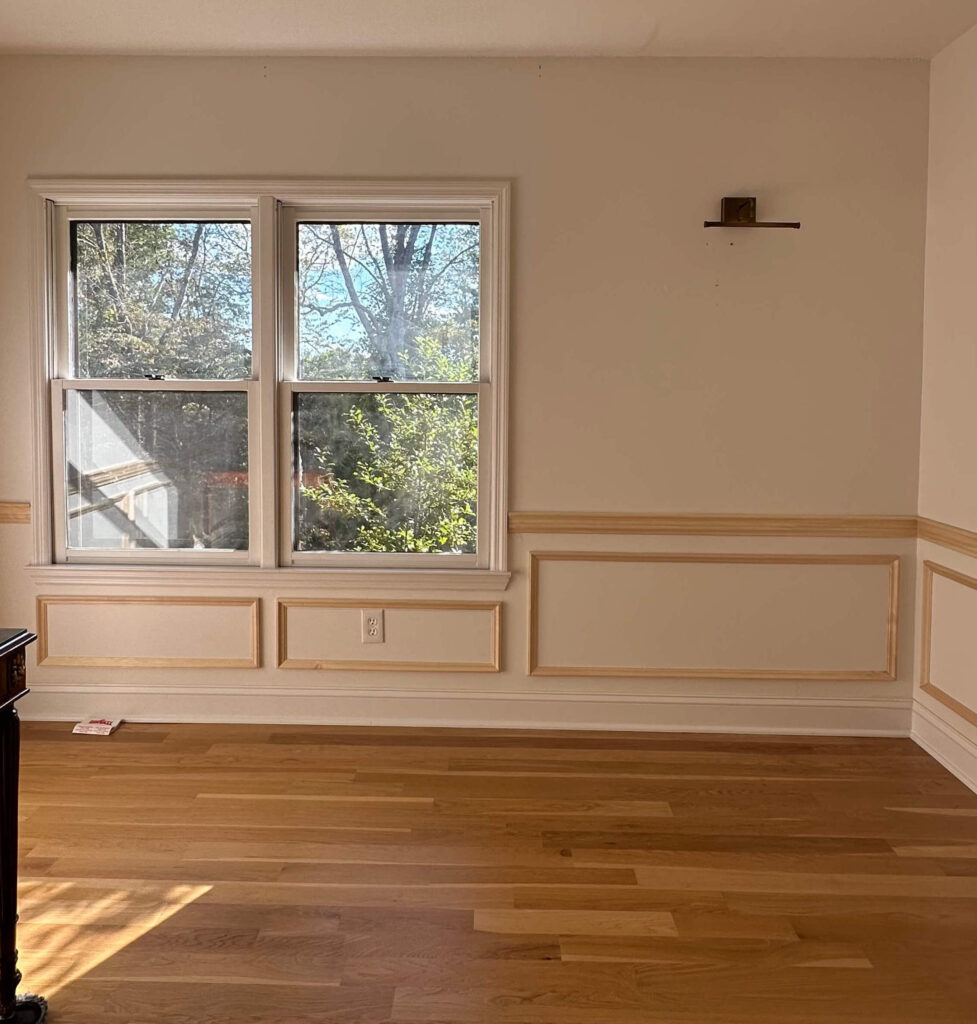
- Another has off-centered double windows
When designing picture frame molding, design for the wall not the room and work with existing features like windows and doors
That means symmetry across the entire room just isn’t possible. Instead, I focused on what made sense for each wall and how to best complement the existing architecture. I love to start with the wall that already has these existing features. For me, that’s always the easiest jumping-off point.
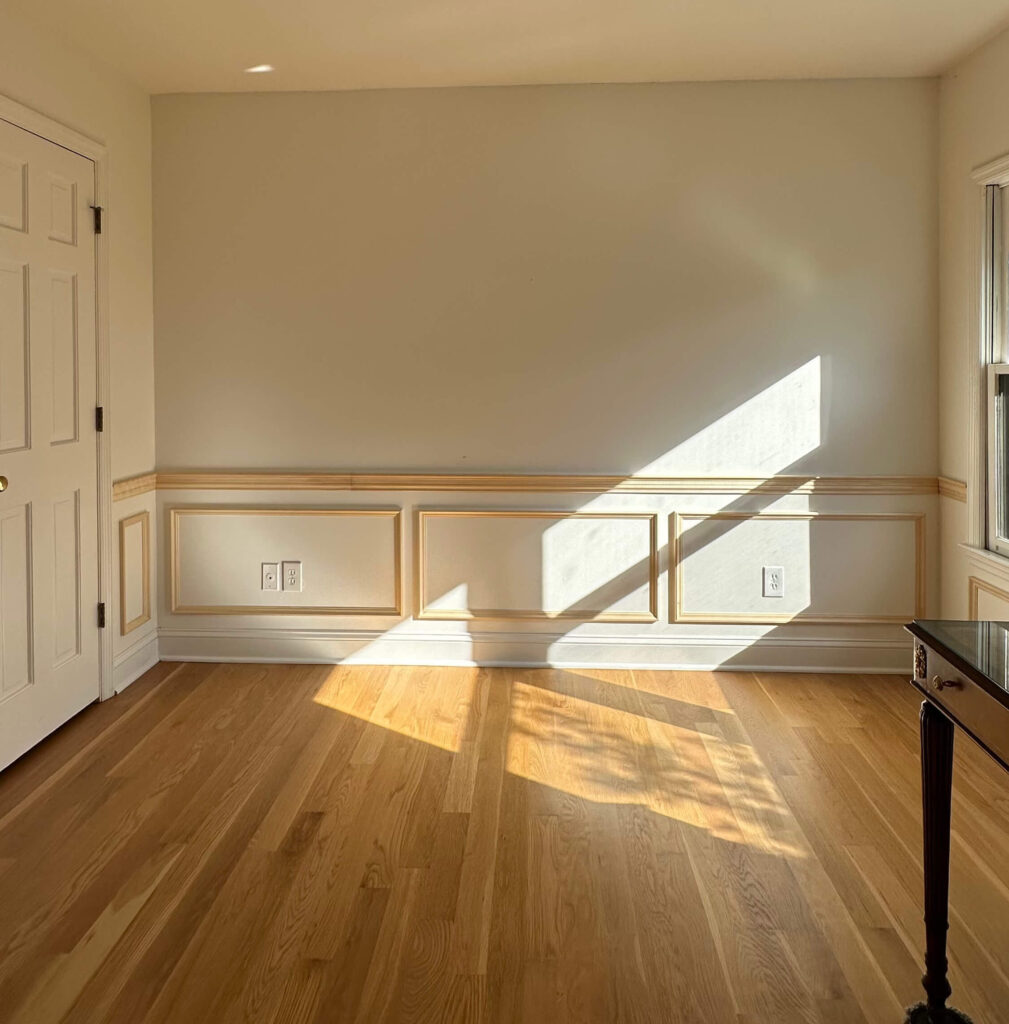
For example, in this room I started with the wall that had the double windows. I had two options: one long box beneath both windows or two long rectangular boxes. I chose two, which felt more balanced. On the shorter section of wall beside the window, I decided on one box instead of two.
That’s what I mean by designing for the wall. It’s about what looks right in that specific space, not what matches the others perfectly.
Visualizing the Layout Before You Cut
A key step in how to design picture frame molding is visualizing your layout before you make a single cut. I like to upload a photo of my wall into Canva and experiment with digital “boxes” until I find a layout that feels right.
You’ll see how I mocked up two options below – one with three boxes and one with four boxes. Some people prefer more square boxes; others like them long and rectangular. Personally, I lean toward groupings of three whenever I can. The “rule of thirds” is classic for a reason as it’s naturally pleasing to the eye.

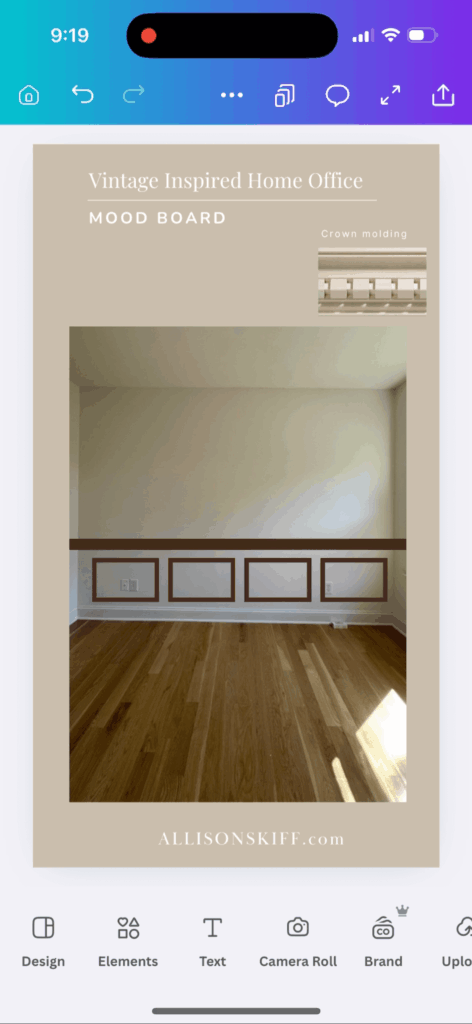
For this room, I landed on three boxes on the wall behind my desk and three boxes on the wall across from it, which kept the layout feeling balanced.
You can also go old-school with painter’s tape, which I did in my first few projects. Tape out the boxes on your wall, step back, and adjust until you’re happy with the proportions. It’s a low-stress way to get confident before you start cutting your trim.
Spacing and Installation Tips
The most important tip when installing picture frame molding is when it comes to spacing, consistency is everything. You’ll want the spacing around each picture frame molding box—top, bottom, sides, and in-between—to be exactly the same.
Shop: chair rail | picture frame molding | laser level
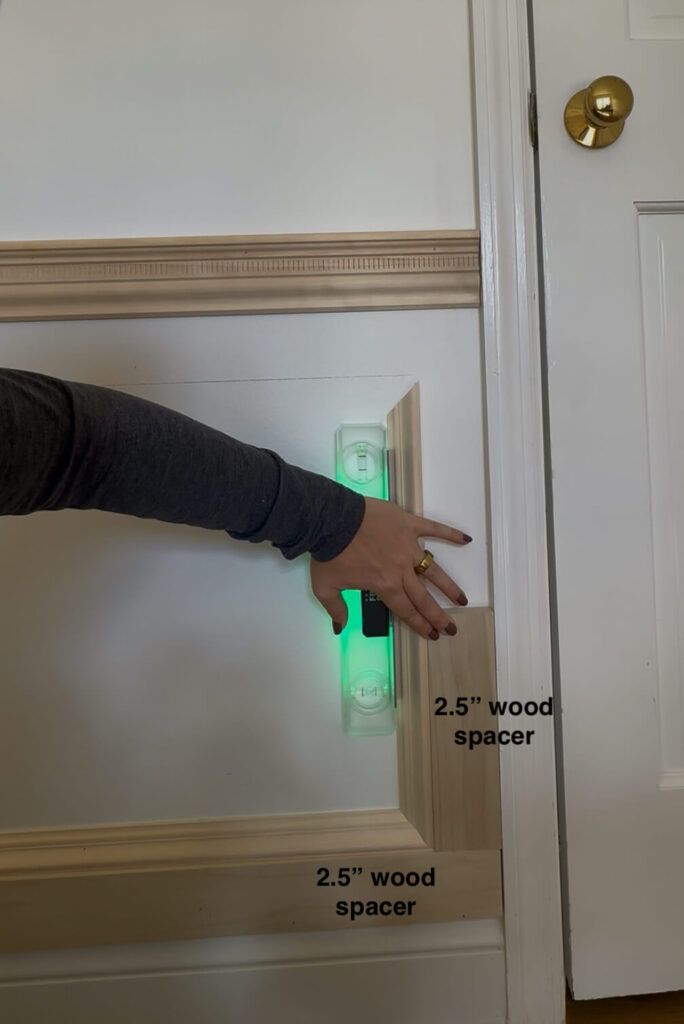
For this project, I decided on a 2½-inch gap instead of my usual 3½-inch spacing since my ceiling height is lower. I used pieces of 2½-inch scrap wood pieces to use as spacers, which made lining everything up fast and easy.
After marking all the box outlines on the wall, I measured each section, cut my molding at 45-degree angles on my miter saw, and then dry-fitted the pieces to make sure everything aligned. Once I was happy with the fit, I double checked everything with my handheld laser level, and then installed each piece using my brad nailer and 2-inch nails. I’ll also note I find it easiest to start with the bottom piece first, then sides and then the top piece of molding. You work with gravity this way versus against it!

#1 tip: make sure all your spacing is the same around the picture frame boxes
For this project, I used picture frame molding from Ornamental Mouldings from Novo Building Products (it’s the same profile I used in my bathroom!). I love the subtle detail it adds without feeling too fussy.
Conclusion: How to Design Picture Frame Molding Like a Pro
Every time I tackle a wall molding project, I’m reminded why I love them so much: they add instant character, texture, and architectural interest without requiring a full renovation.
Learning how to design picture frame molding might feel intimidating at first, but once you understand a few basic principles—like the rule of thirds, consistent spacing, and designing for each wall individually—it becomes a creative, approachable DIY that looks completely custom.
Whether you’re working with a blank wall or incorporating existing windows and doors, the key is to visualize, plan, and take your time.
The Home Office Makeover: What’s next?
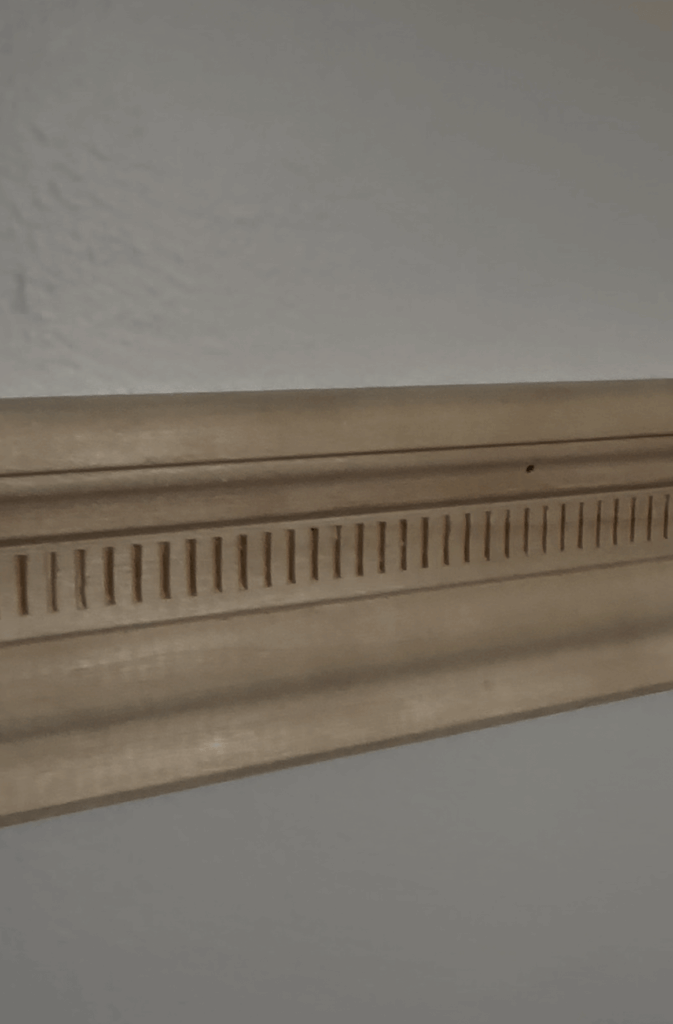
Now that I designed and installed the picture frame molding the next step is installing this dental crown molding! I’m so excited about the detailing and cannot wait to get crown molding into this room. Make sure you’re following along on socials to see the transformation take shape!
Supply List
- Bosch laser level
- Brad nailer
- 2″ brad nails
- Miter saw
- Measuring tape
- Handheld Laser Level
- Scrap wood spacers (2½”)
- Picture Frame Molding by Ornamental Mouldings
- Chair rail molding by Ornamental Mouldings
- Painter’s tape (optional for mockup)
Related Posts:
How I Designed Picture Frame Molding in the Dining Room
Primary Bathroom Custom Wainscoting
Designing Stacked Picture Frame Trim in the Primary Bedroom
This project is part of the Fall 2025 One Room Challenge! You can follow along with the challenge here.


