


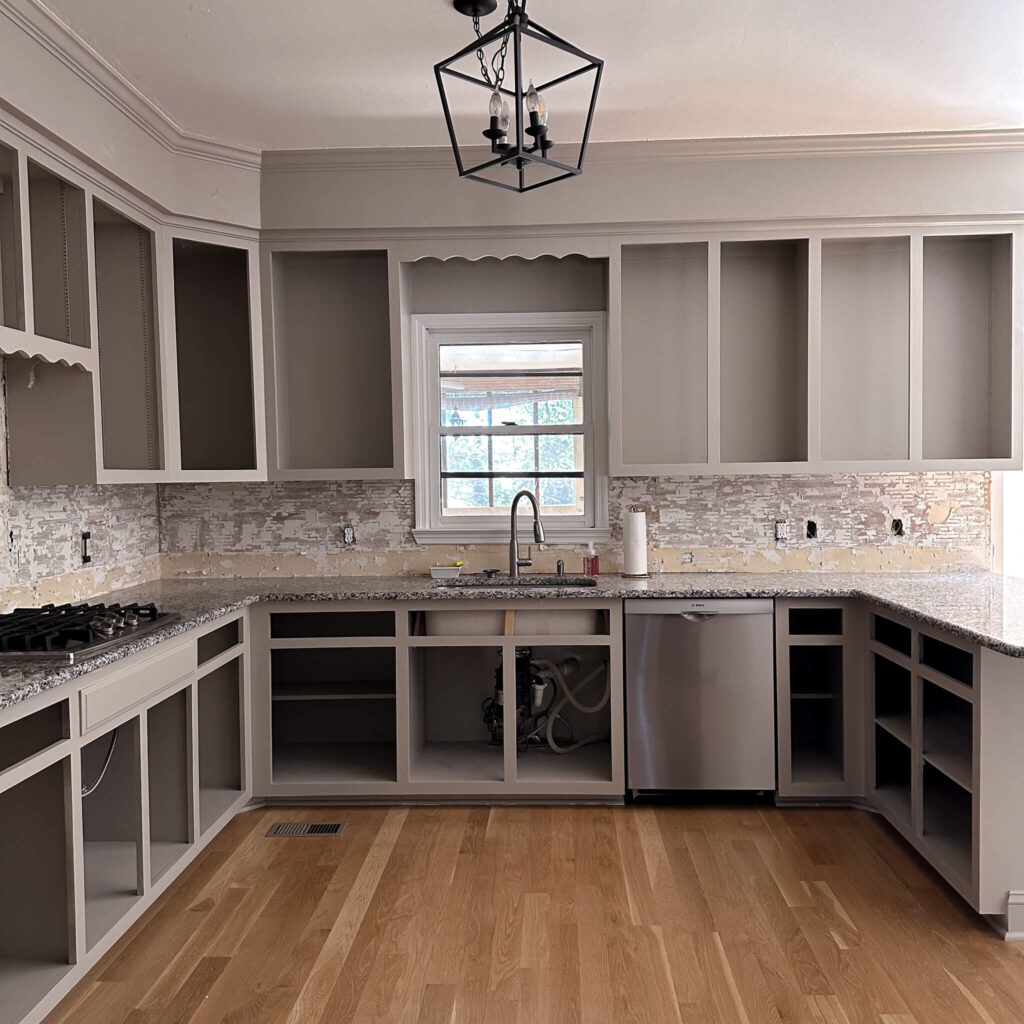
This is my first ever kitchen renovation and I think it’s fair to say that this week might have been the breaking point. While I had a little extra pep in my step last week from the new paint that went on the cabinet boxes, the wave of excitement came crashing down this week as I worked to remove the existing glass tile backsplash. As I look at my original mood board, there’s still so much left to accomplish with this budget friendly kitchen renovation and I feel like this past week set me back a bit. Lets recap…
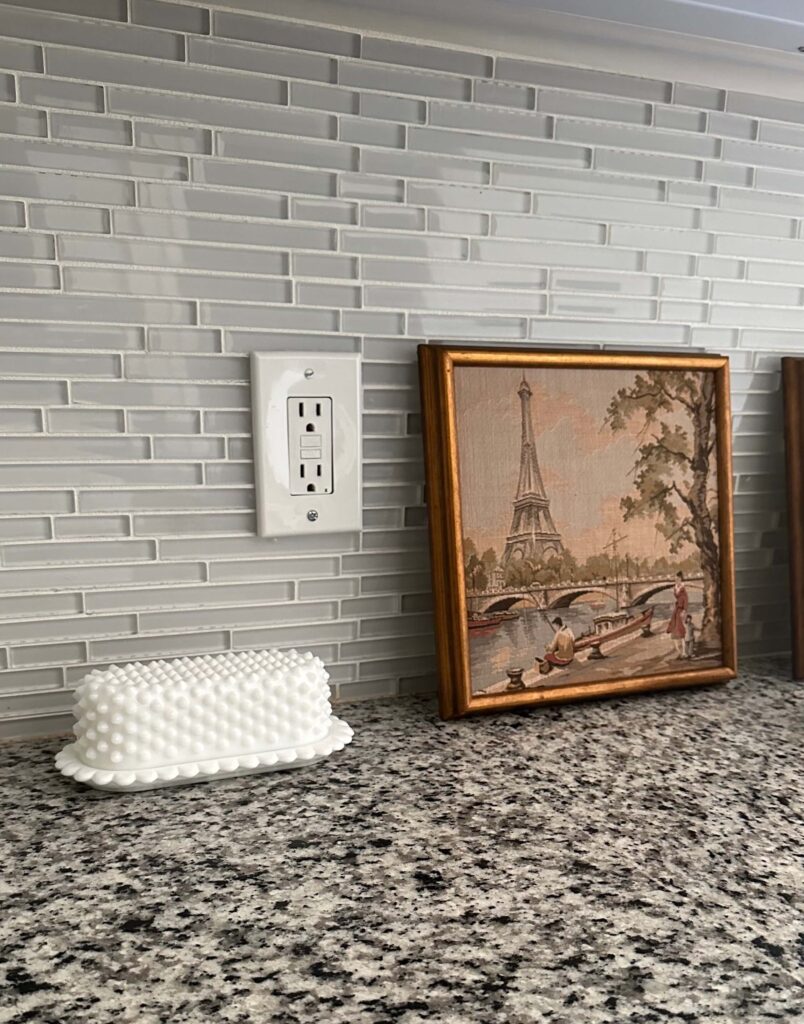
I know some people probably liked my glass backsplash. It was not dated, and is relatively new. However my goal of the budget friendly kitchen renovation is to warm the kitchen up and give it more continuity with the rest of the home (which has a warm tone). The backsplash, as well as the previous white cabinet color and granite countertops are all very cool toned. So that’s why I chose to remove it and replace it with wood paneling which will be painted the same color as the cabinets.
If you’re also looking to remove a glass backsplash without ripping out your drywall, I’m here to share that it IS possible to do. Yes, ripping out the drywall might be quicker, but that also opens itself up to potential hidden surprises. Which I’m not in the mood for! So lets get into how I removed this backsplash and then we’ll reassess the rest of the renovation schedule.
How to remove an existing backsplash without ripping out the drywall
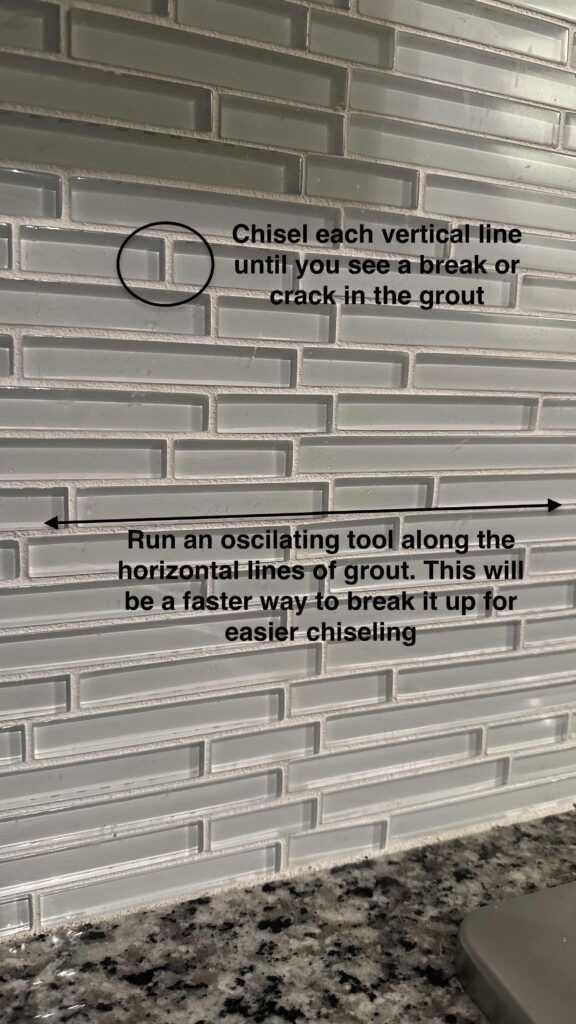
Before you demo anything, it’s important to understand how it’s originally installed. For my backsplash, it comes in sheets with spaces in between each piece of tile. You skim grout on the wall first, and then place your sheet of tile on top. Once placed on the wall, grout is skimmed overtop of each sheet and pressed into each space around each piece of tile.
So when you think about it that way, there is grout on all sides of tile (except the top) holding it to the wall. To remove the tile without removing the drywall with it, you need to break up each line of grout first. Admittedly, this was trial and error for me, as I’ve never demo’d anything before, but with a little patience and the right tools, it was certainly doable.
Before you get started make sure you’re wearing long sleeves and pants, have protective glasses and safety gloves. You’ll also want to lay drop cloths on the counter and floors, and have some kind of waste bucket near by for the old tile and grout. Tool wise, you’ll need a hammer, chisel and I highly recommend an oscillating tool.

I did not own an oscillating tool before this project, but after two hours of chiseling and not getting very far, I ordered this Kobalt oscillator from Lowe’s. It was $99 and came with multiple blades including one specifically for grout, as well as a battery and charging dock. I know I’ll use it for so many more projects in the future.
I used the oscillating tool to grind away at the long horizontal strips of grout first, working in 1 foot sections at a time (top to bottom). From there, I went in and chiseled each vertical line of grout until I saw a break in the line. After that, I was able to wedge my chisel behind the end pieces of tile and gently pop them out piece by piece.
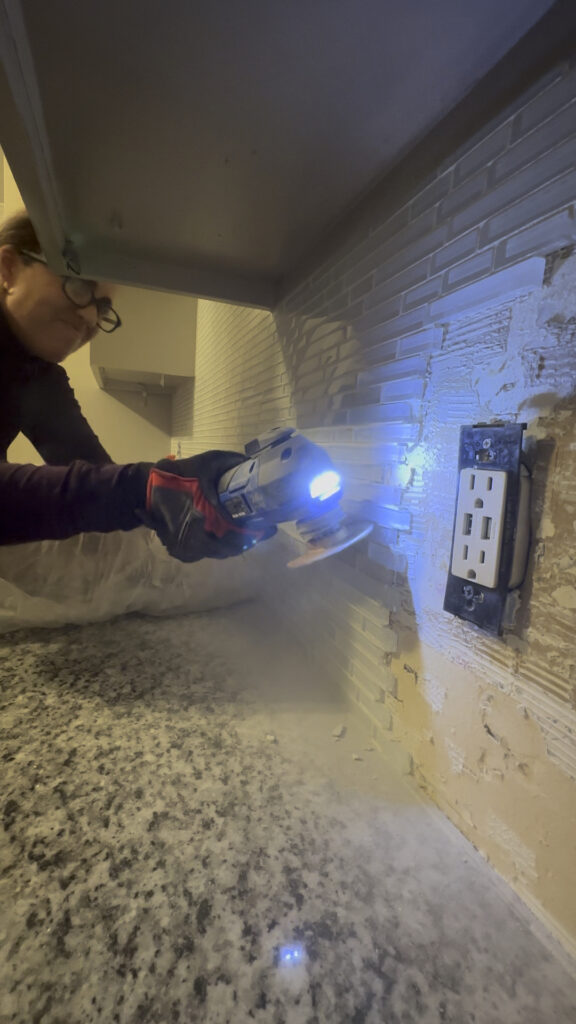
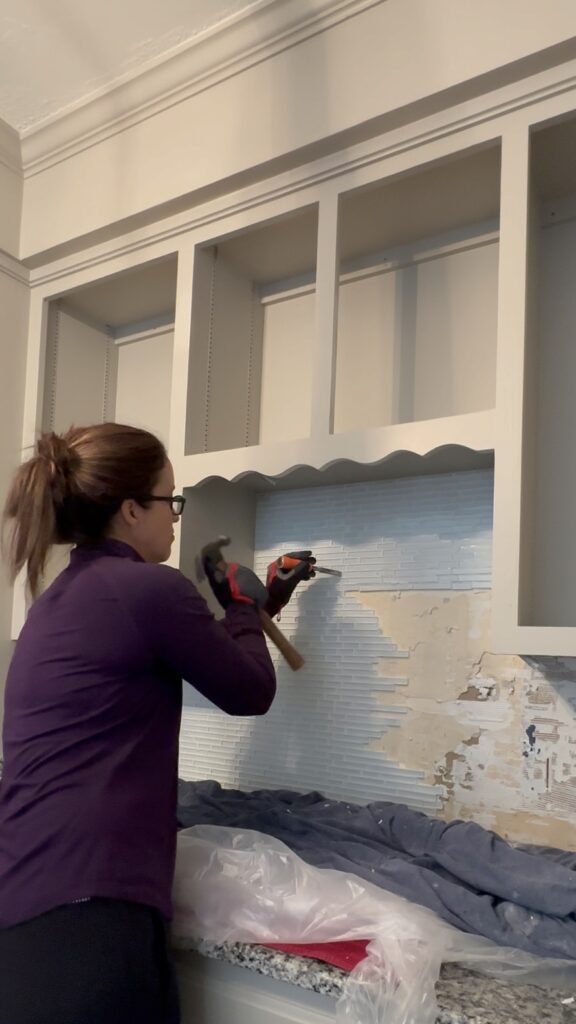
There were definitely moments during this process that I questioned my decisions, but I’m so proud to say I was able to demo this entire backsplash myself without making a single hole in the existing drywall! It was a very long and tedious process, and probably the best upper body workout I’ve ever experienced. So if you’re thinking about doing this, just know that it can be done, but be prepared for a very serious work out and pack your patience.
Budget Friendly Kitchen Renovation – what’s next?
Week 4 Plans
As we enter into week four of the One Room Challenge, we’re approaching the half way mark. And I’m definitely not halfway through my to do list. This past week was supposed to include both the backsplash demo and the new backsplash install, but obviously that was not the case. To make up for lost time, I’m going to aim to double down in week four and try to install the new backsplash as well as start the countertops. Here’s everything that needs to happen:
The New Backsplash
The new backsplash is going to be vertical wood paneling painted the same color as the cabinets. I’m going to cut each piece first using my miter saw, then add two coats of paint, and then install. I’ll need to teach myself how to pull out the electrical outlets and light switches so there’s enough depth to be flush with the paneling. I’ll also be learning how to use a jigsaw for the first time to cut the panels to fit around the outlets, window trim, etc.

New Countertops
I shared in my initial mood board and plans, but didn’t go into a ton of depth around the plan for my countertops. In a perfect world I’d be upgrading to real marble countertops, but as you know, this is a budget friendly kitchen refresh. New countertops for my square footage would cost somewhere between $8k-$10k, so that was out of the question for the time being. Instead, I’ll be using a kit from the brand Giani to paint my existing granite countertops to look like marble. I’ve spent a ton of time this week watching videos and reading tutorials about how others have done this same exact thing, as well as some pitfalls to avoid. I’m a mix of nervous and excited for this!

Other odds and ends that I’m trying to tackle during weeknights include painting all the shelves, prepping the cabinet doors for paint and finding a solution for new hidden soft close hinges. I’m not quite to the point of sketching out the new island plans and dimensions yet, but that’s not too far behind.
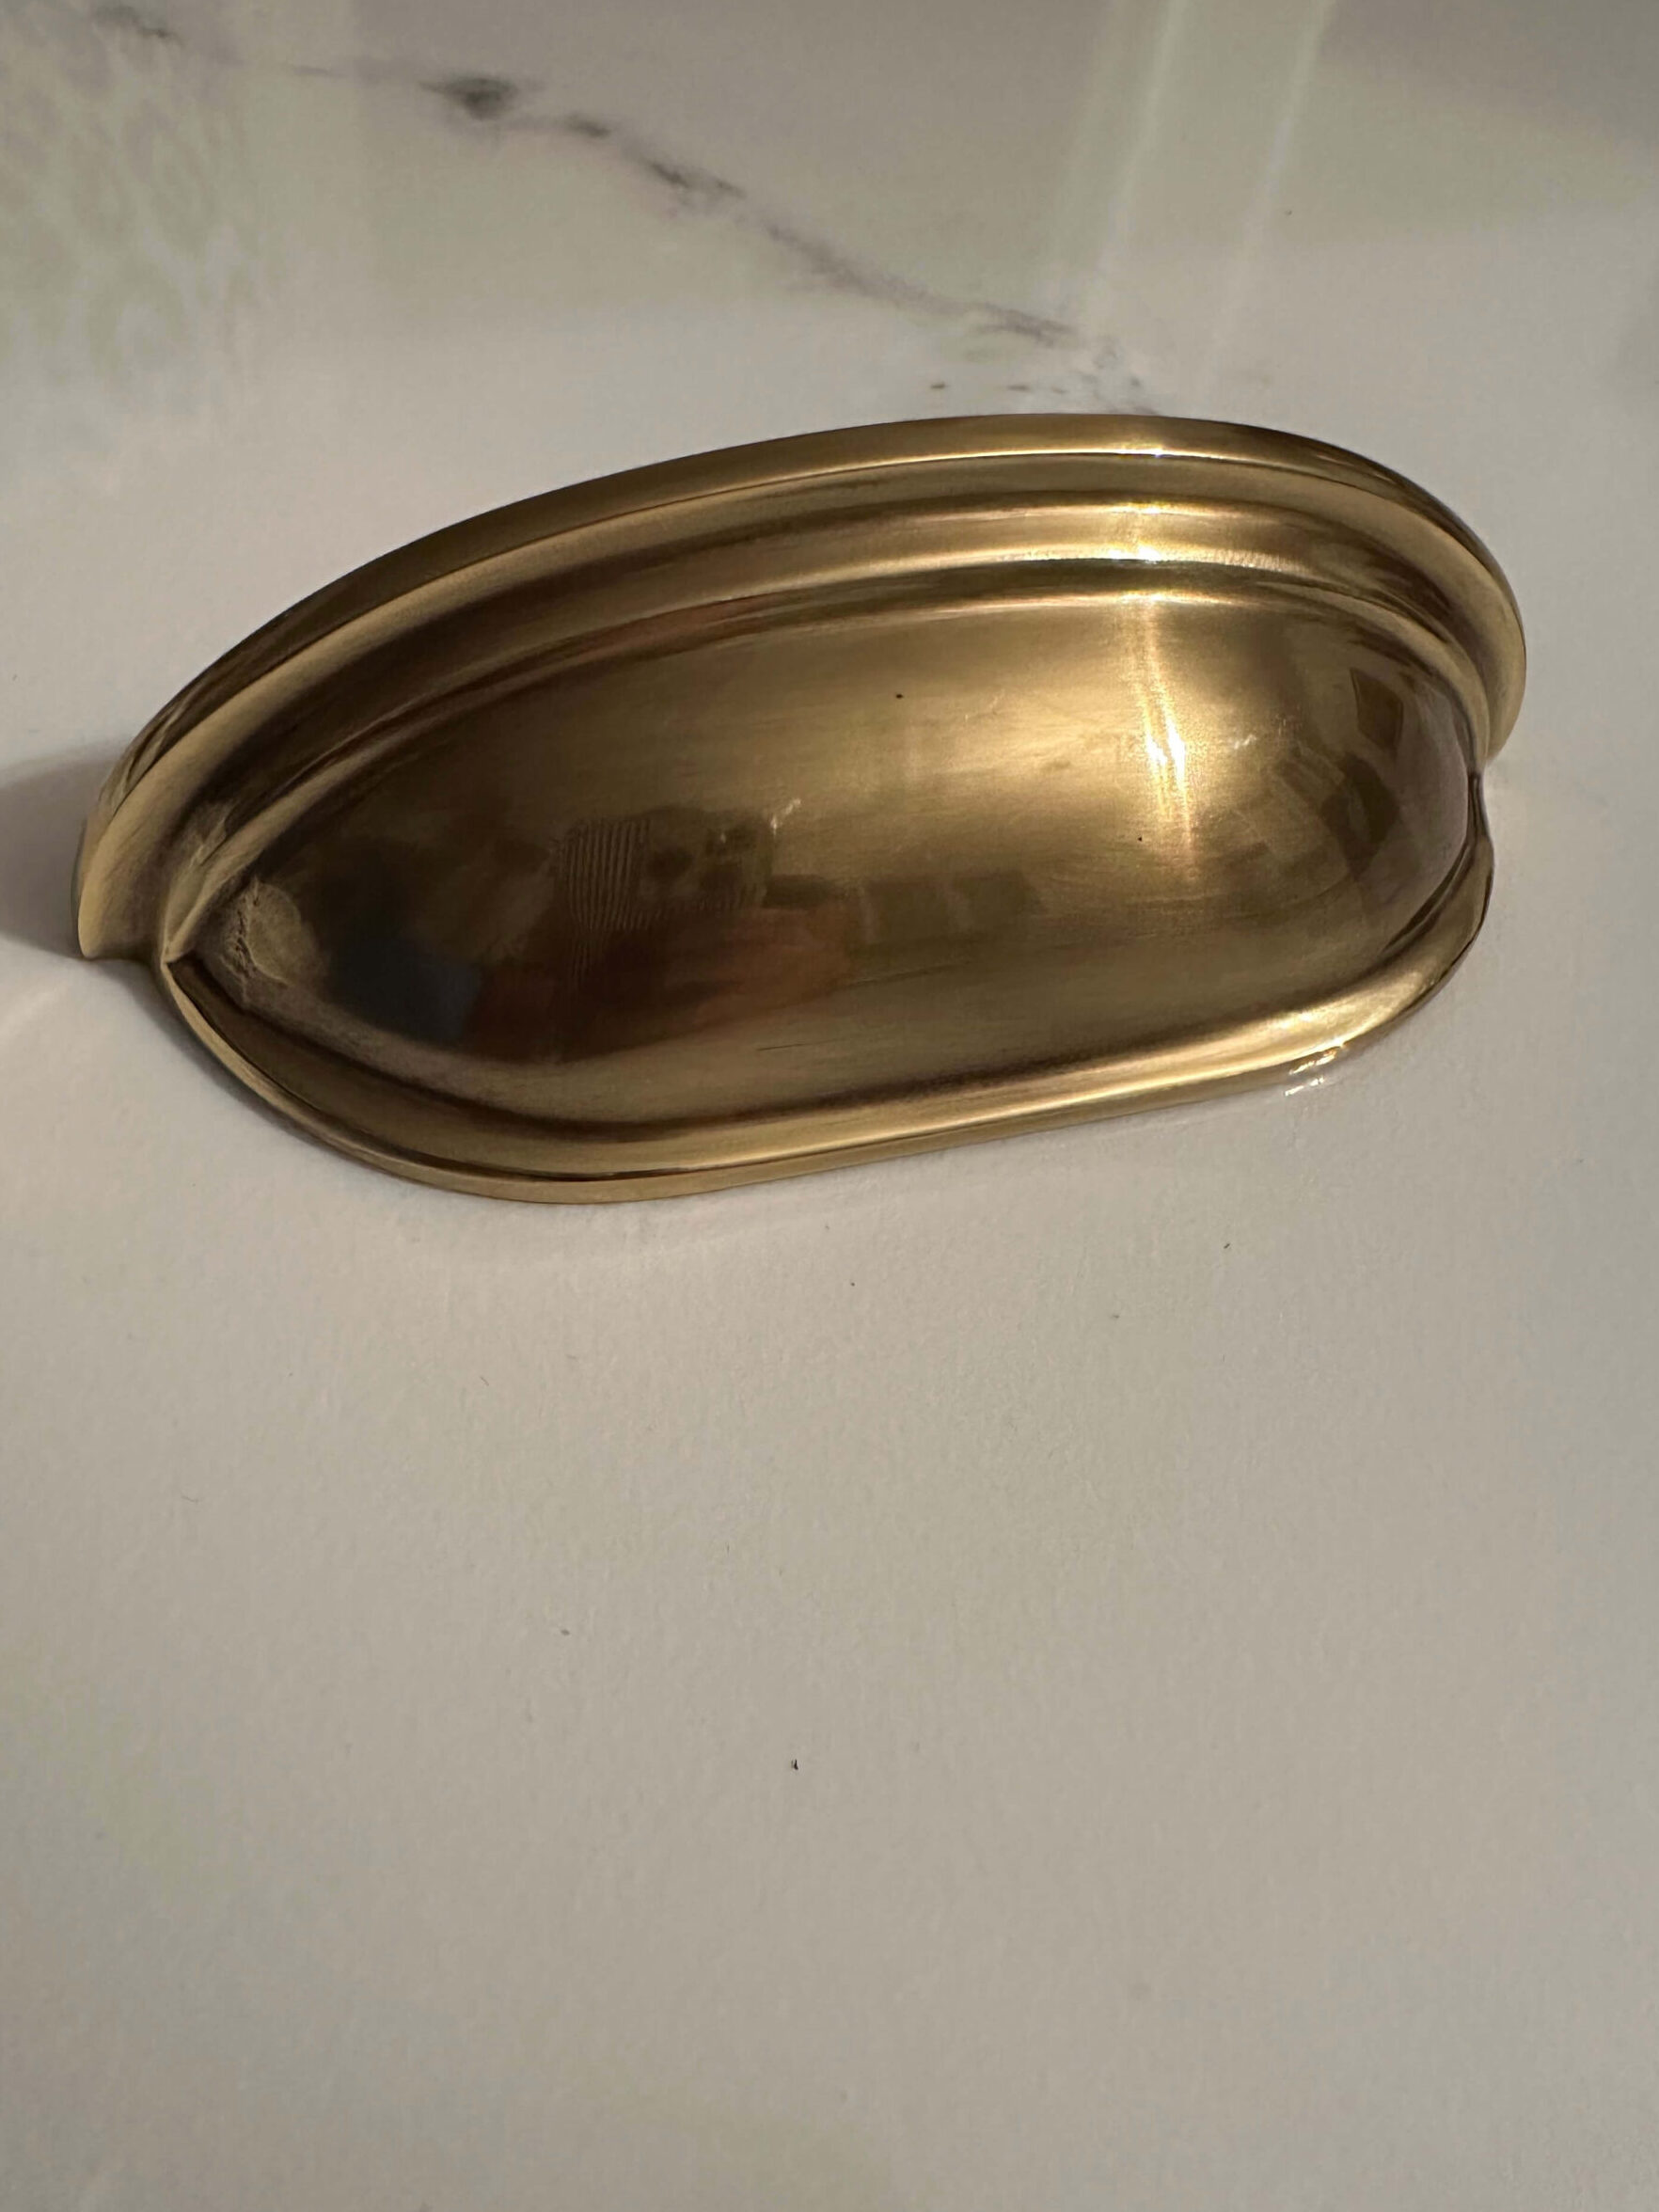
One thing that’s keeping me going right now is my new hardware that just arrived! I’m trading out my old handles on my drawers for these beautiful cup cabinet pulls by EMTEK. I chose the French Antique finish and I love how warm they look, and how substantial they feel. I’ll be installing a mix of 4″ center set pulls and 3″ center set pulls on my drawers. More to come on that soon!
I’m still optimistic that I can finish this budget friendly kitchen renovation by Thanksgiving, but I’m painfully aware that I need to make every minute count. I’ll be working on the project before and after work, and then of course over the weekends too.
Make sure you’re following along on my instagram account to see all the behind the scenes in stories, and weekly recaps in feed. To see and cheer on other designers, you can follow the One Room Challenge weekly progress reports here!
Catch up on my budget friendly kitchen renovation
One Room Challenge Kitchen Renovation – Week 1
One Room Challenge Kitchen Renovation – Week 2
One Room Challenge Kitchen Renovation – Week 3
One Room Challenge Kitchen Renovation – Week 4
One Room Challenge Kitchen Renovation – Week 5
One Room Challenge Kitchen Renovation – Week 6


Wow you’ve come a long way in your renovation! Since the tile removal was so tedious you will definitely appreciate your new backsplash. Keep up the great work!!
Thank you so much! Yes the new backsplash will definitely have a special place in my heart after all that effort!