Are you ready to paint?! Follow along below as I guide you through how to paint a wall like a professional. Speaking of professionals, I’ll share the cost savings you can anticipate by choosing to DIY this project. Get excited – we’re about to transform your space!
Getting Set Up
After you’ve decided on your paint and have properly prepped your space, it’s time to get your painting clothes on and get ready to paint your walls!
First thing’s first: Open your paint can and start stirring. When you think you’ve stirred it enough, keep going. Seriously though, paint (even if it’s white) is mixed of multiple colors that will eventually settle to the bottom of the can. Stir your paint for at least 2 minutes straight, making sure you’re touching the bottom of the can.
Once your paint is mixed, pour paint into both your painting tray and your painter’s cup. Set the painter’s cup and paint brush aside.
Attach your extension pole to your roller (I prefer this but it’s a personal preference) and dip the roller into the paint tray, coating it evenly. Roll off any excess paint on the ridges of the tray.
Rolling Technique
Start painting by rolling the roller onto the wall in a “W” or “N” shape. Apply even pressure and work on one wall at a time.
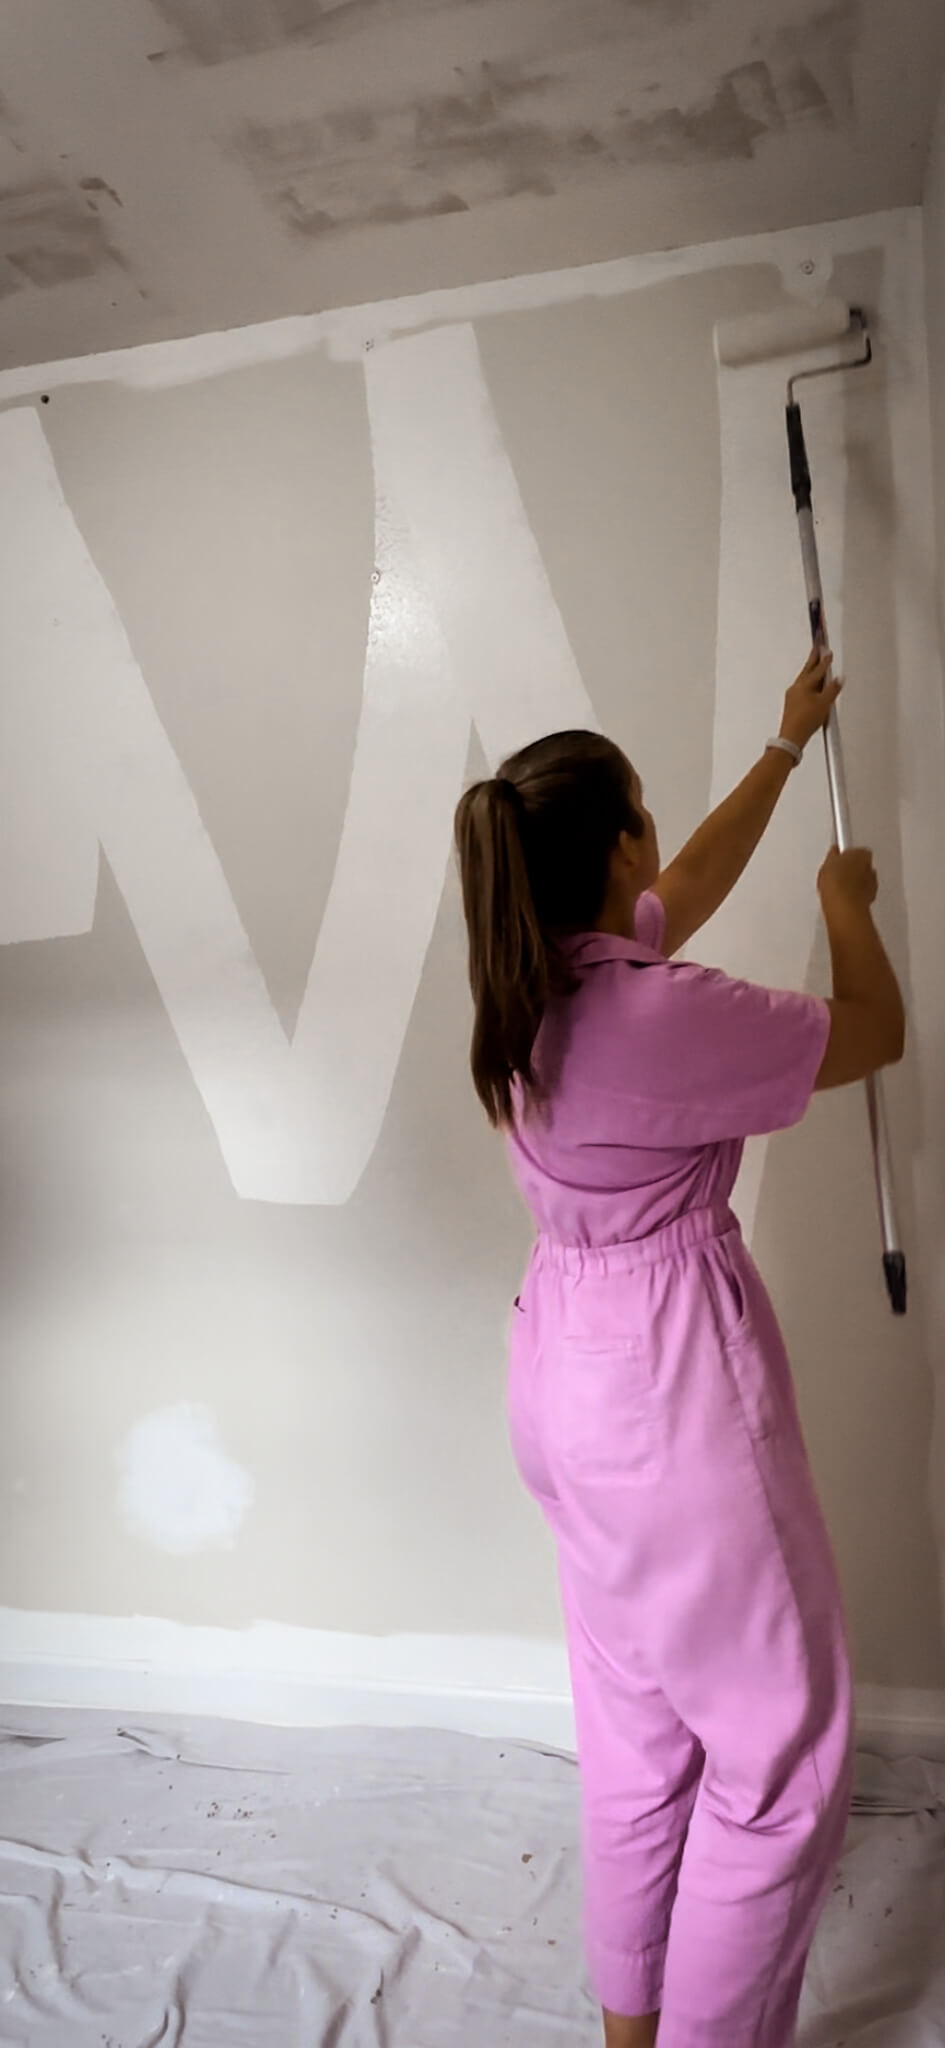
Above: painting a W on the wall. Below: filling the W in with the remaining paint on the roller brush.
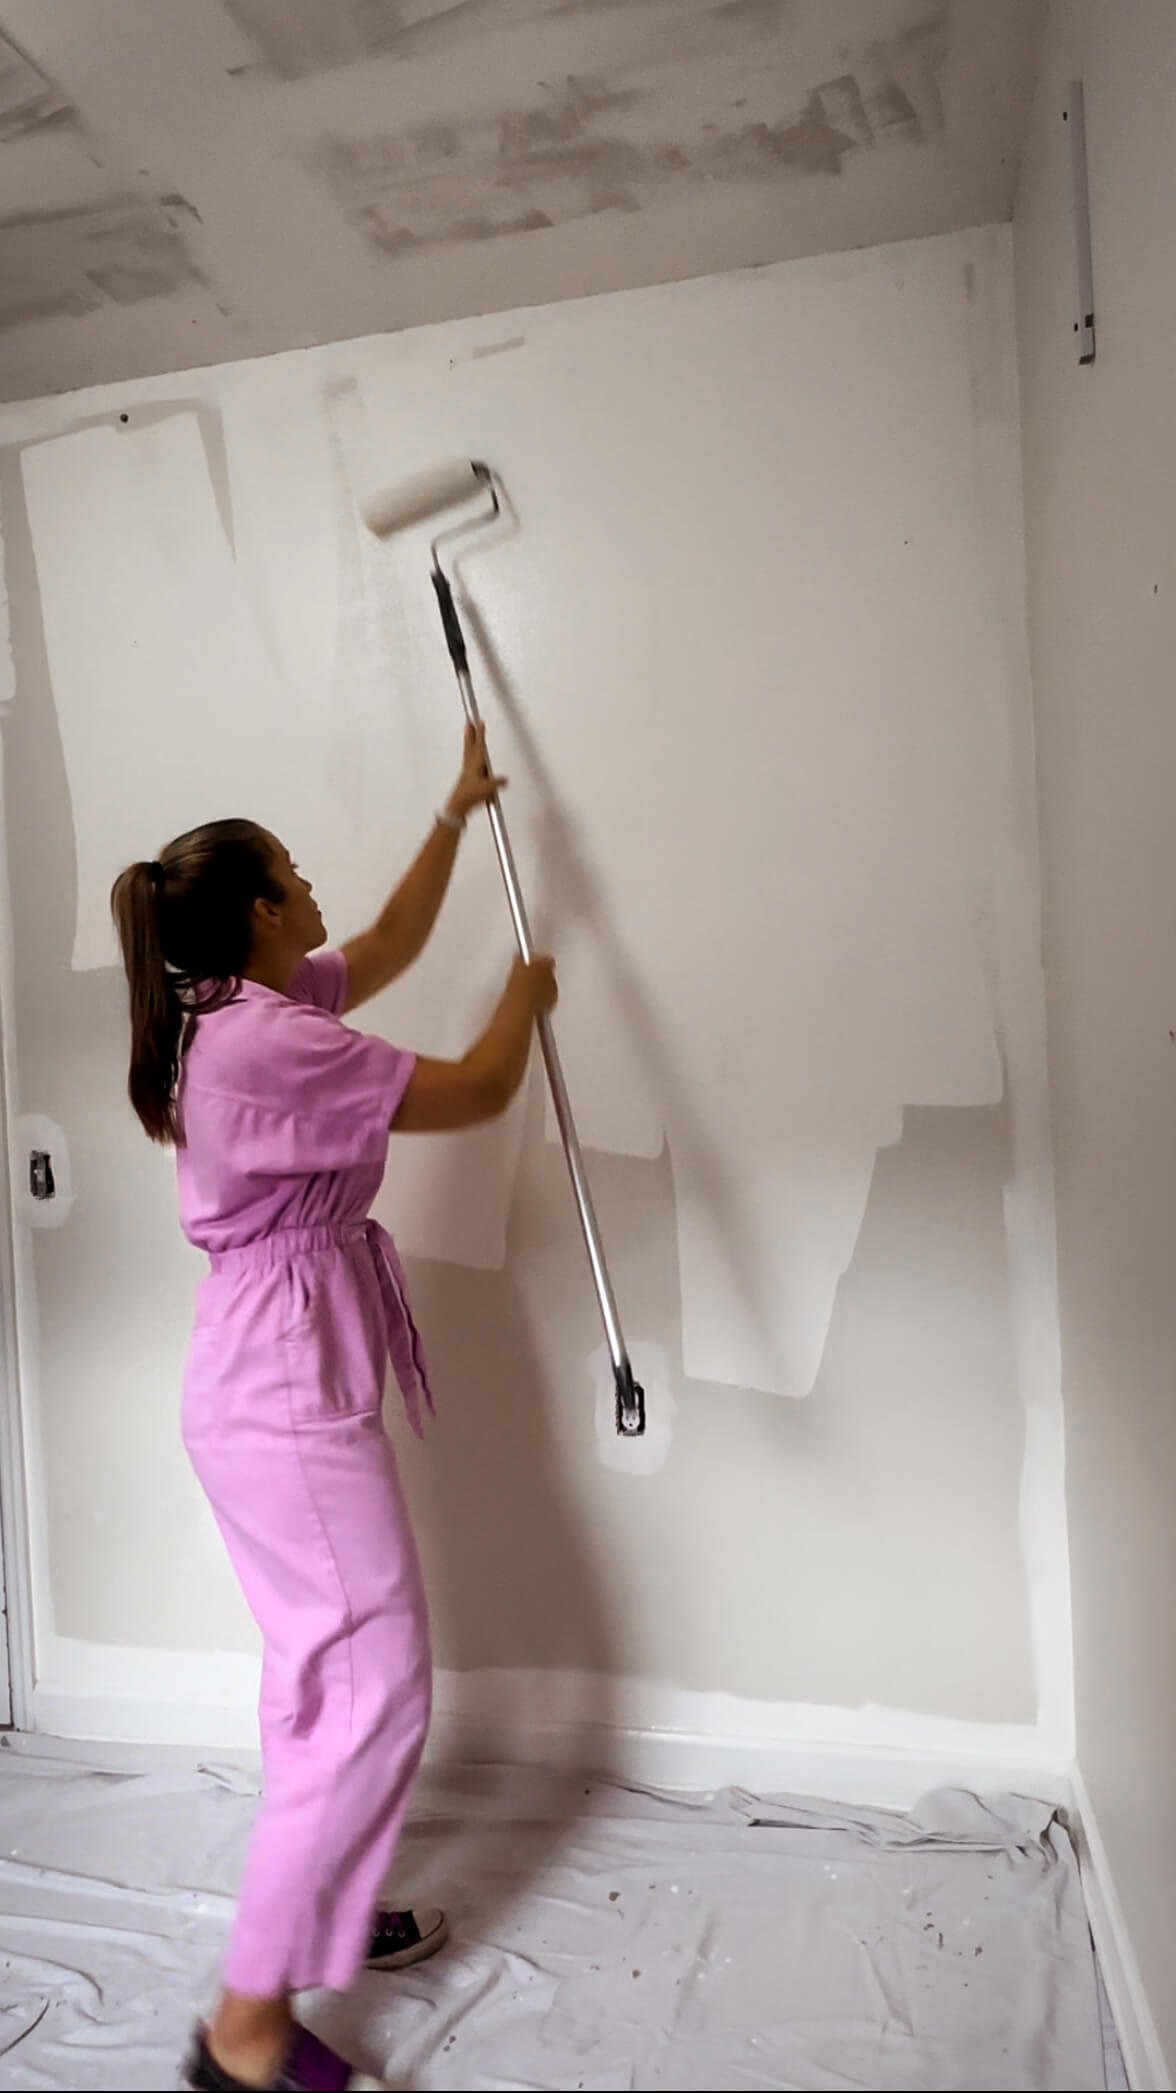
Once you’ve painted your “W” or “N” use the roller without reloading it with paint to smooth out the in between unpainted sections of your letter. This eliminates any visible roller lines and is called “back rolling.” Continue painting the wall, working from top to bottom and from one side to the other. Maintain a wet edge, which means avoiding drying areas and overlapping sections while they are still wet.
Cutting In
Now it’s time to “cut in.” This is the part where you’ll use your angled brush to paint where the roller can’t reach, which will include around doorways and windows, corners, along the baseboards and along the crown molding / ceiling. If you’ve decided to tape the trim, this will be a faster process, as you won’t need to be as careful. I generally like to work from left to right, starting in the corner. I’ll paint up and down the corner first, as far as I can reach on the ladder along the ceiling, and then will move down to the baseboards.
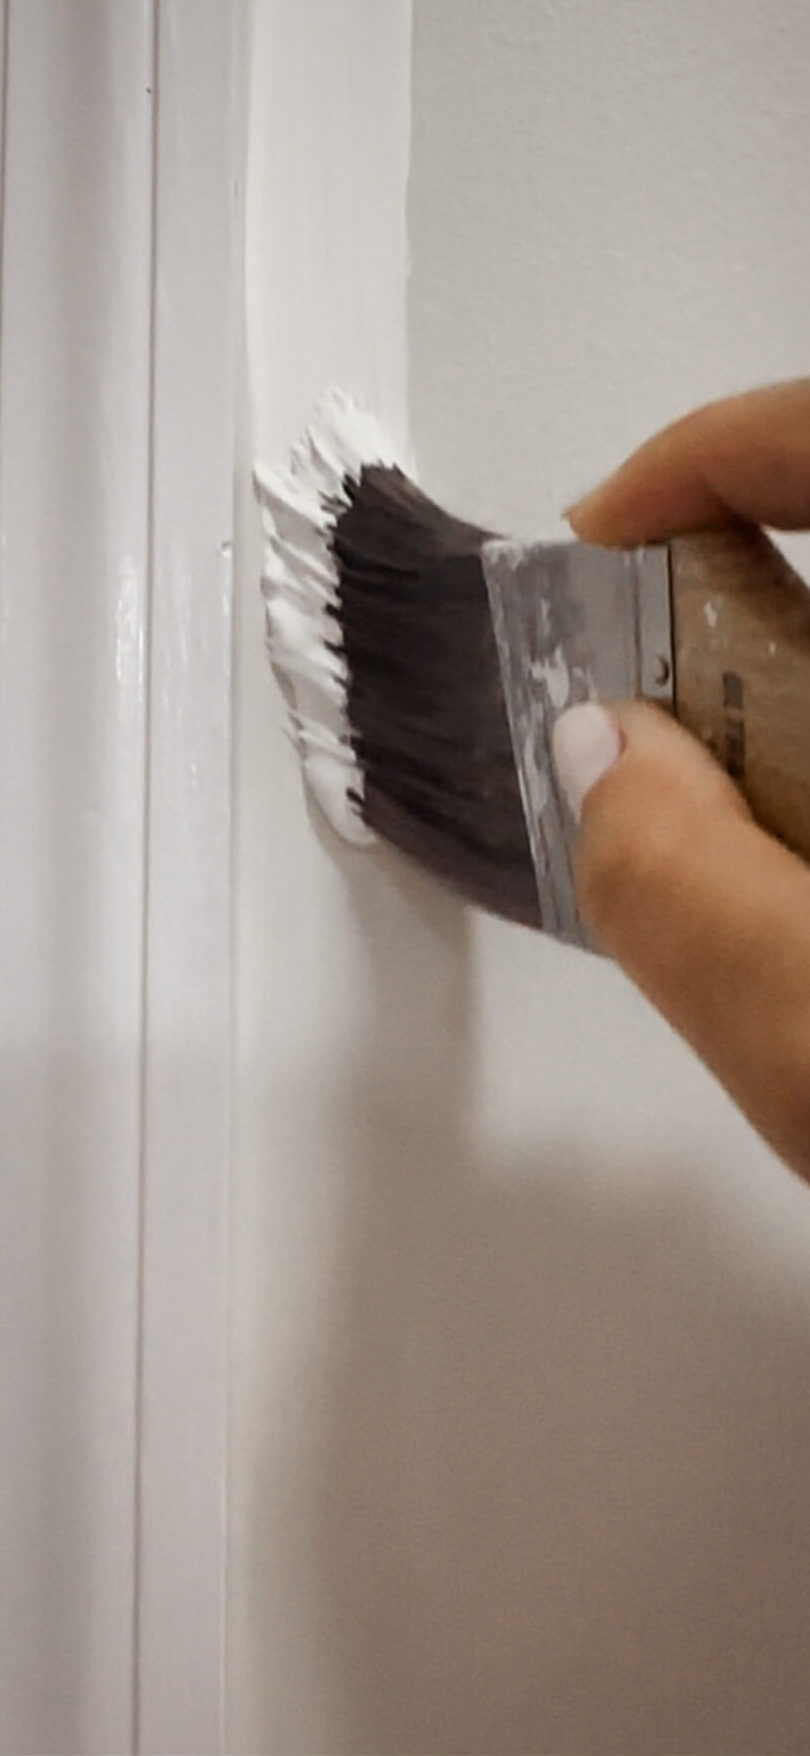
Above: Cutting in against door trim. Below: Cutting in against the ceiling.
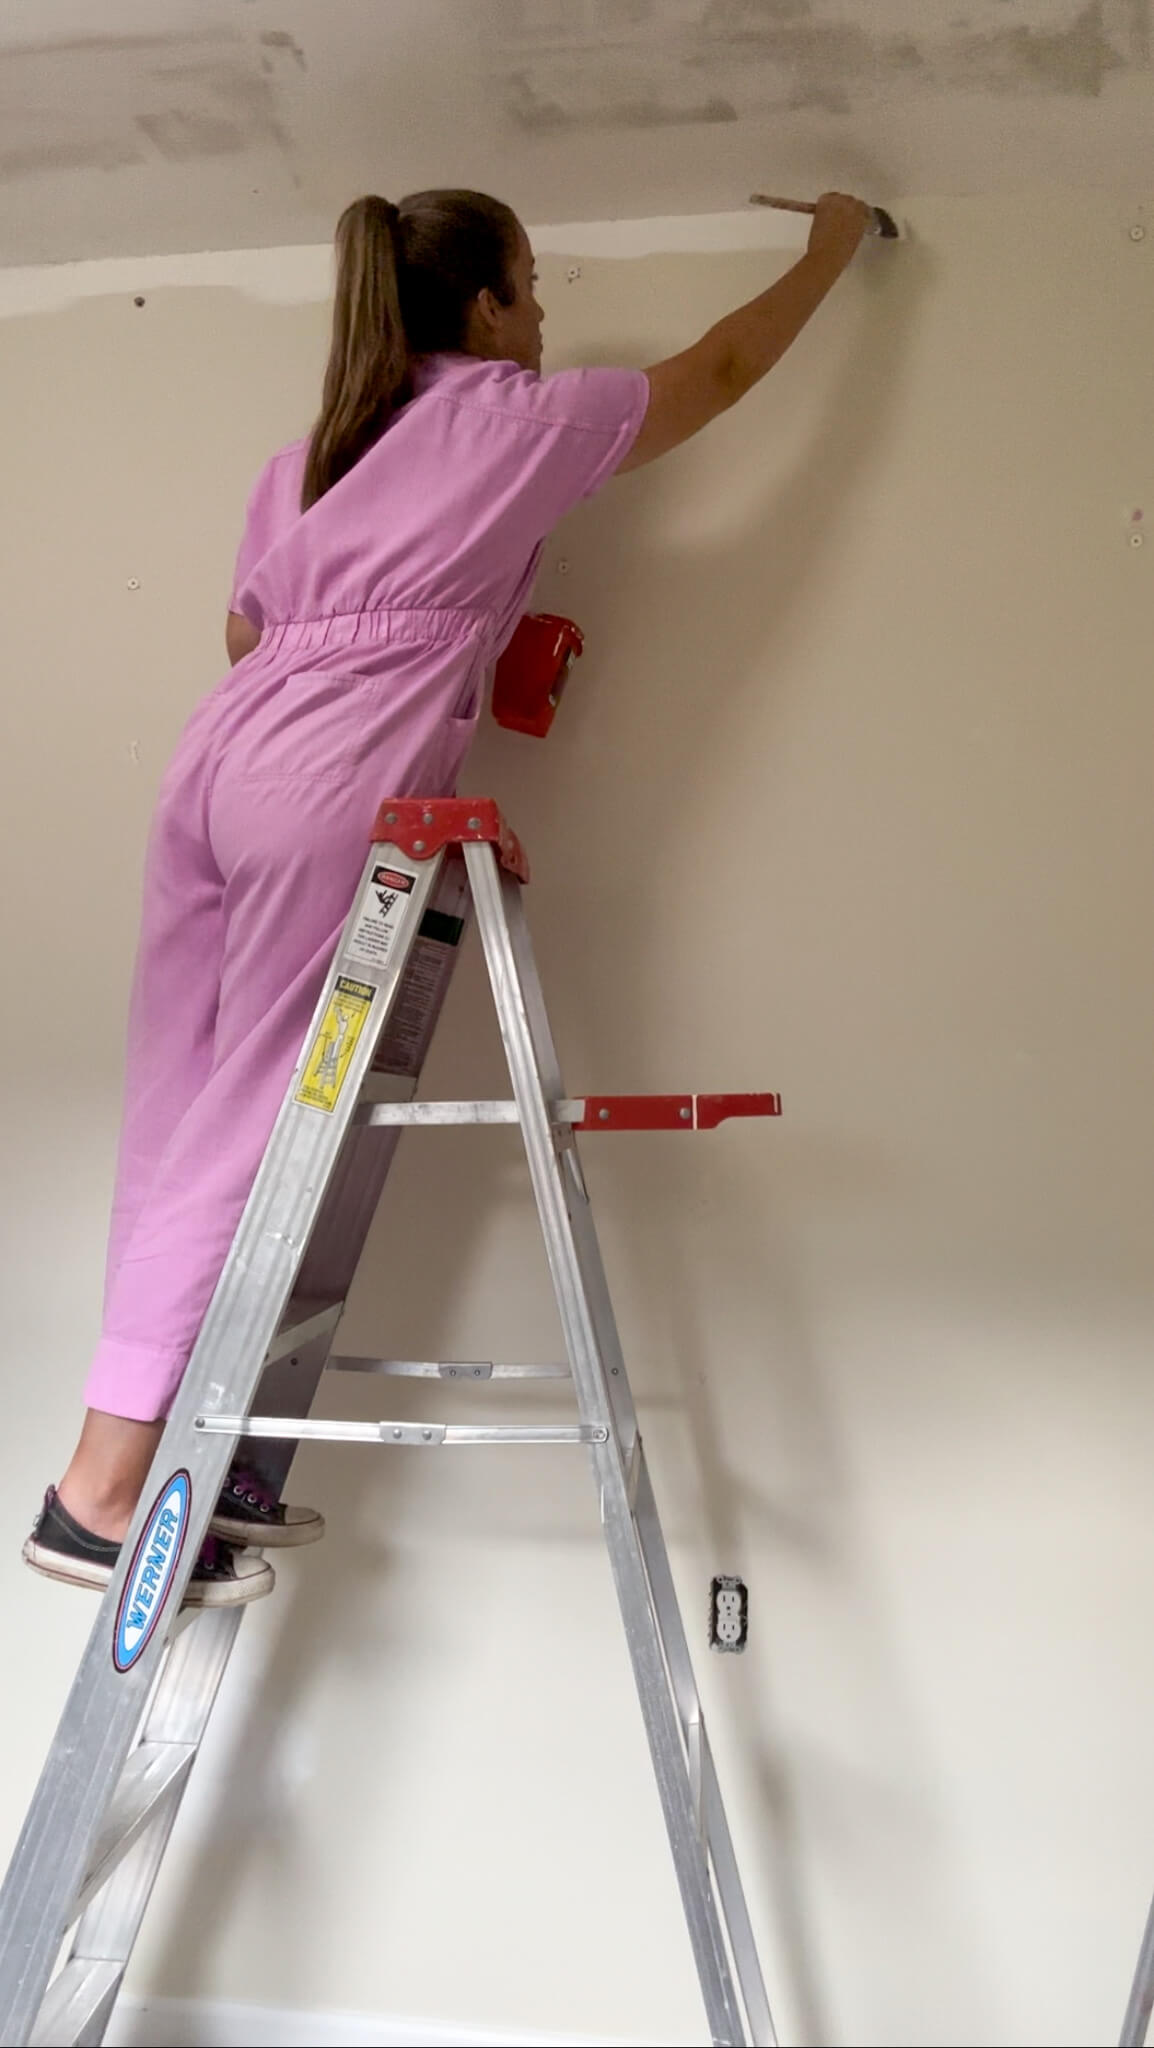
I’ll move the ladder and then repeat until I’m across the whole wall. This helps keep the paint lines wet, and prevents streaking. When using your brush, dip the brush about one-third of the bristle length into the paint and remove excess by tapping it against the side of the painter’s cup.
Drying Time + Second Coat
Continue to the remaining walls and then you’re all done with coat #1. Now I know it’s tempting to want to finish the job and clean up, but it’s important to let the paint dry. Drying time will differ based on the type of paint, and sometimes even the brand. It should be listed on the paint can. Honestly, I would wait a full day for the first coat to dry. Unless you’re painting a super small space and started early in the morning and will go for round two late at night, I generally feel giving the paint a full day to cure is the best approach. If you apply another coat too soon, you run the risk of lifting the paint up with your roller, which will make the paint look like it’s peeling in spots. Yes, I’m guilty of not waiting long enough…so please learn from my mistakes!
Once you’ve applied all coats of paint you should remove the painter’s tape while the paint is still slightly wet to avoid peeling the dried paint with it. Gently peel it off, walking with it as you peel.
It’s suggested to wait a couple days before hanging things like artwork or mirrors, however you can move your furniture back in place the next day.
What Would A Professional Cost?
As with most services, the cost of a professional will depend on where you live and how big your space is. For a frame of reference as it relates to Nashville, I can share for walls alone it’s roughly $2 per square foot. So for example if you have a 2,000 square foot home, it would cost $4,000 plus the cost of paint (around $200 for this space) to have your walls only painted.
All of this to say, painting your walls is a very manageable DIY project and is achievable with a little bit of patience and prep work. Personally, taking the time to hone this skill has saved me thousands of dollars over the course of owning a home. I encourage you to head to your local paint store, pick up some supplies and a gallon of paint and give it a try. You might just surprise yourself!
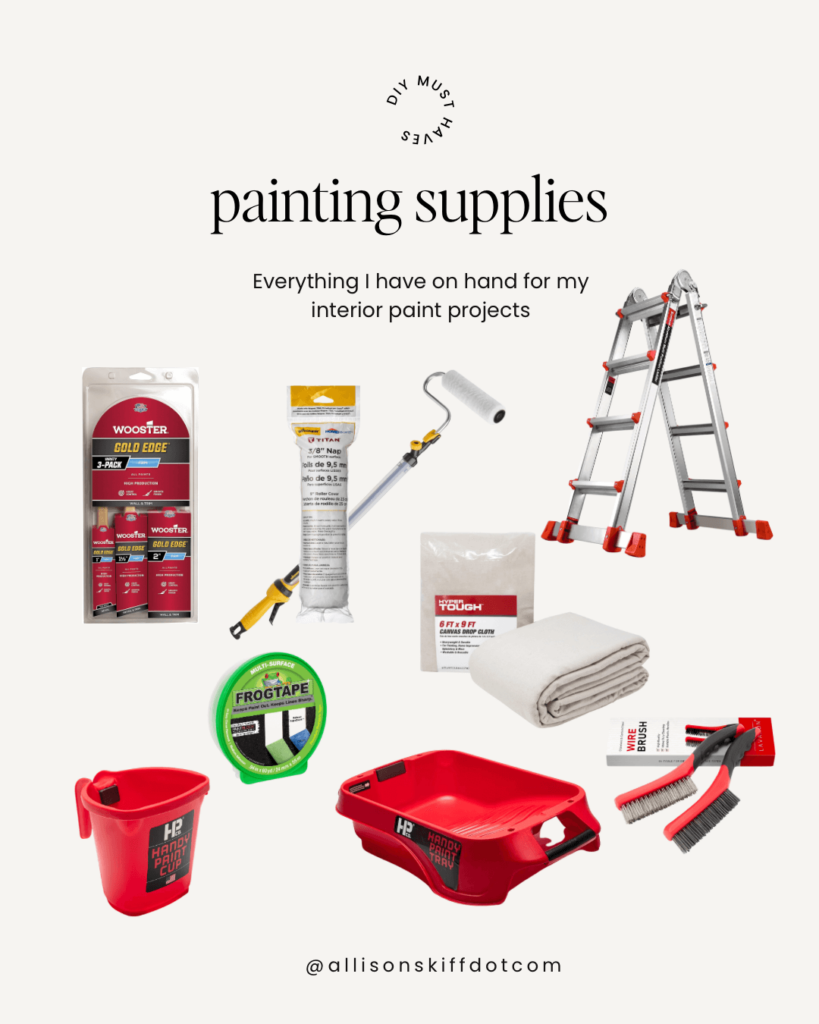
My Favorite Painting Supplies