


Tom Petty once said the waiting is the hardest part. Well Tom, you were right. If you remember, I shared I’d be doing my hardwood flooring installation in phases. Due to the kitchen leak, we knocked out the downstairs first, then scheduled the upstairs second. With how I live in the house, I really use the downstairs floor the most. The primary is downstairs and the only room I use upstairs is my home office. Knowing this, I didn’t think it would be a big deal to space out the installations. Well…turns out I got a taste of something I liked and just couldn’t get it out of my head. I’d be padding across the new white oak hardwoods and then I’d look over and see this dark staircase. The balusters stuck out like sore thumbs and I kept looking back and forth at the contrast. I couldn’t wait.
The Upstairs

The upstairs flooring took no time at all. There are 3 bedrooms and each room is significantly smaller than the spaces downstairs. The contractor had everything ripped out and bundles of hardwoods placed at the end of day one. Coming home and seeing this I felt like a kid at Christmas! I even dared to think that maybe we’d be ahead of schedule and I could have a full weekend day to put my house back together, and (gasp!) live like a normal person once again.
The Staircase
The staircase though, the staircase had other plans. The big issue was adjusting the steps. The very top step was higher than all the other steps, so the entire staircase needed to be adjusted. They needed to raise each tread up to make each stair equidistant. I’m still scratching my head at how the staircase ended up this way in the first place, and I’m happy to know that as of now, it’s been done the right way.
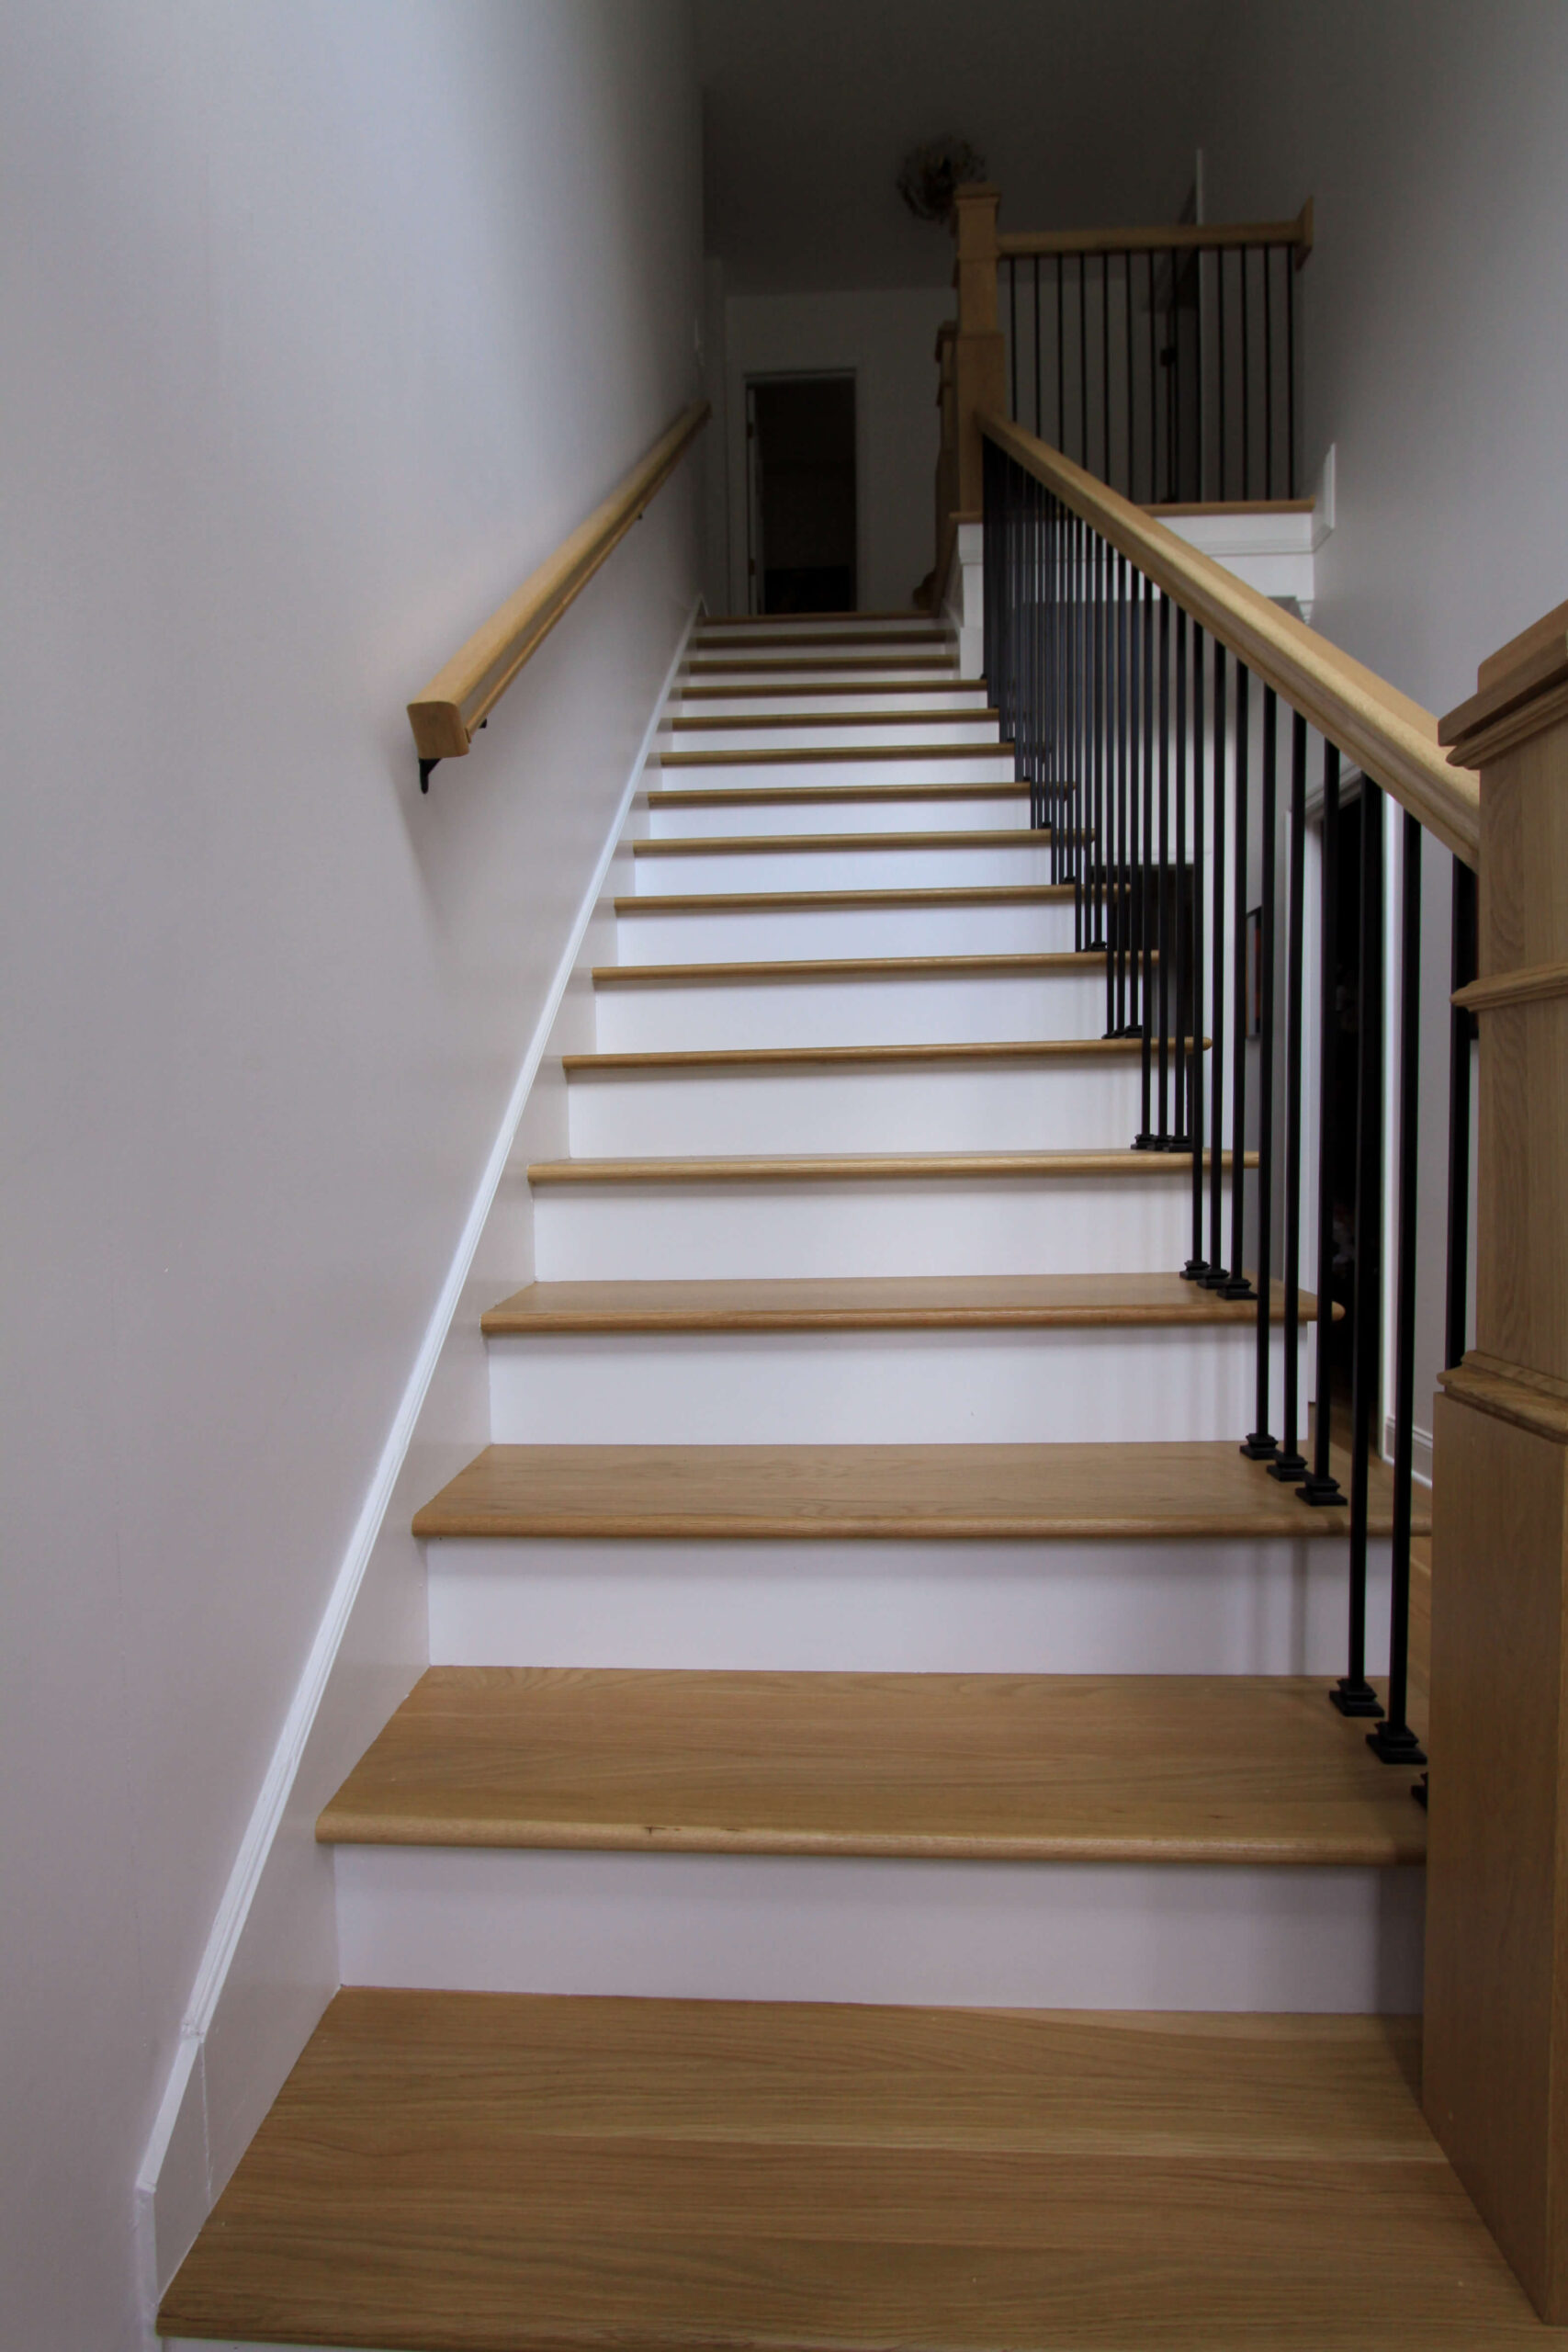
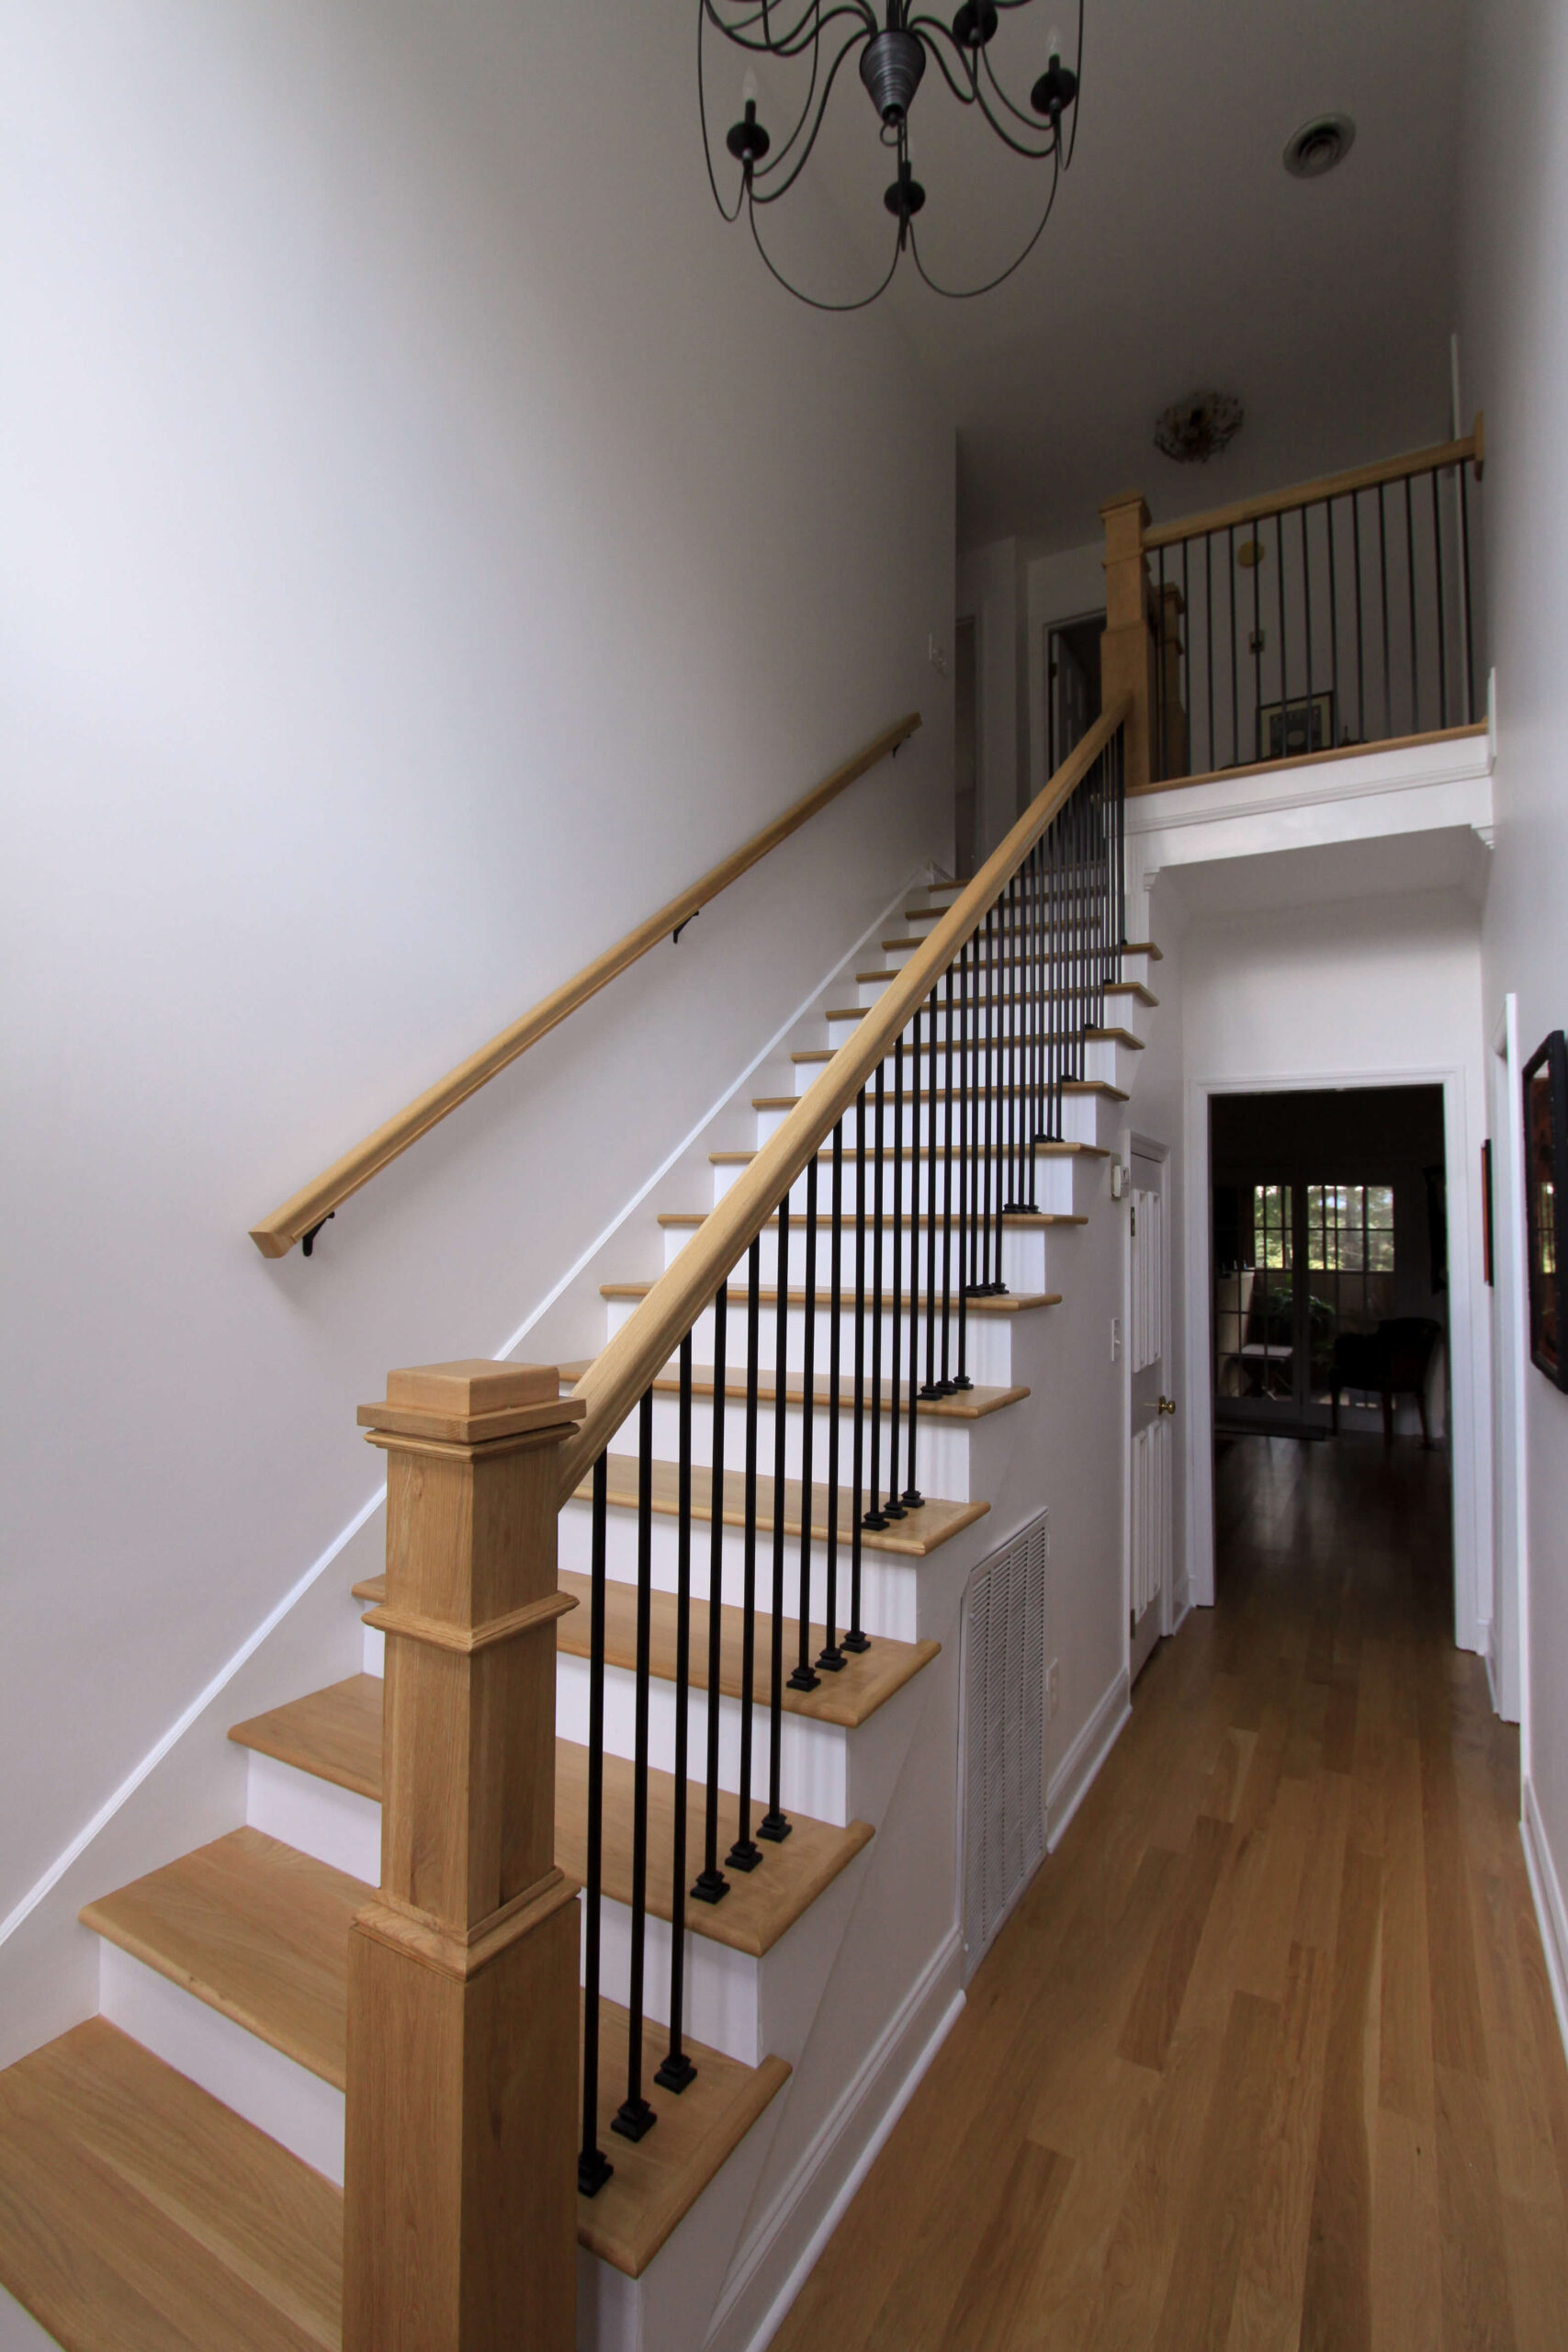
Open Stringer
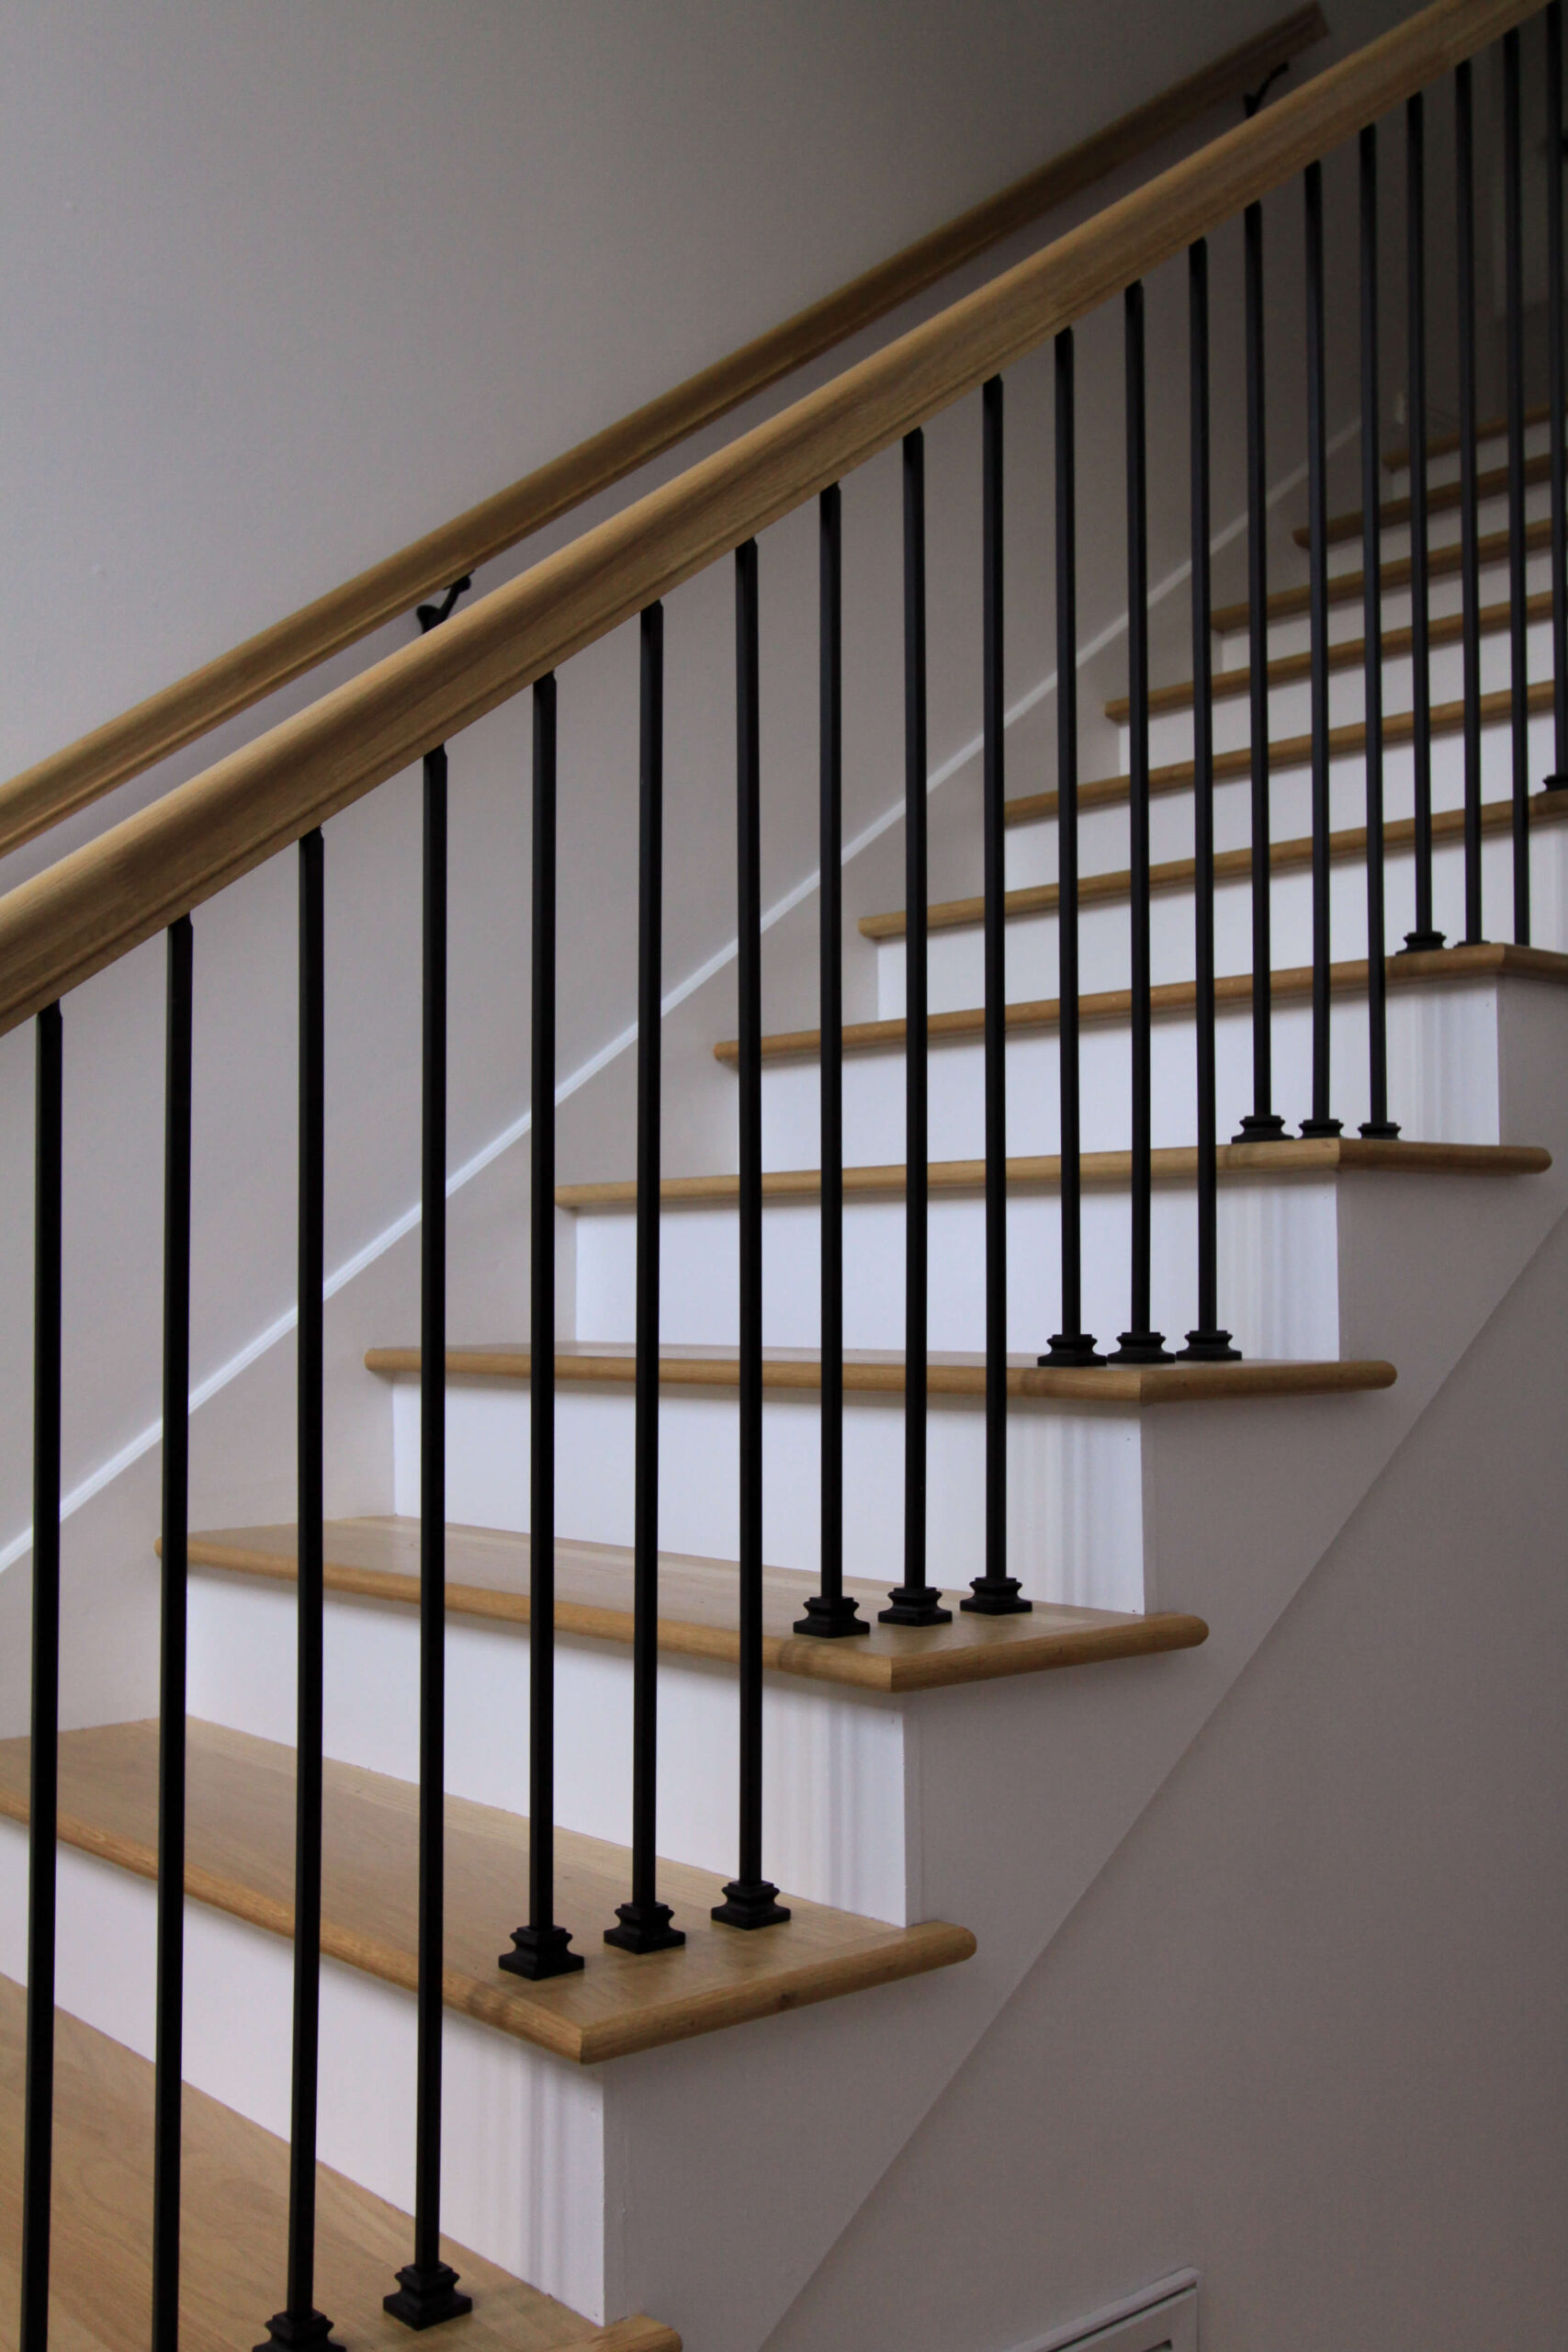
If you recall during the staircase design, I was originally planning to keep the stringer closed (see staircase anatomy and design plans here), but at the last minute decided to open it. During the install week, I would peer around the plastic sheeting each night at the progress and hope I had made the right decision. There was no going back. My fear was the open stringer would feel too modern for the style of the house, and the new number of balusters would feel too busy. Remember, the previous balusters weren’t up to code and were spaced unevenly. So although I opted for a more streamlined baluster, there would be double the amount. The balusters were installed on the second to last day, so it was a long week of waiting for this girl.
Newel Posts

When I saw the newel posts installed for the first time, I knew I had made the right decision. They are chunky and stately and blend perfectly with the traditional style of the house. As soon as I saw them placed I felt like I had at least made one decision right. On the previous staircase, the newel post at the base of the staircase was on the floor, however since these newel posts are so much thicker we had to place this one on the first stair tread in order to allow the front door to clear. It was a design decision that was made for me, but one that I’m happy with and actually prefer to the previous version.
Final Results
The installers worked up until the end of the very last day, but they managed to finish on time and on budget. Similar to seeing the new downstairs flooring for the first time, I am blown away at the transformation this renovation has made to the entire feel of my home. It is lighter, brighter and more open. It’s updated but not in a forced way. It just feels cleaned up.
after / before
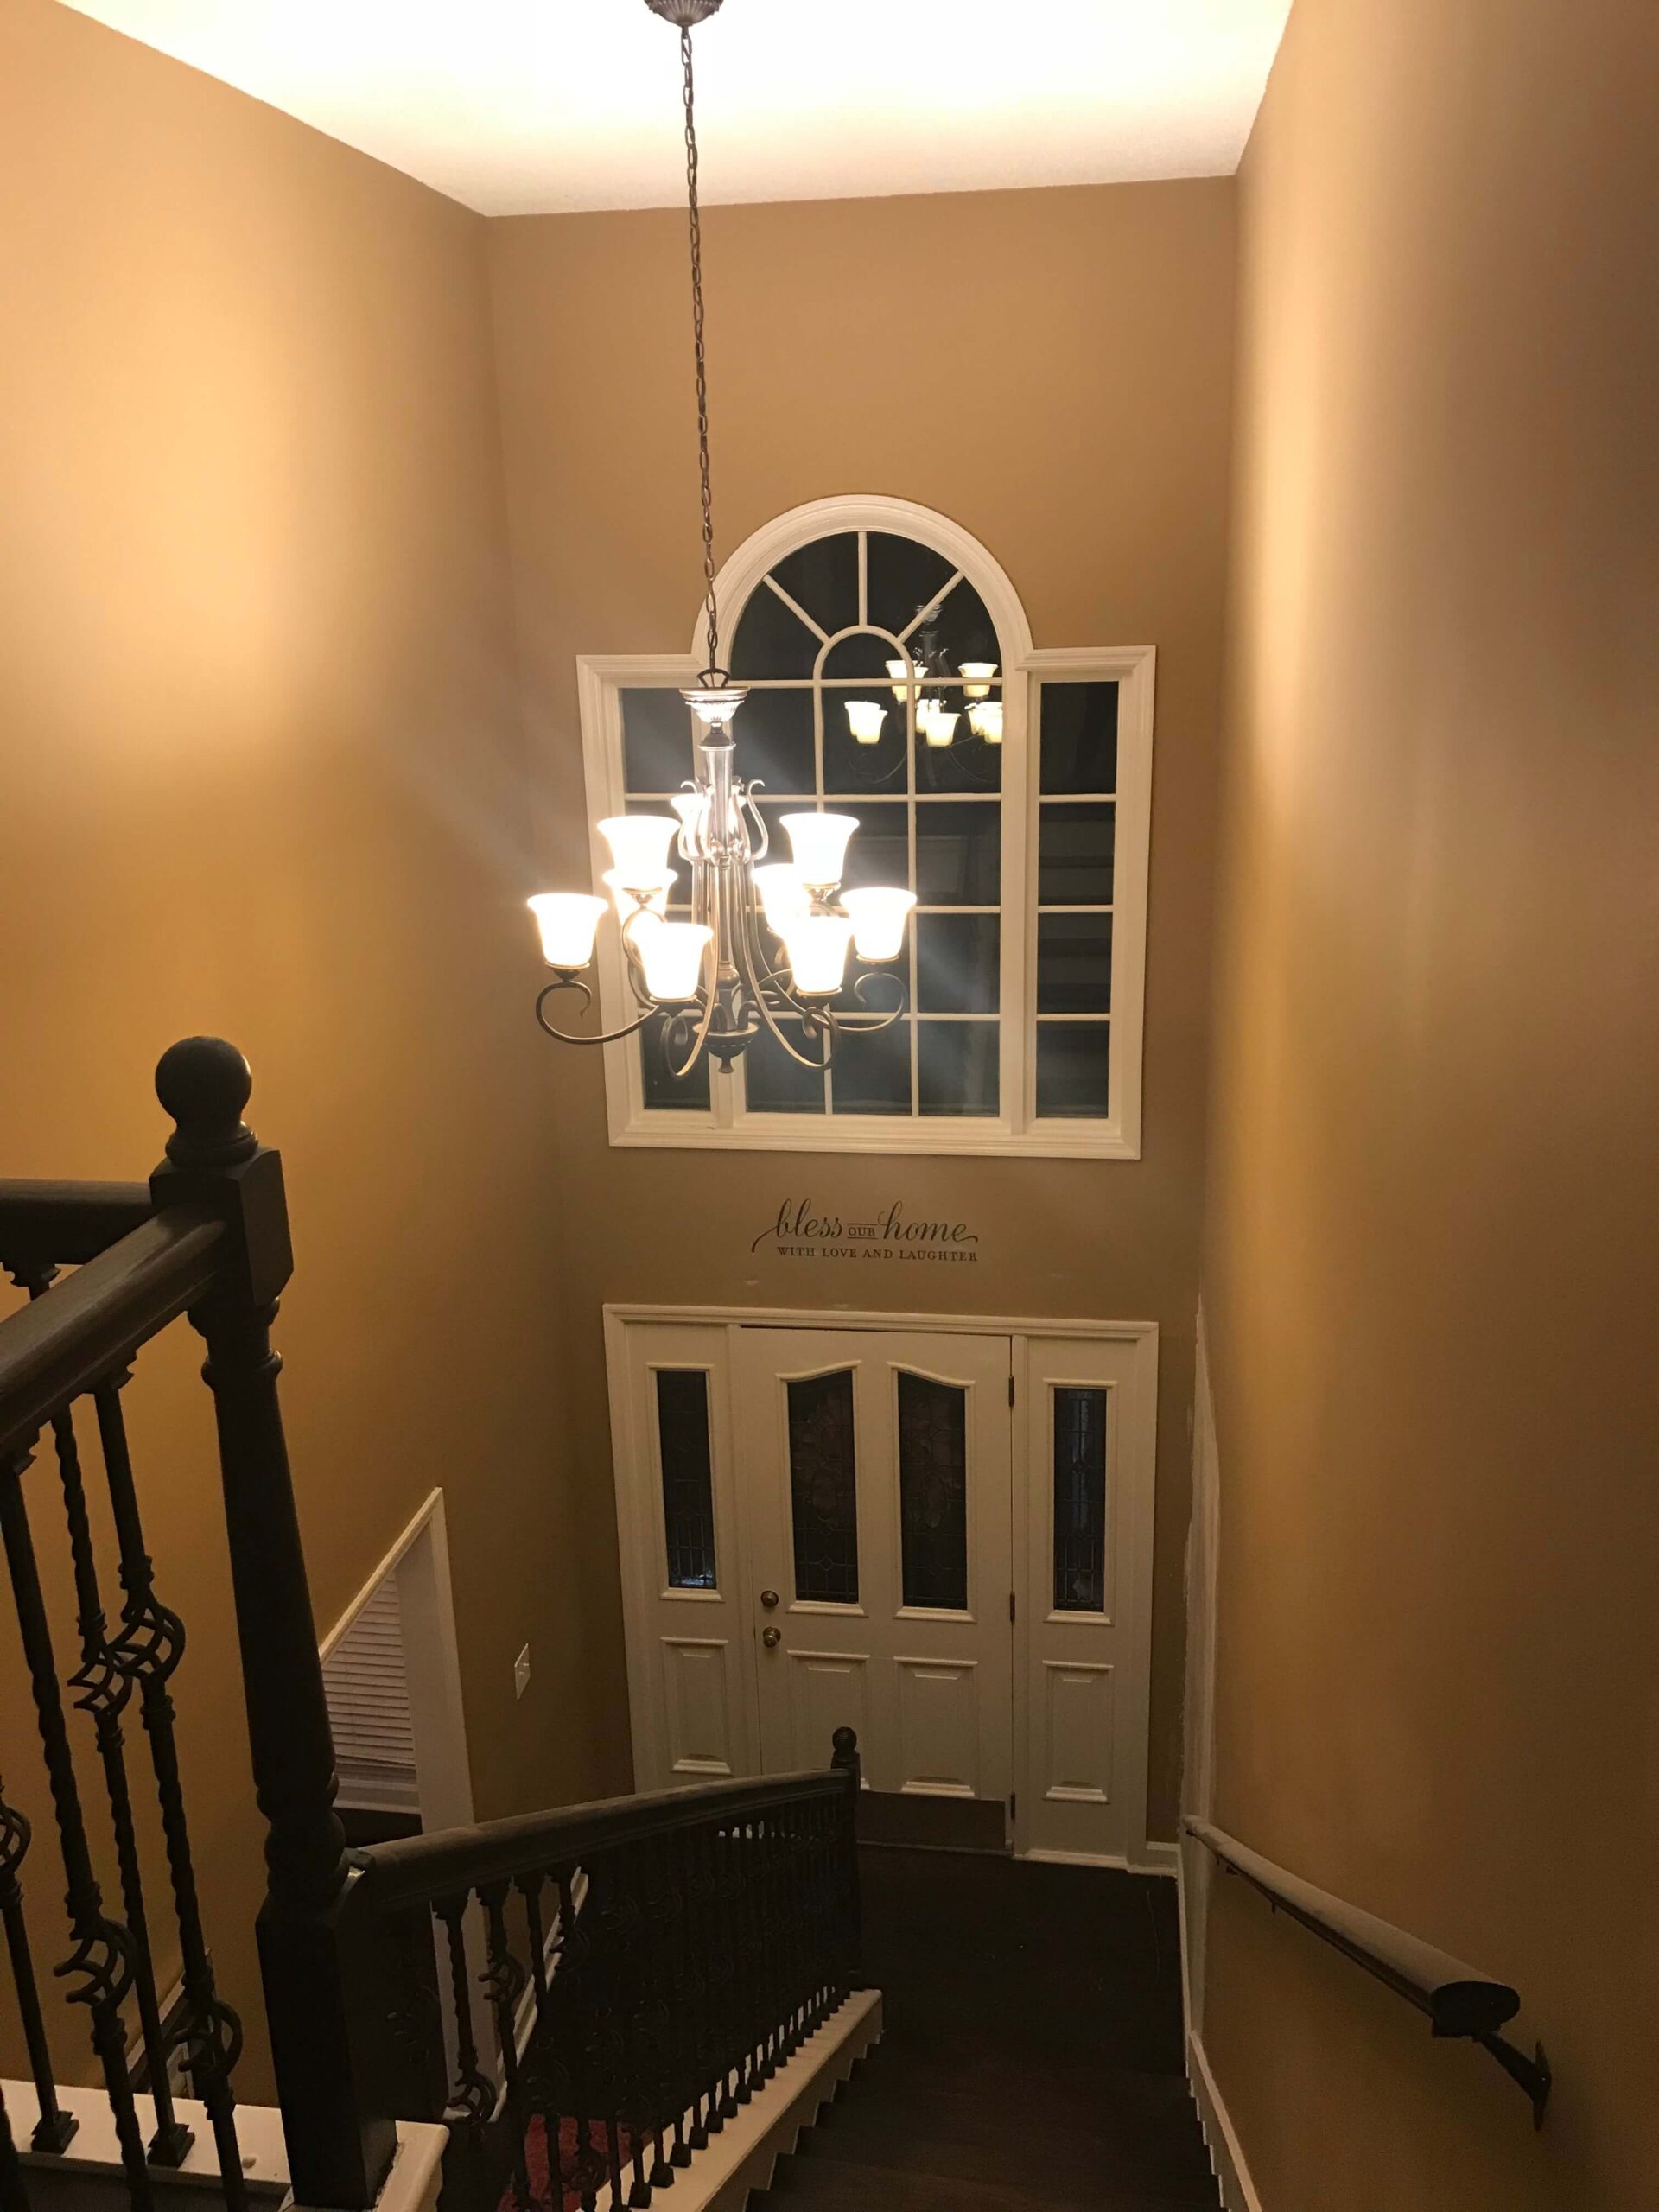
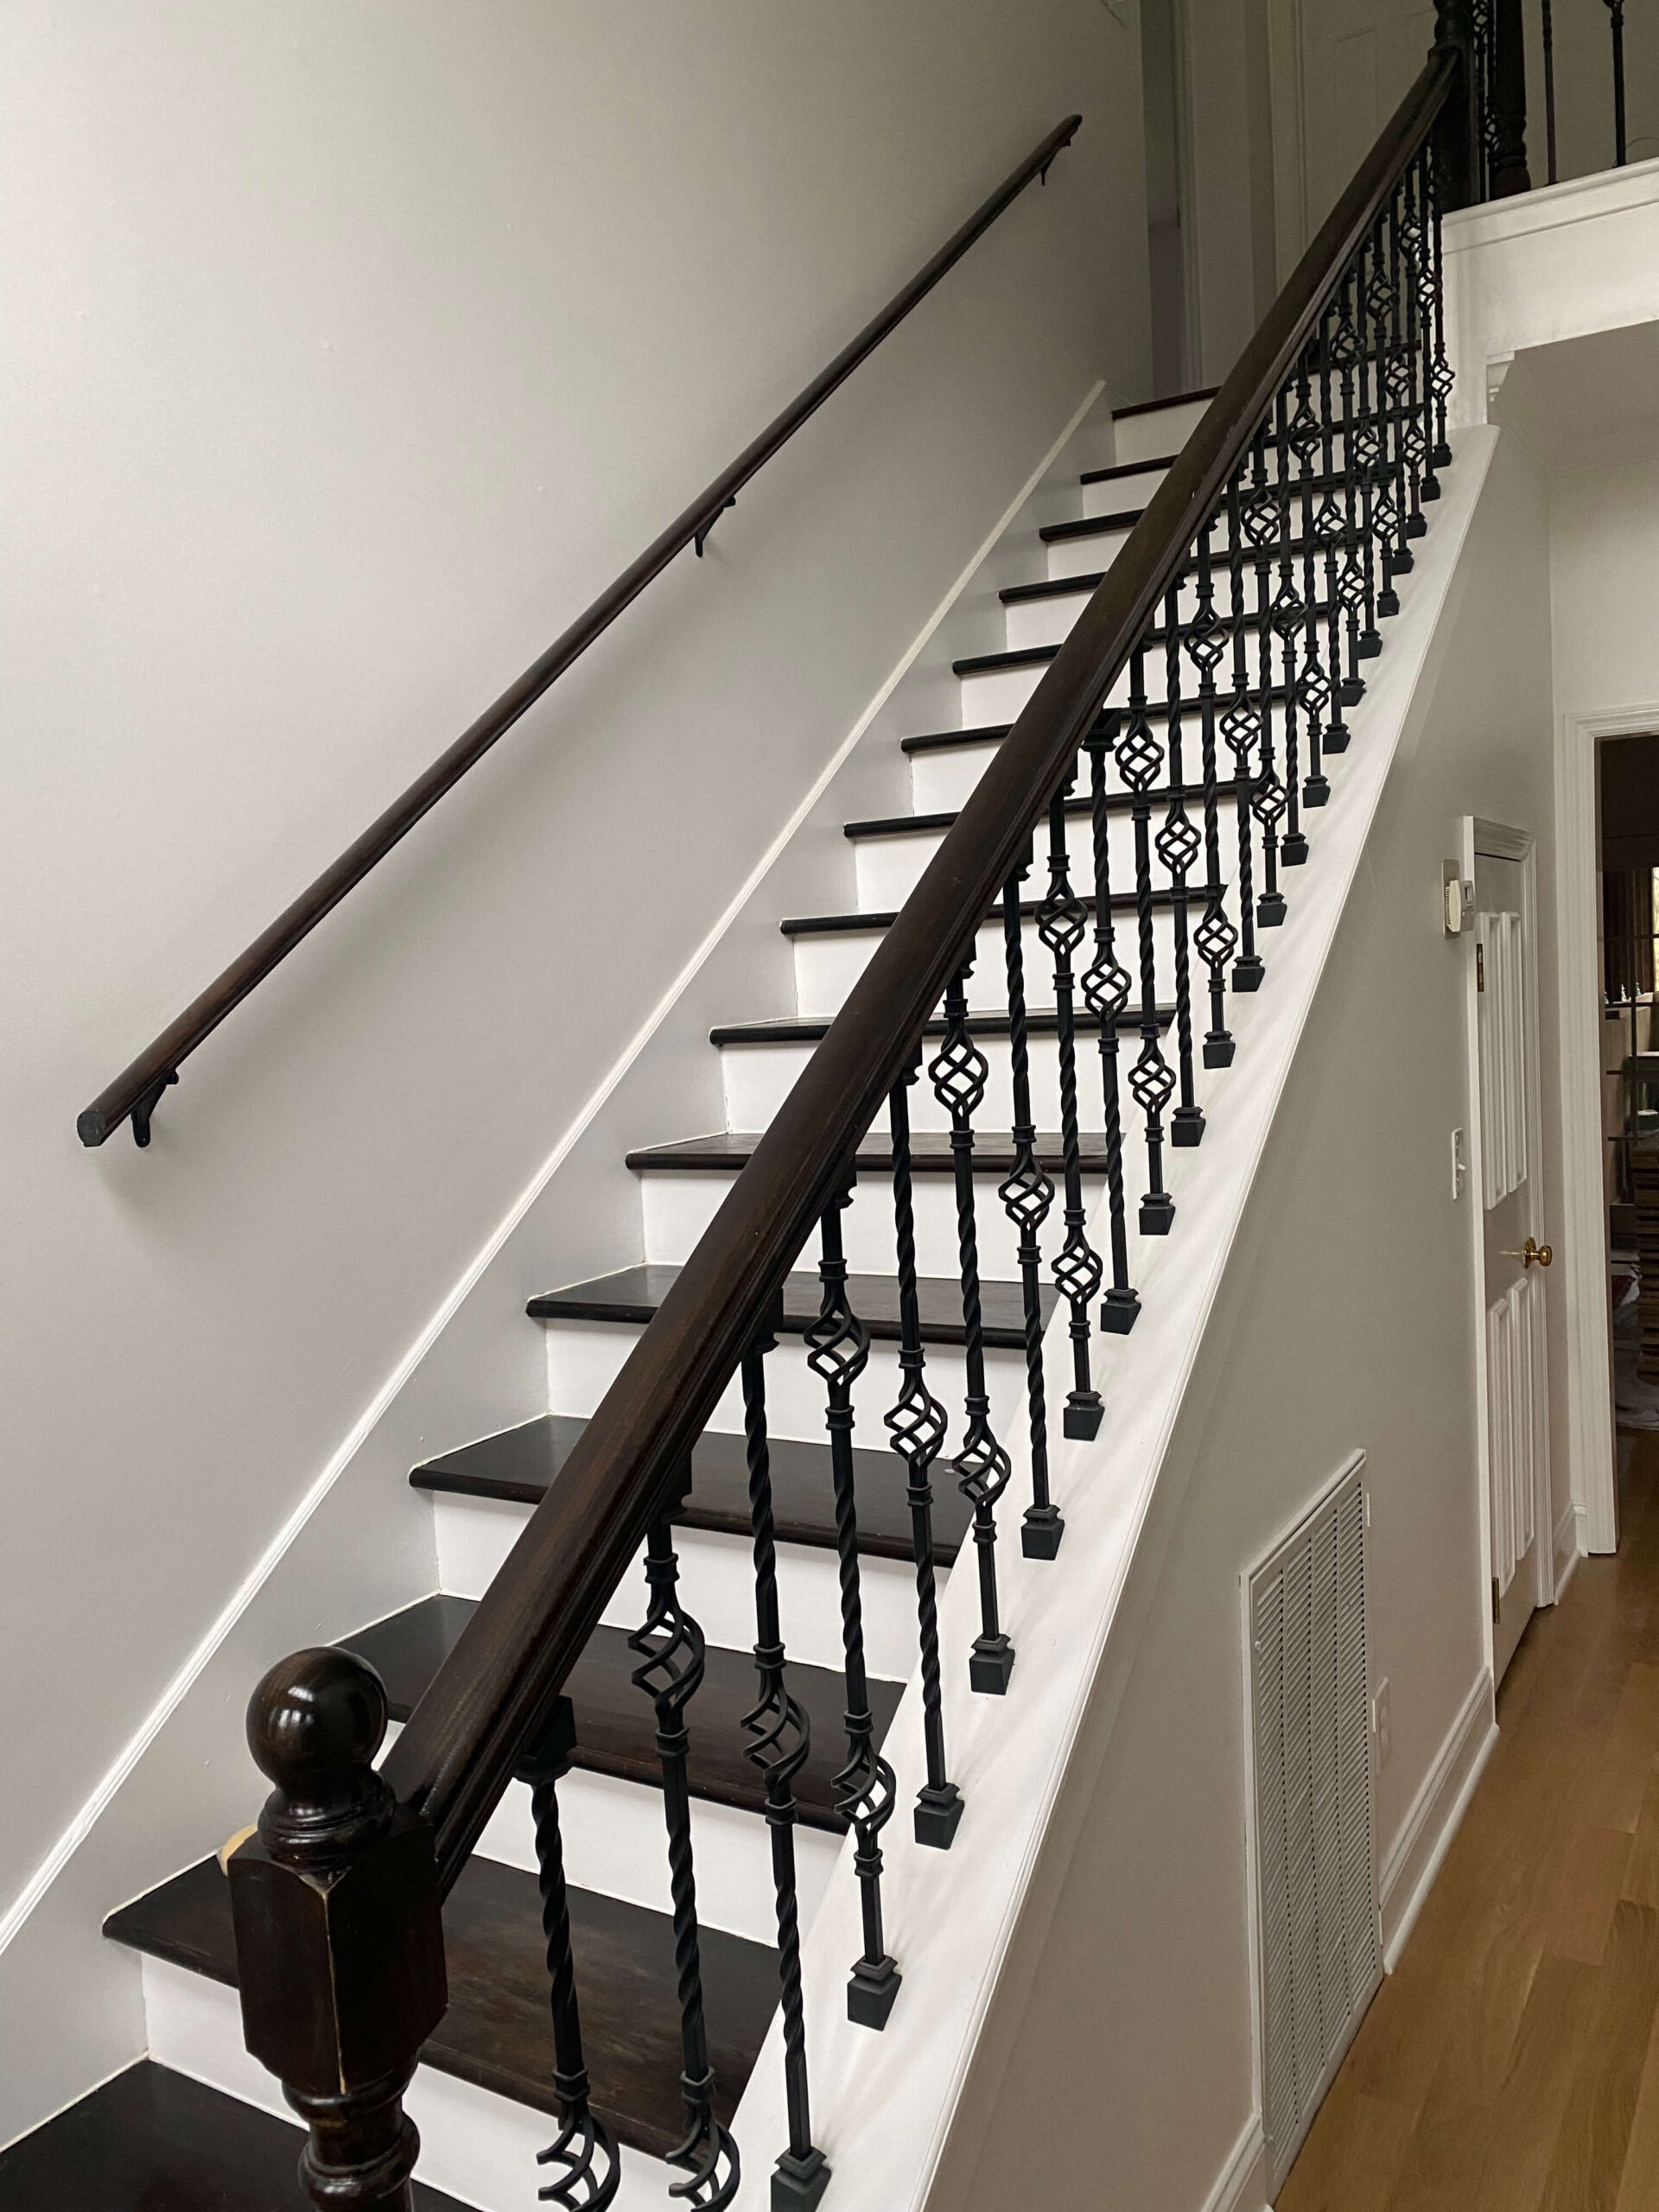
When I walk up and down the stairs now, they no longer creak. The first step from the top doesn’t feel like you’re falling off a cliff. And the railing doesn’t shake when you grab onto it. These are all things I lived with because in the grand scheme of things it wasn’t a big deal – there are bigger problems in the world. But there is something to be said for when a design comes together and you know it’s right. It’s this feeling. It’s a shift from a cringe to a smile.
This is just the beginning for this front entry way. Further on down the road I plan to update the front door to a black one, which I know is going to tie in beautifully with these new black balusters. In the short term, I’m already browsing and pinning new ideas for garland and can’t wait to see what it will look like all decorated for the holidays! I’ll also be hosting Thanksgiving this year, and will be so proud to open the front door and invite family into my home (and not worry about them falling off that top step).
In the coming weeks I’ll share a breakdown of the budget for each phase of this renovation, and will also aggregate all of the design decisions into that post for safe keeping. In the event you find yourself designing a staircase and/or a hardwood flooring renovation, I hope my experience and many learnings will be useful to you!


