


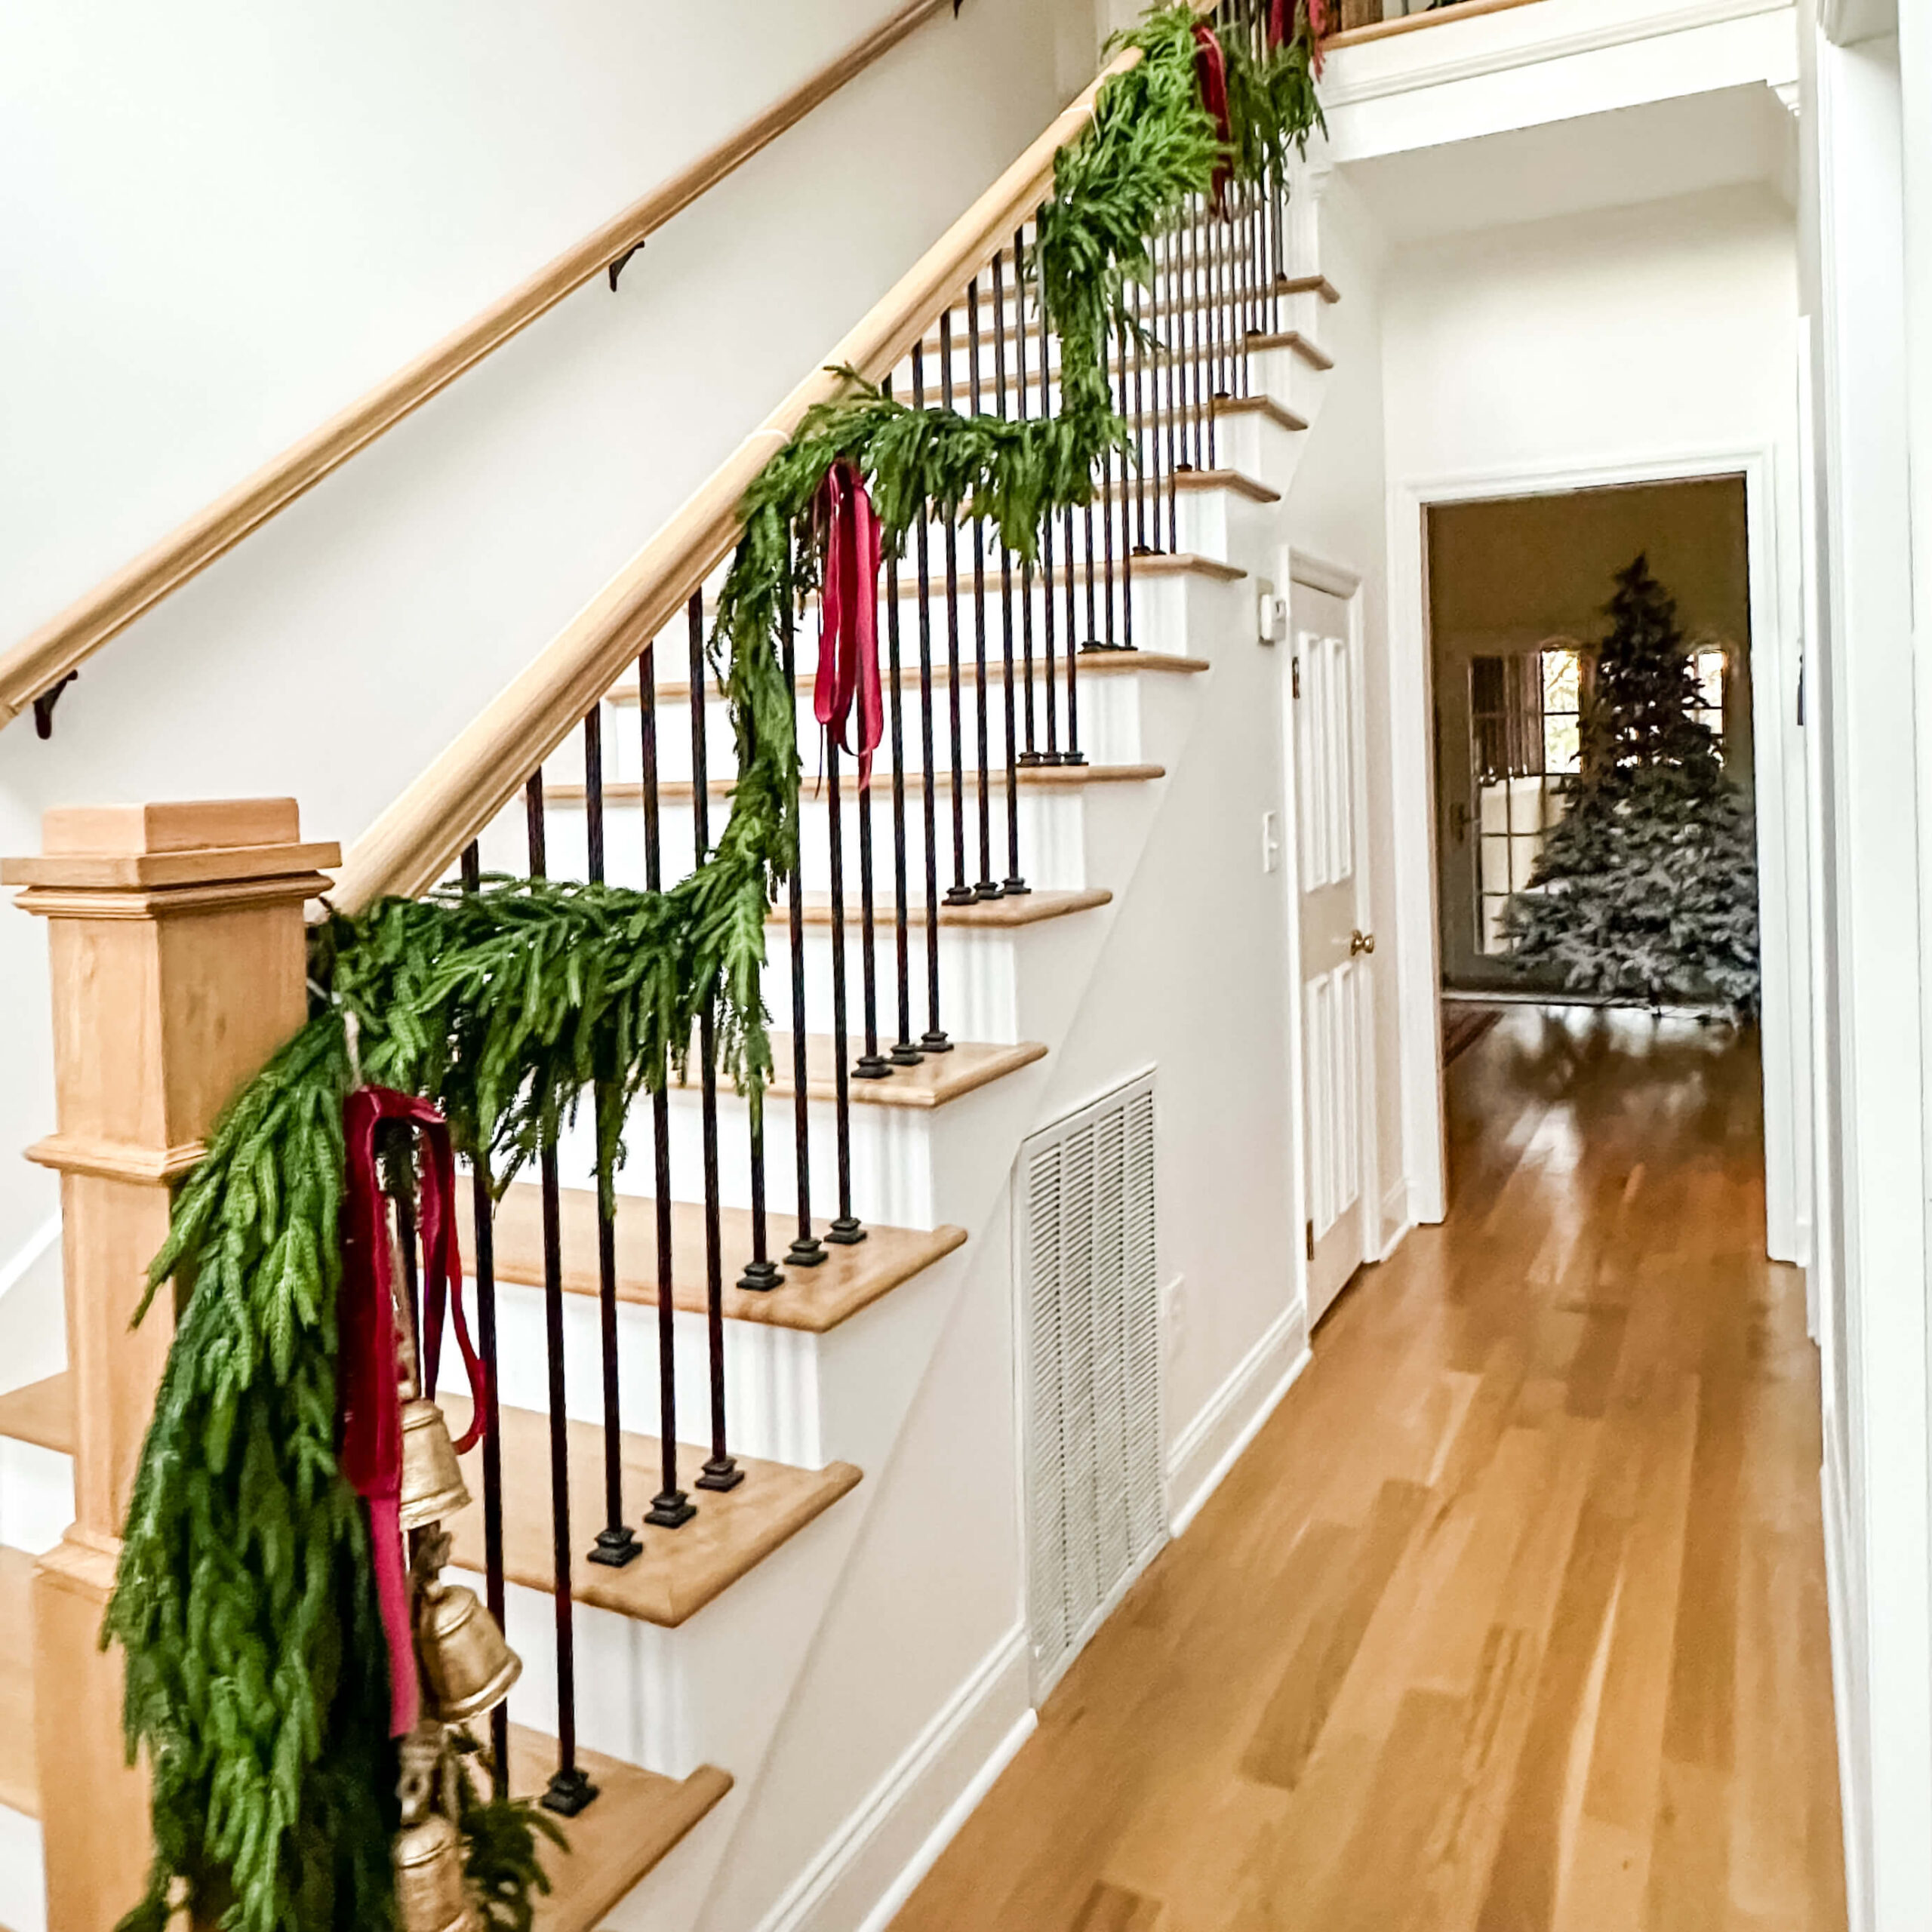
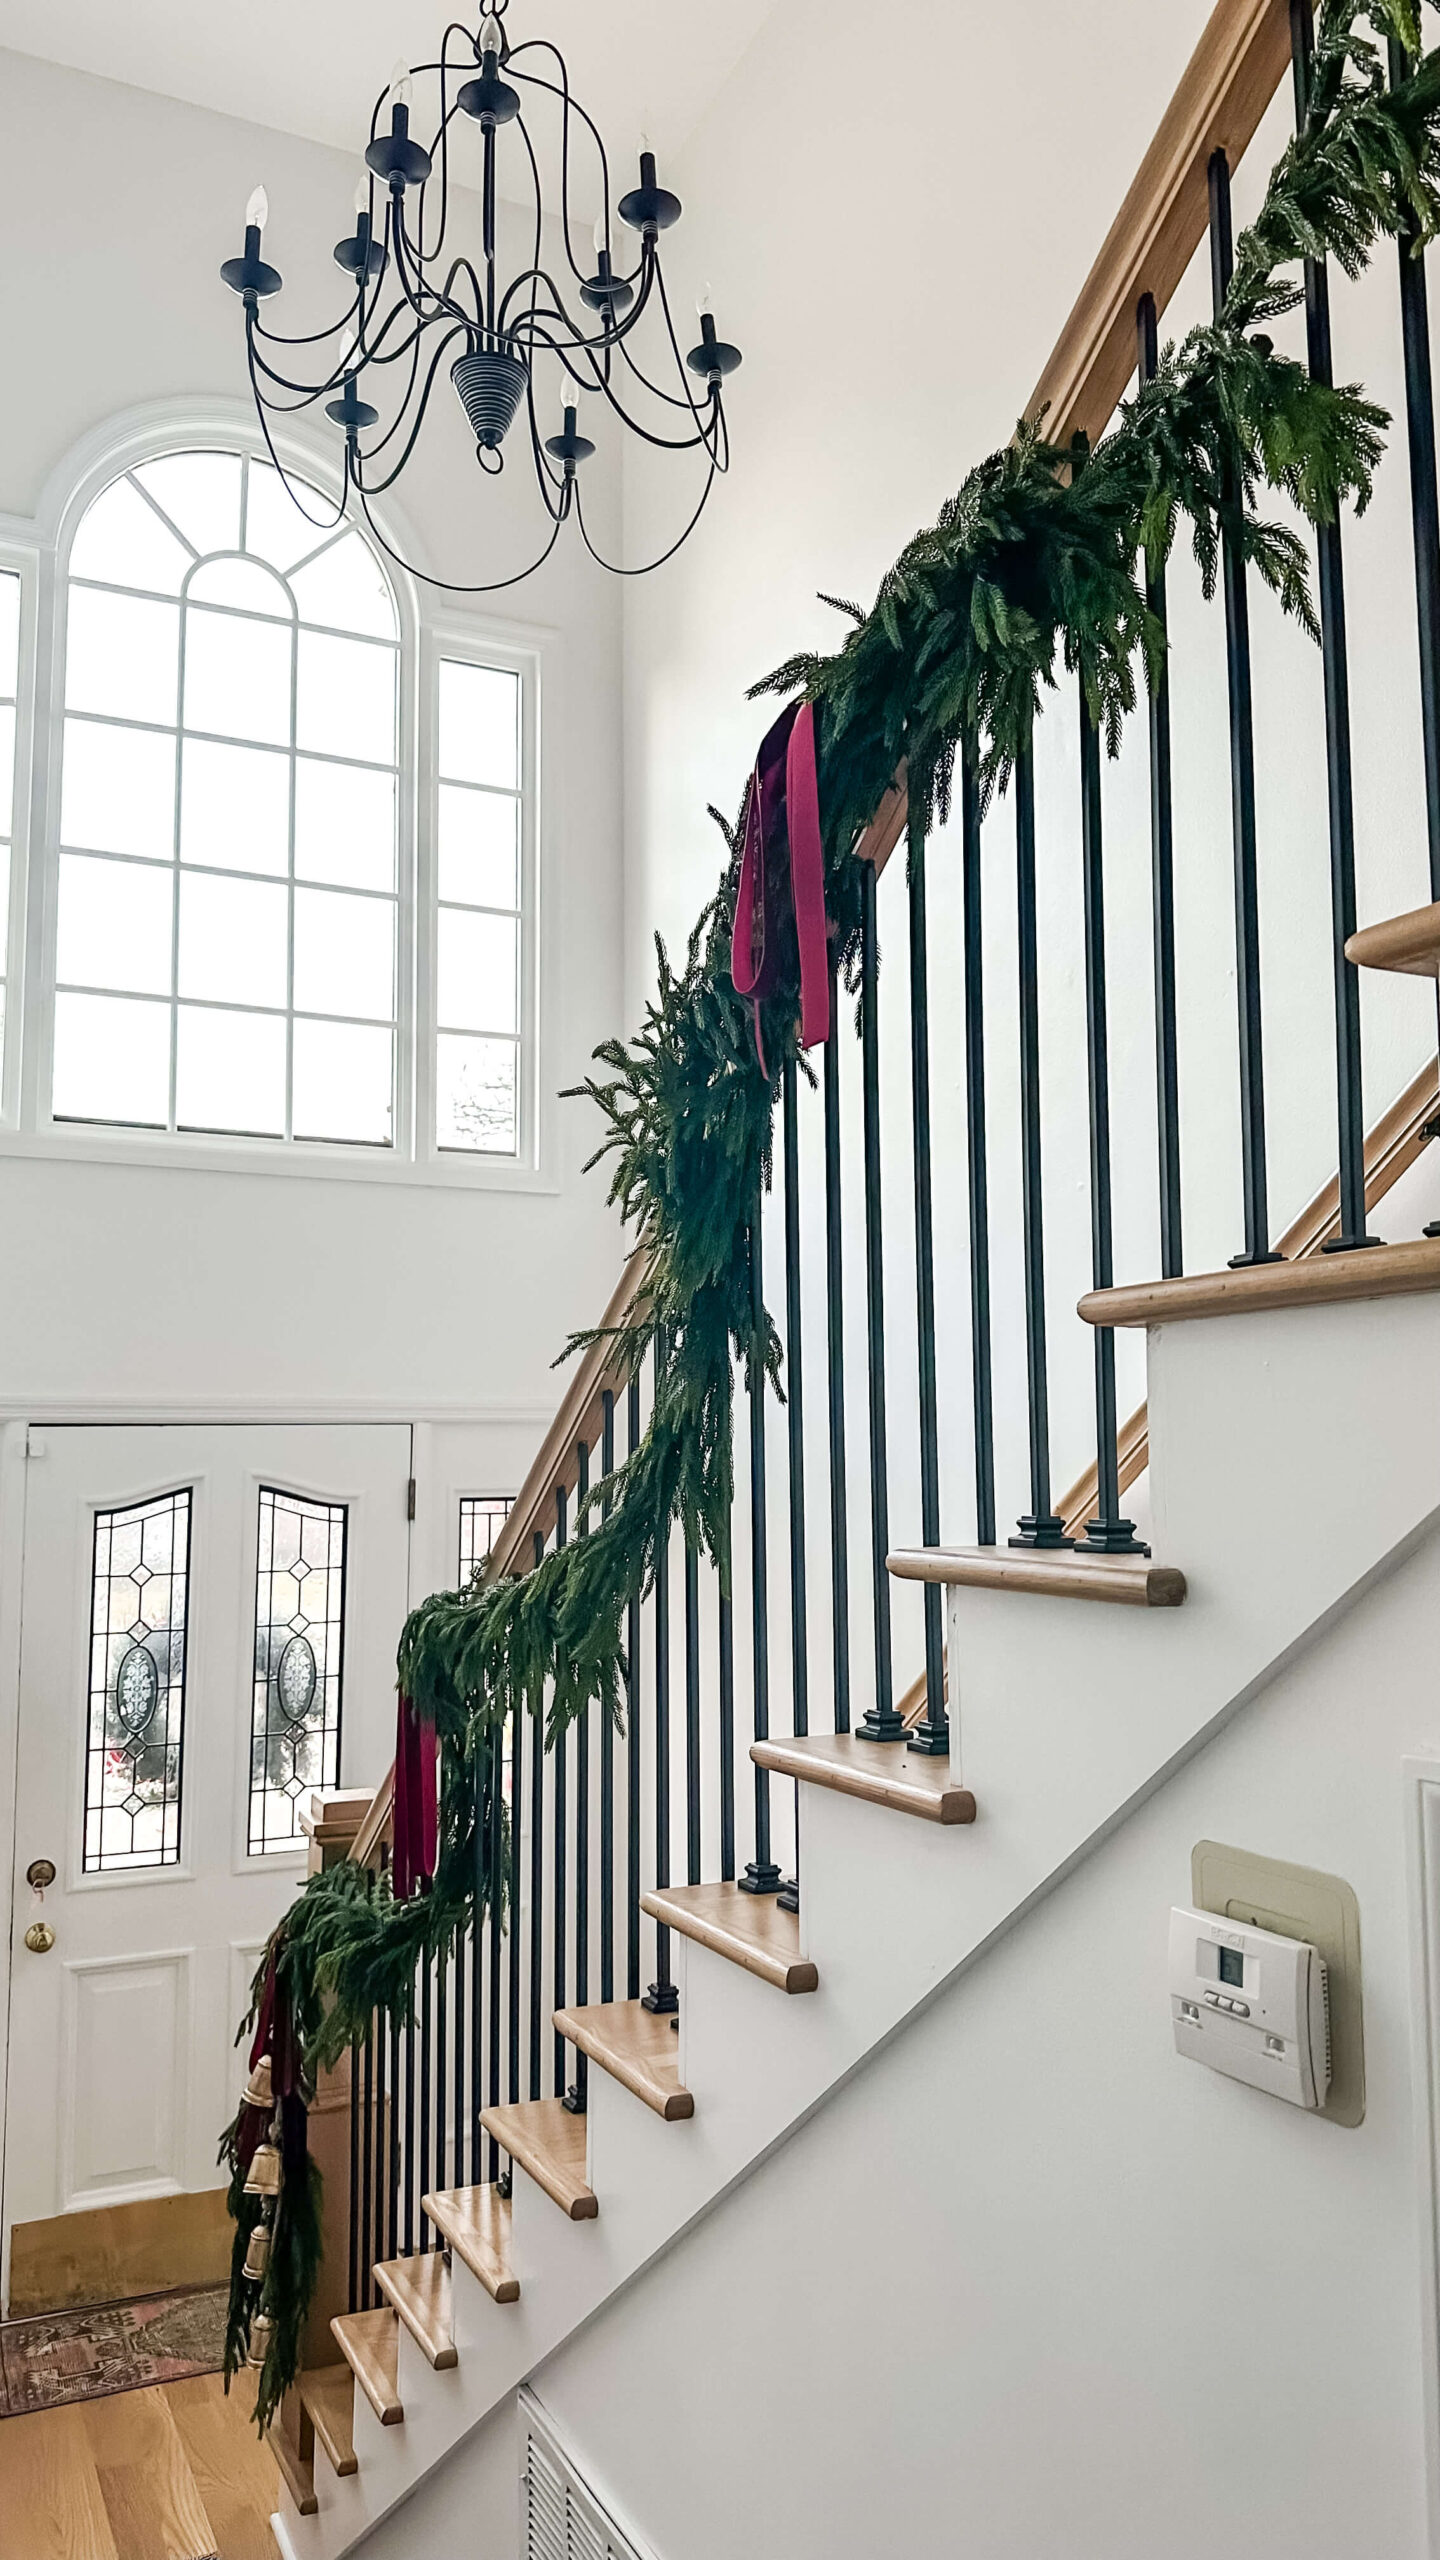
If you’ve been following along, it will come to no surprise to you that I’ve decided to reward myself with some new holiday garland this year. After enduring the messiest renovation with new hardwood floors and a new staircase to boot, I’m ready to show it all off. I decided to splurge on Afloral’s Norfolk Pine real touch garland and it does not disappoint. Follow along as I share my method for how to hang garland on a staircase.

Step 1: Measure
Before you open up your wallet (or browser) you need to decide how much garland you’ll likely need. This will also depend on how you hope to hang it. Do you want long drapey loops or do you plan to wrap it around the banister. What about the newel post, or posts? Are you wrapping those as well? Take time to measure your staircase and add a little extra to be safe.
Personally, I knew I wanted to simple whimsical look, and wanted my garland to be in swoops. With a banister measuring 9 feet, plus an extra 4 feet of railing on the landing above, I opted for two 15 foot pieces off the Norfolk garland. This will allow for draping and a little overage.
Step 2: What type of Garland? Full or Thin?
Right alongside measuring is deciding what kind of fullness you want your garland to have. Do you want a fuller garland or a dramatic one? Keep in mind that many of the pictures you see online or in catalogues are really multiple garlands layered. If you want a fuller look, you may need to double your original calculation. Do you want lit garland or unlit? Is your staircase near an outlet? Run through these questions before you start browsing,
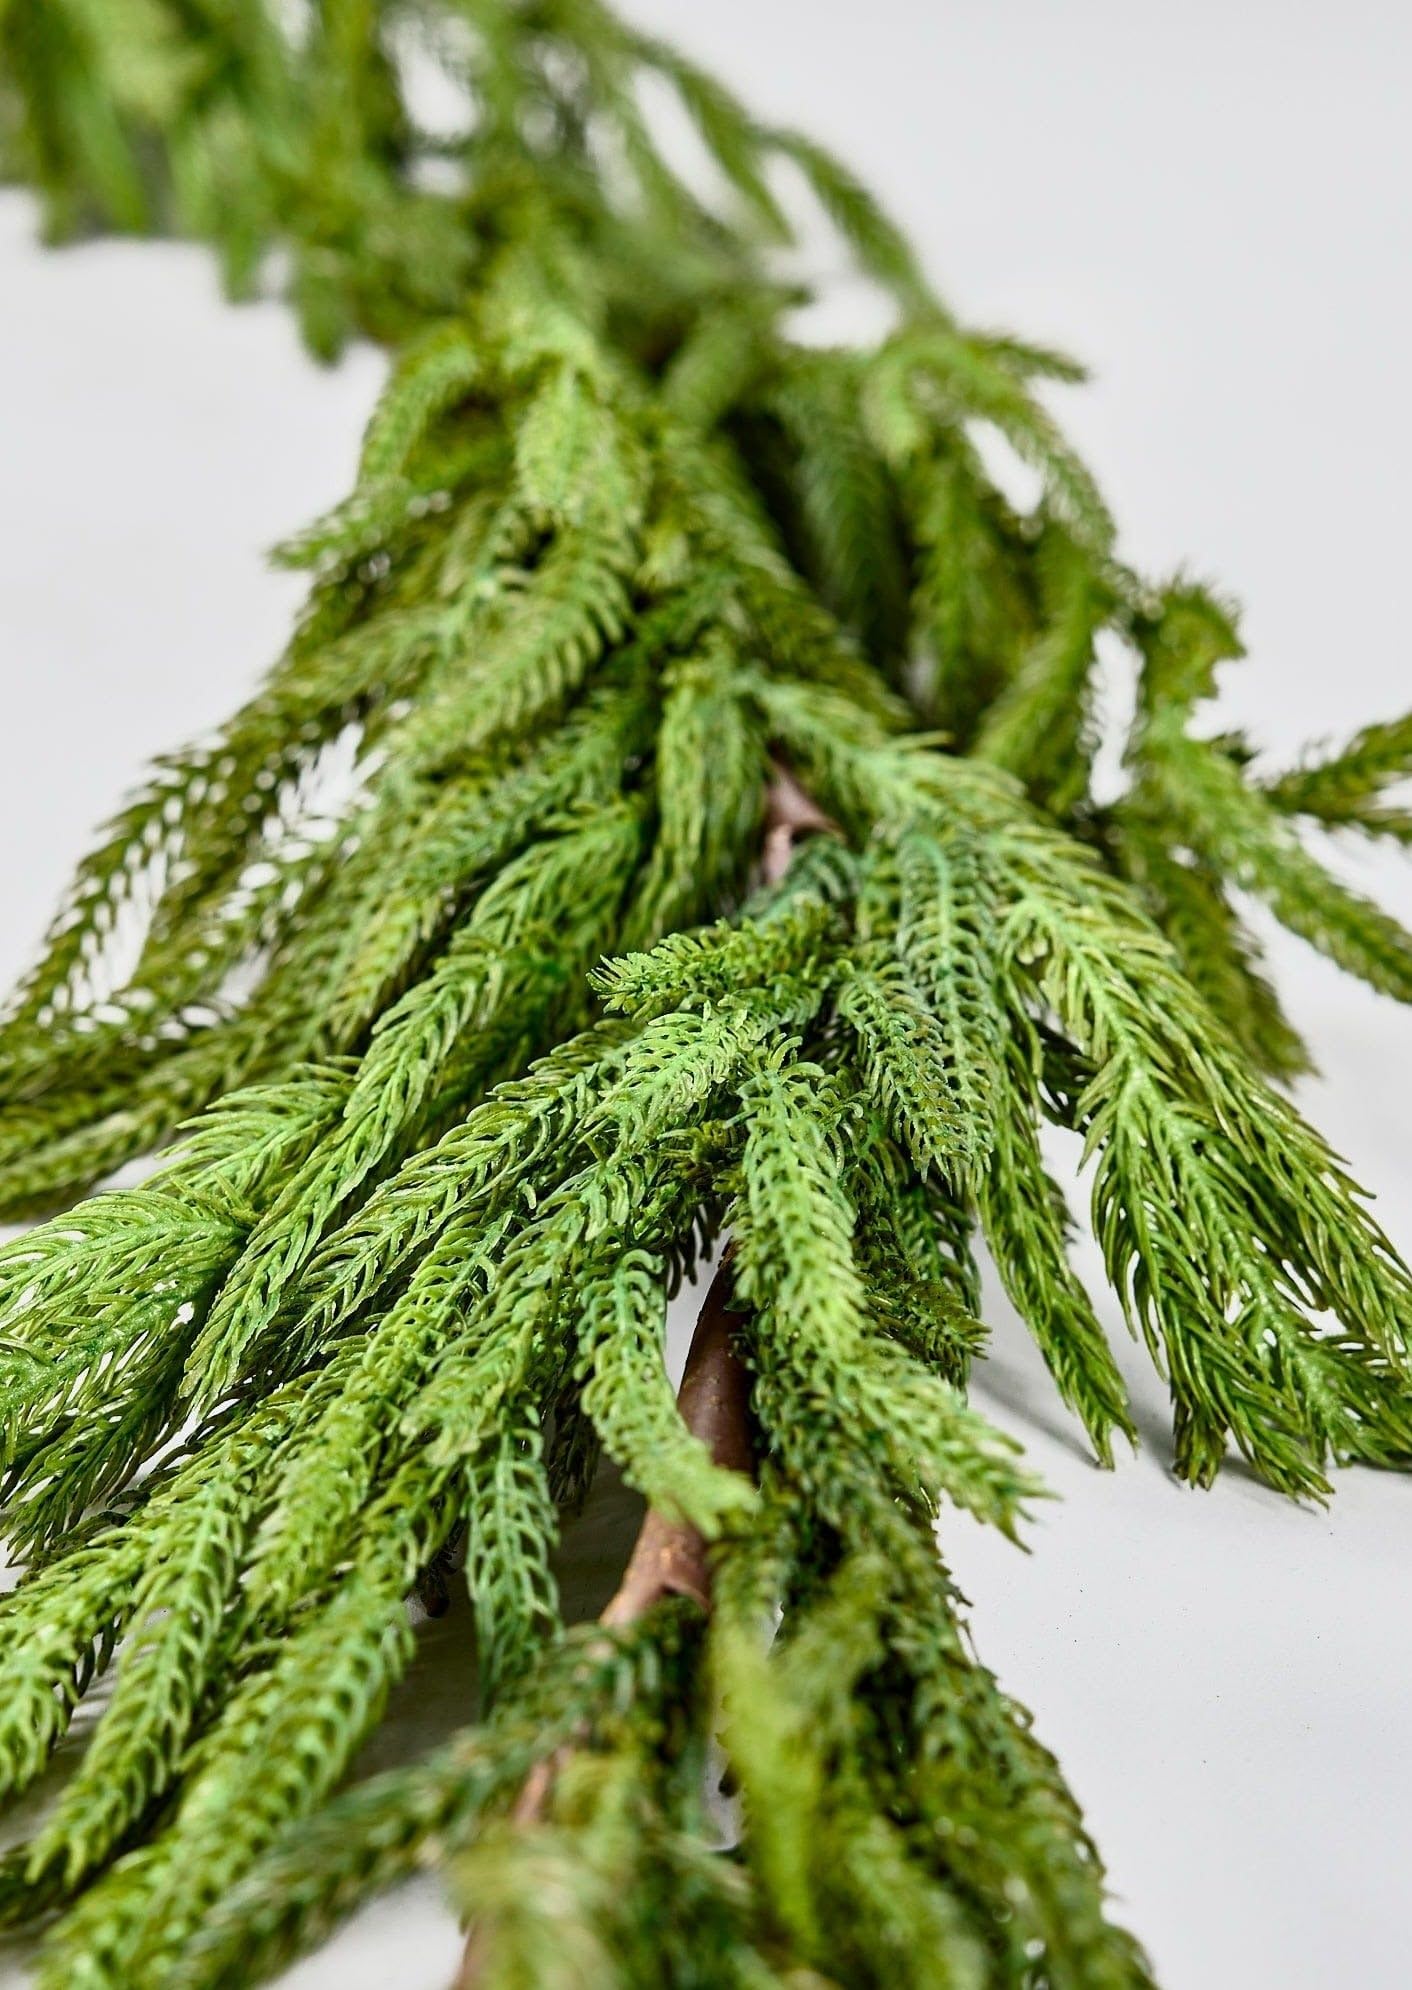
Again, I wanted a whimsical, romantic and dramatic look. For the first year, I’m going to stick with a single layer and see how it goes. As this is an investment for me, I can always build upon it in years to come if I decide I want a fuller look. And unfortunately, my outlets are not in a convenient spot in relation to the staircase, so we’ll be moving forward with an unlit staircase for the time being.
Step 3: Placement
It’s time to place your garland! Start at either the top or the bottom and properly anchor your first piece to the banister. I’m opting to use clear zip ties, but you can also use green pipe-cleaners.
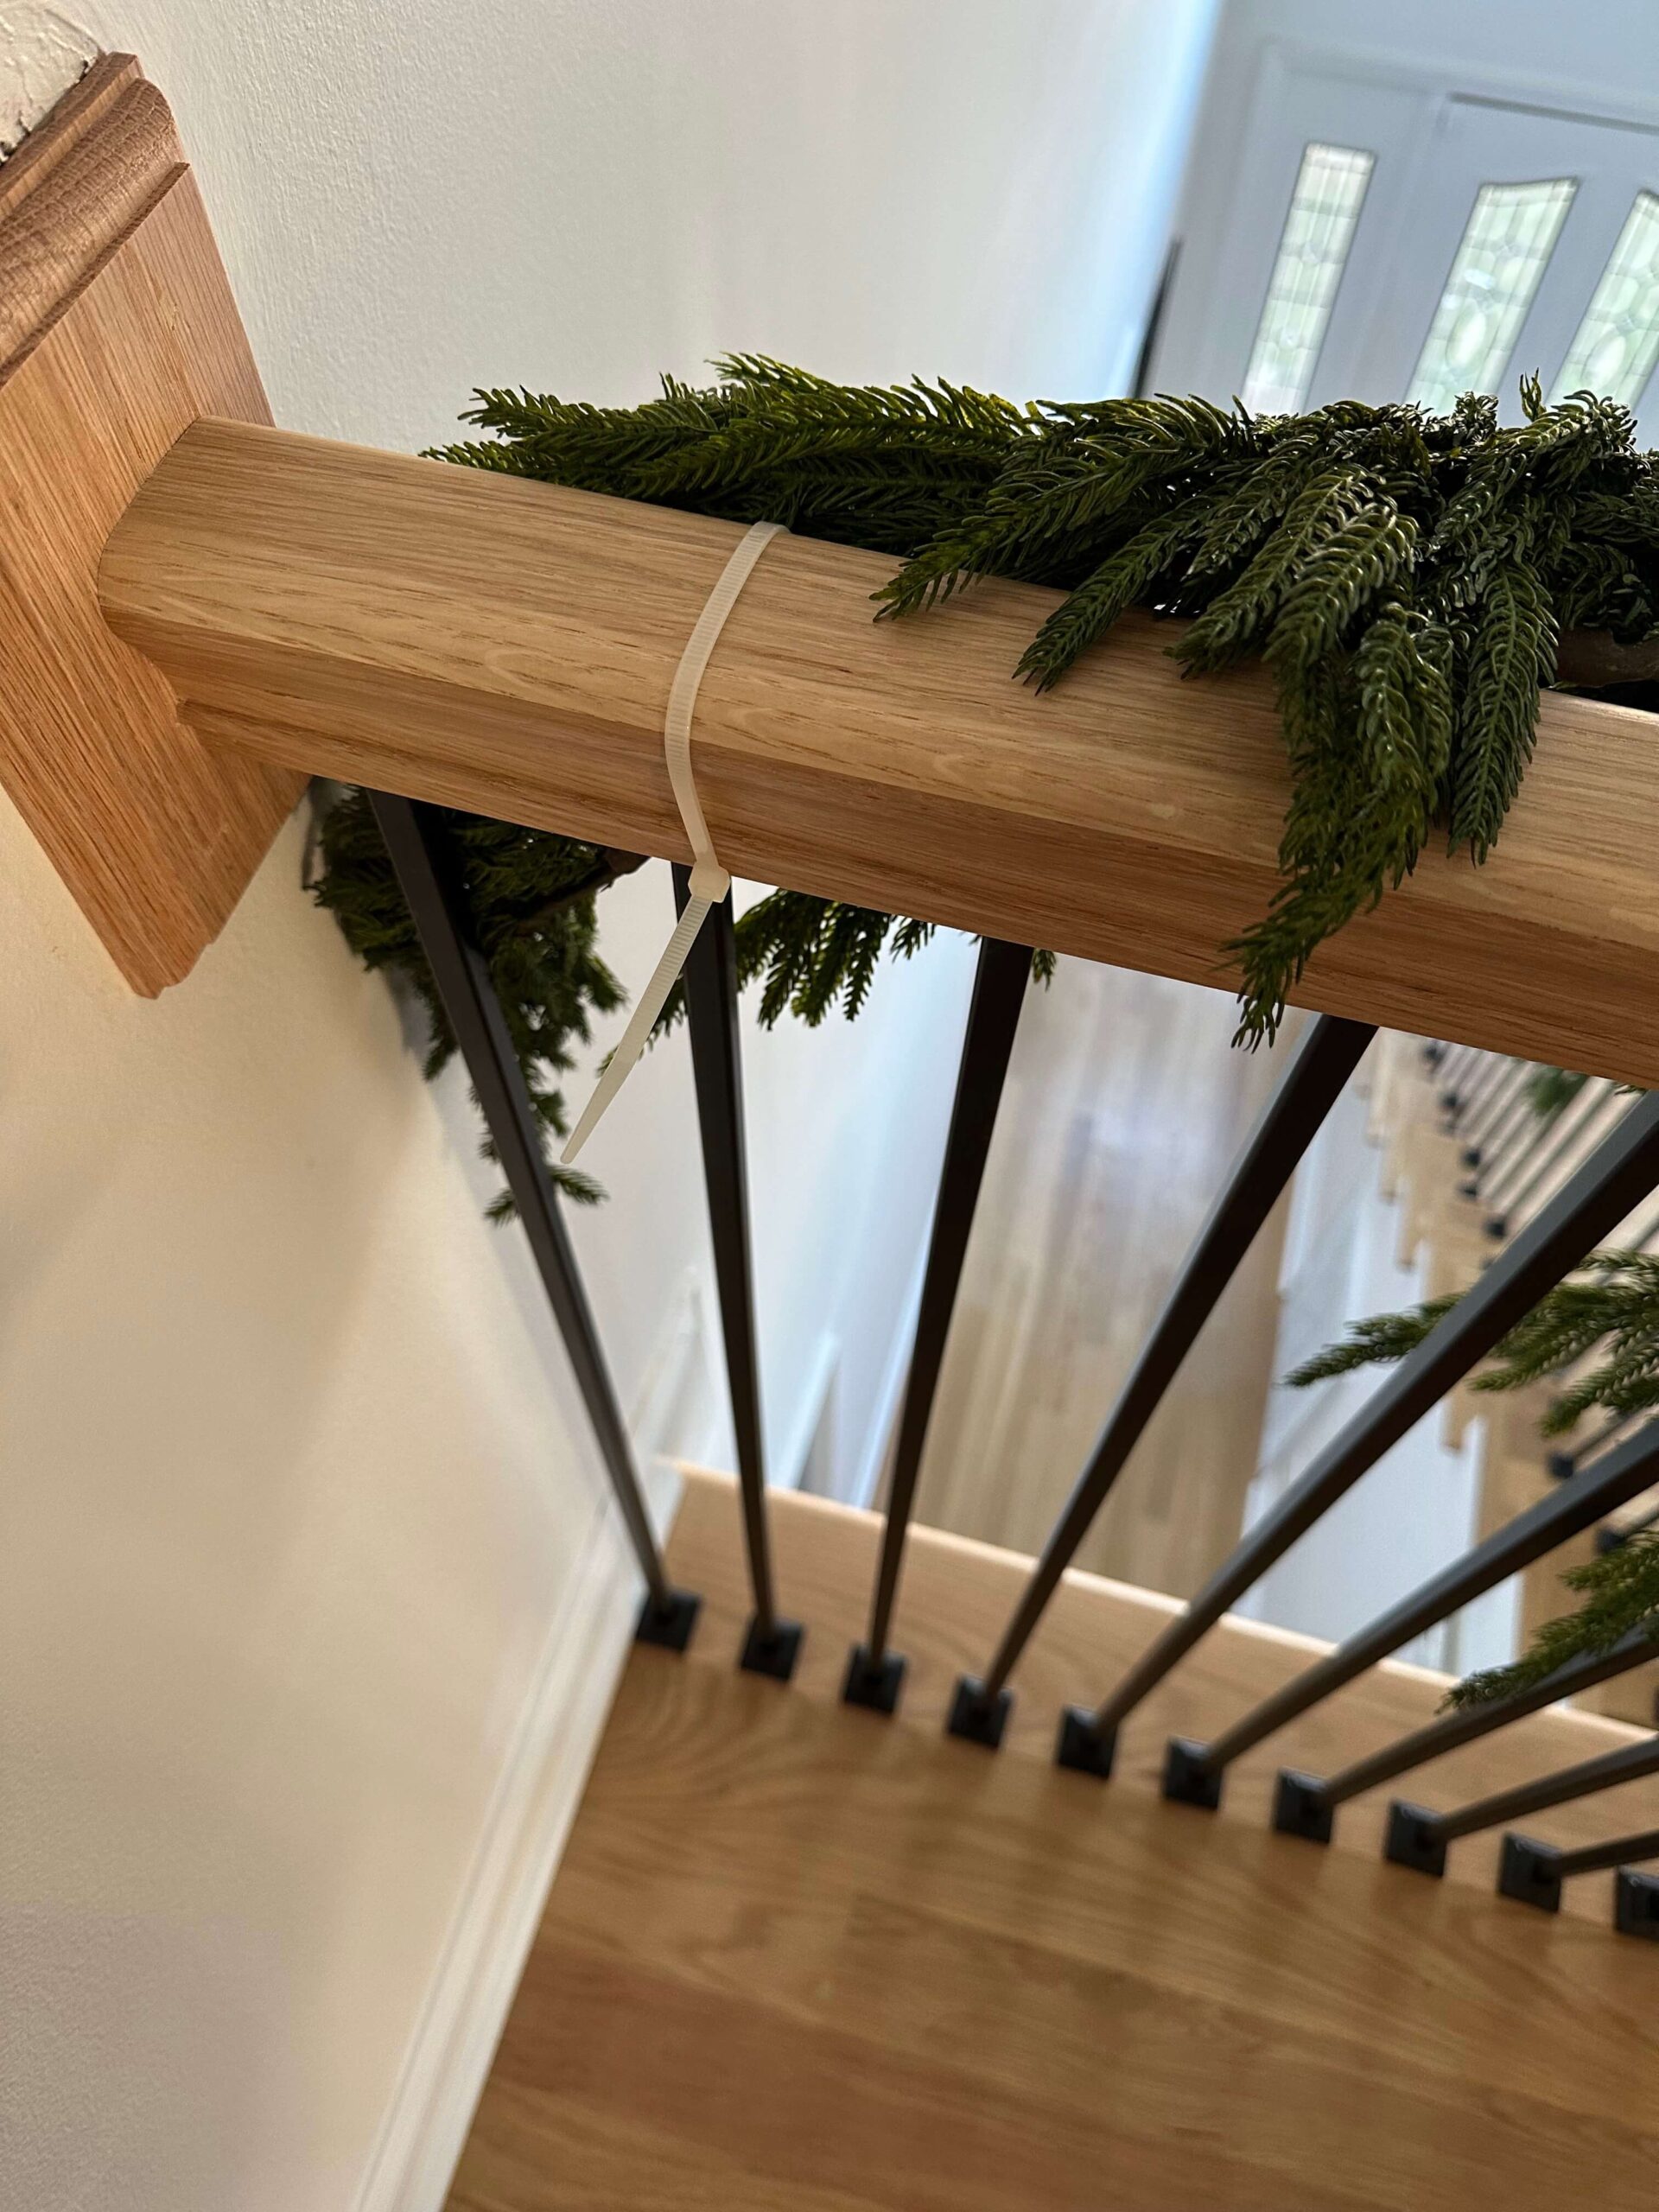
Once you’ve anchored your first piece, its time to decide when to drape or wrap your garland. The way I’ve decided to do it is by counting steps and then dividing. From my 9 foot banister, I have 12 steps from the bottom to the top. Since I want a dramatic look, I’m going to do a long drape. I’ll drape the garland every 4 stairs, which will leave me with 3 big loops.
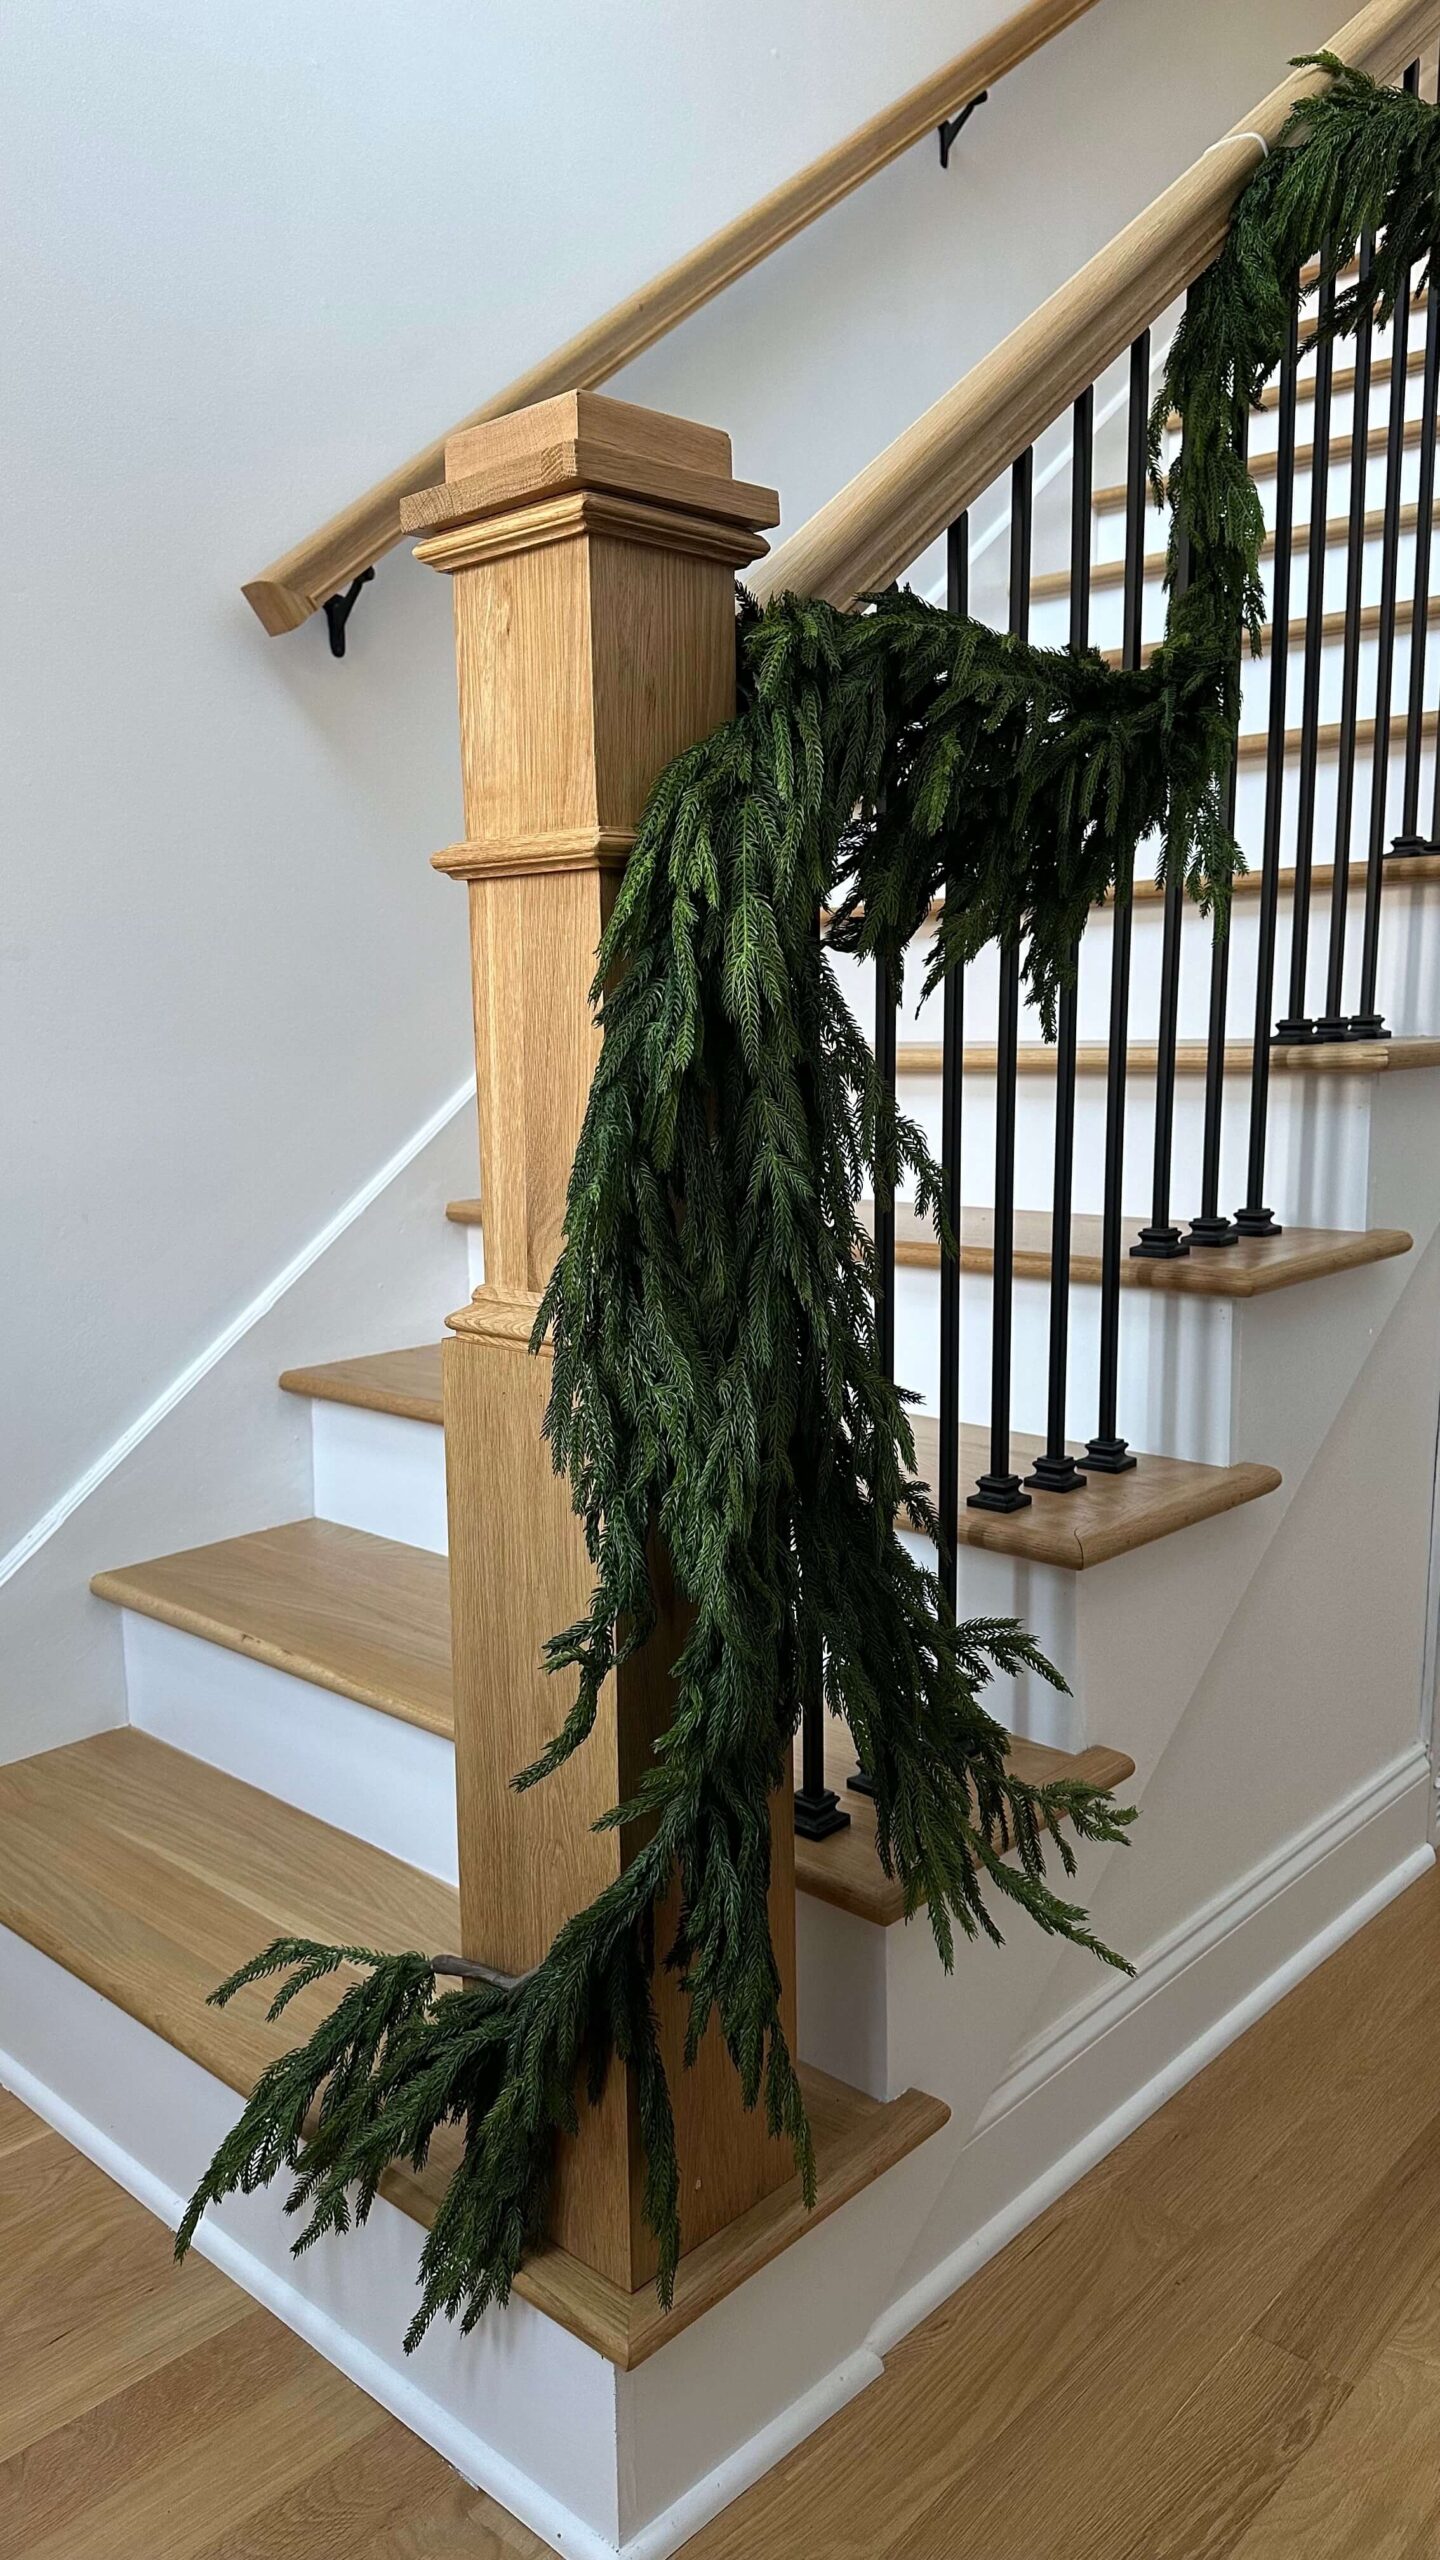
Step 4: Newel Posts
Generally, you should plan to double up your garland around the newel post. I have an extra 5 foot garland that I’ll be tying onto the base of my last piece, which will help create a fuller look at the bottom.
Step 5: Put a bow on it!
Or something else! Deck your garland out with long velvet ribbon, dried oranges, a string of bells or something else of your liking. My mom used to place crystal ornaments throughout hers and when the garland was lit it made such a pretty twinkle.
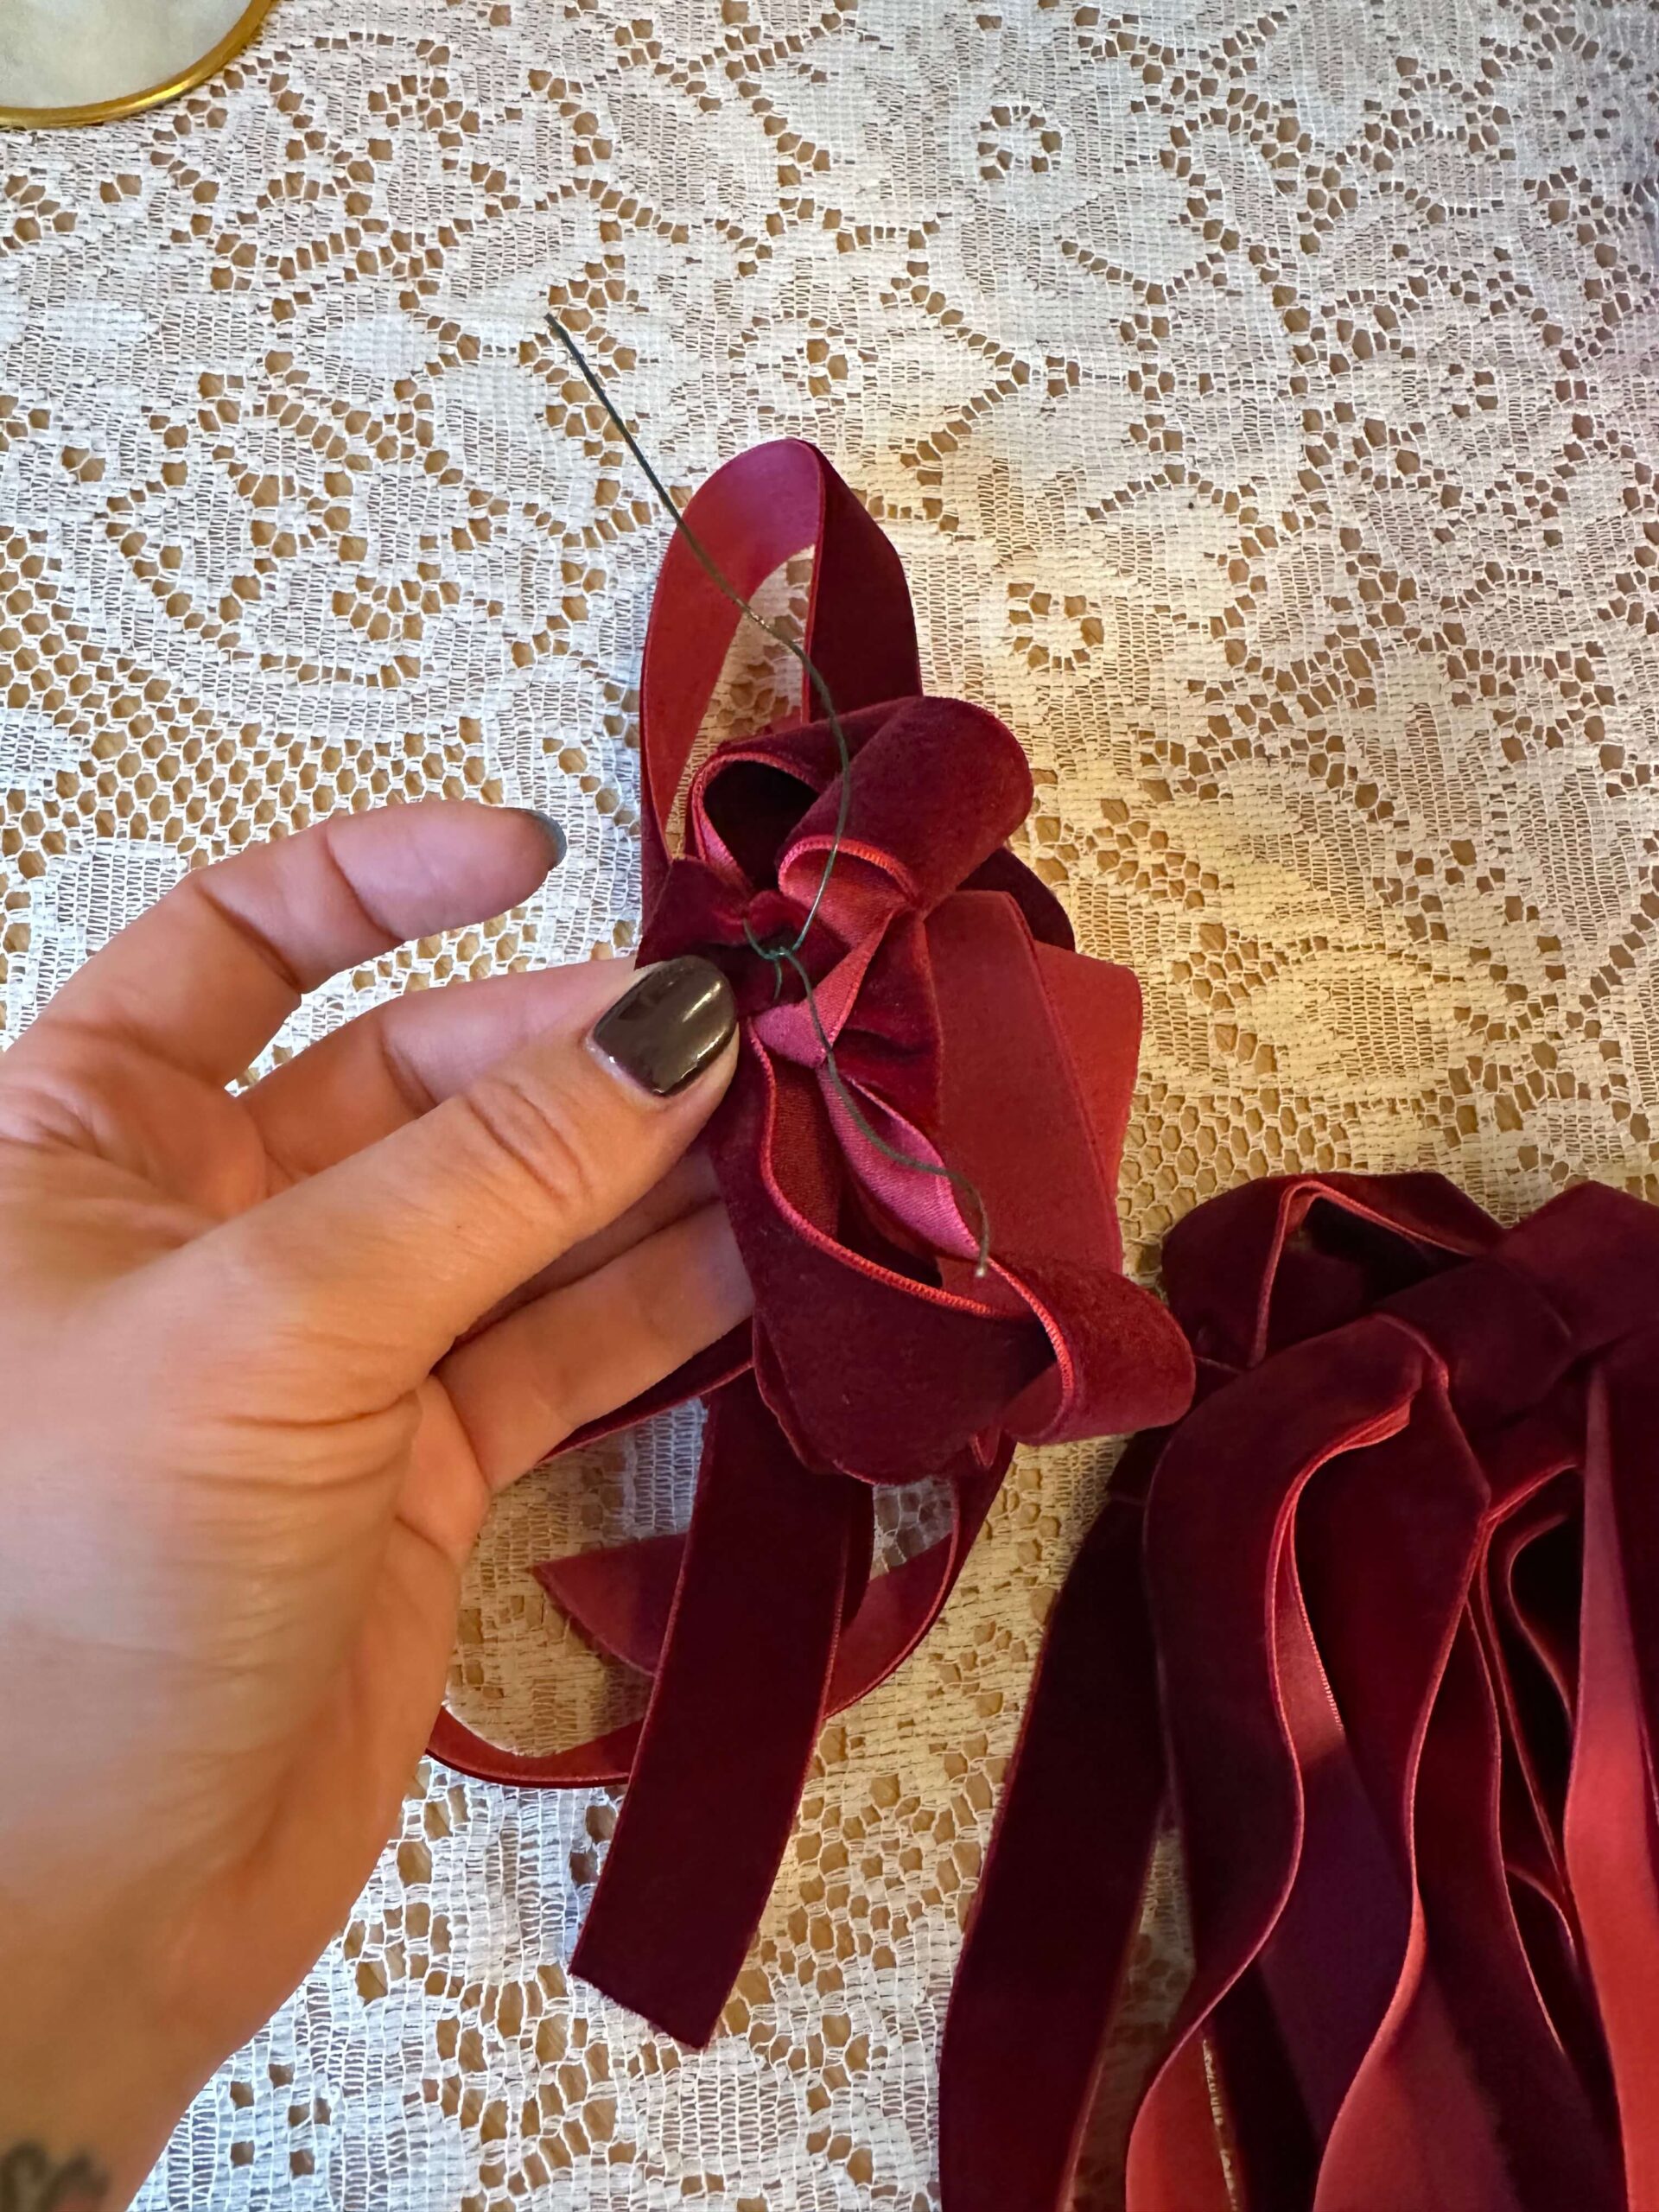
I ordered some burgundy and khaki velvet ribbon from amazon and created long bows for my garland. I ran a piece of floral wire into the back of the bow and then secured this to my zip ties on the banister. When it’s time to take it all down, I’ll leave the floral wire attached for next year!
Step 6: The bells and whistles
As an extra touch, I’m stringing some pretty bells at the base of the garland, which is at the newel post. They add an extra layer of visual interest and help keep the eye moving. Plus, they have a layer of nostalgia to them!

I’m so happy with my new garland, and while it was an investment, I know I’ll enjoy this timeless look for years to come. I might even continue to build on it! The look is simple and effortless and provides such a warm greeting upon entering the front door. I couldn’t be happier with how it turned out!
Shop the Look:
Real Touch Norfolk Pine 180″ Garland


