


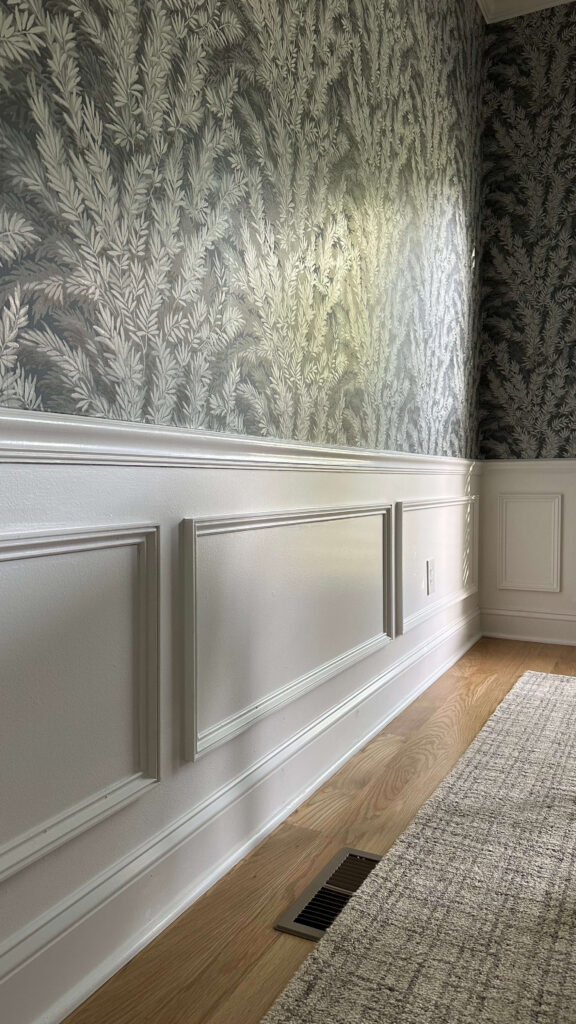
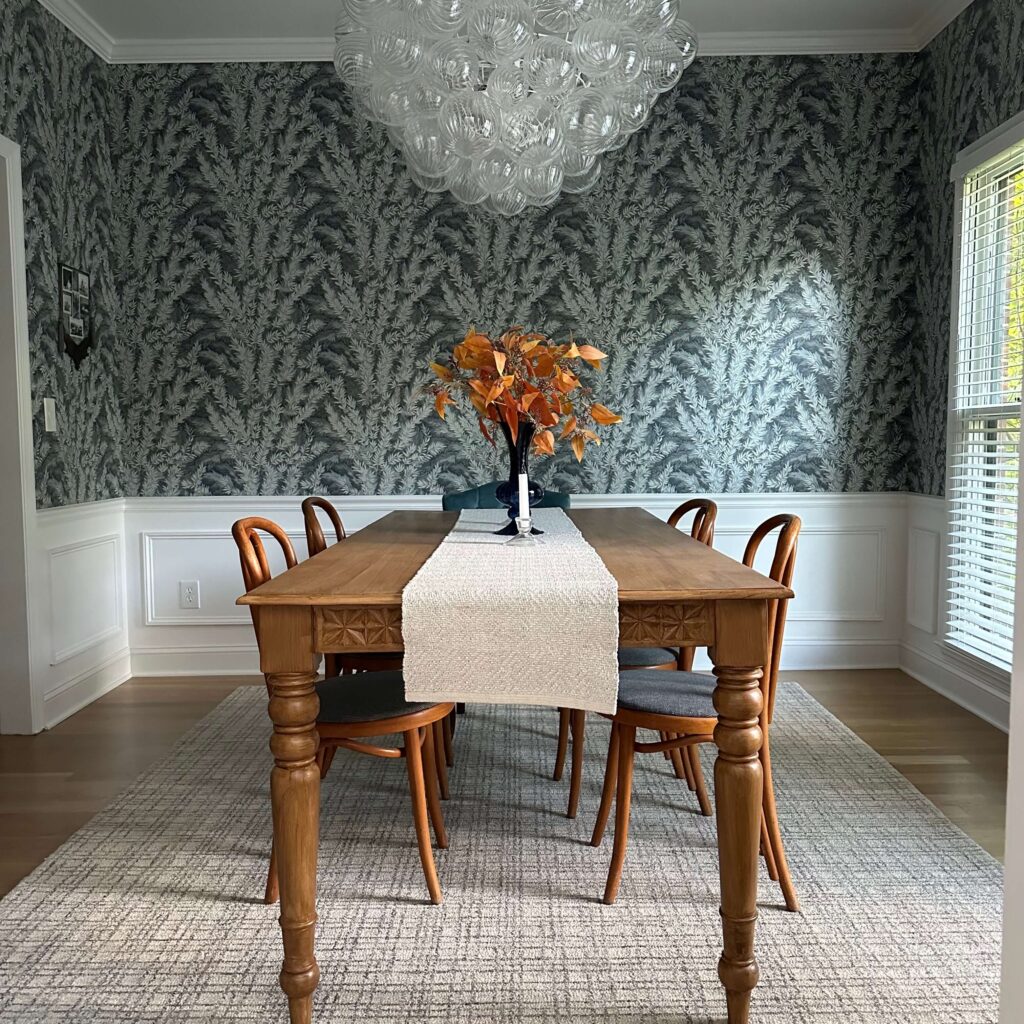
Although we’re in the month of April, I feel like it’s Christmas because I’m THAT excited to share the reveal of the DIY picture frame molding in the dining room. This is a project that is on the 2024 project list but has also been on my mind since I moved into this house. I knew it would be perfect in a formal space like the dining room: it gives it that extra wow factor in my opinion. Today I’m sharing the reveal but I’m also breaking this project down with a step-by-step outline of how to add DIY picture frame molding.
So before we dive in, why add picture frame molding? This decorative trim adds architectural interest and instant sophistication to any room. It’s like putting your walls in a fancy frame. It’s high impact and a relatively friendly DIY that looks impressive.
Finding Your Vision
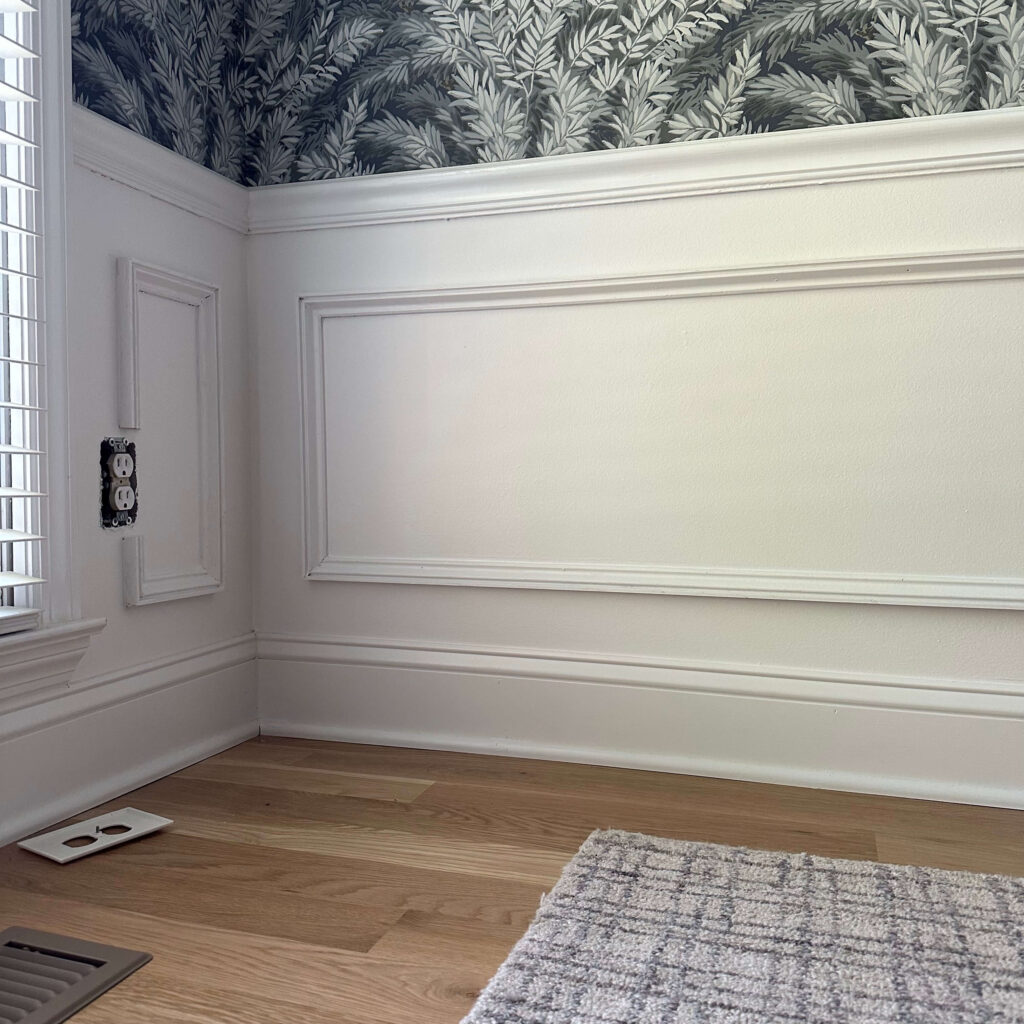
Before we dive into the nitty-gritty, let’s chat about the look you’re going for. Picture frame molding comes in various styles, from classic chair rails to more modern profiles. Start a pintrest board (here’s mine) for inspiration and get to pinning styles that make you pause. It will help keep you focused later on in the project when you may be facing decision fatigue. For my dining room, I was lucky to already have a chair rail in place and the top half wallpapered. That left me with minimal decisions to make for the actual boxes.
When choosing the molding size, consider the scale of your room. Wider molding makes a bolder statement and works well in larger spaces, while thinner profiles are perfect for cozy nooks. For this grand room I wanted something a bit wider and with some visual interest. I found a thicker piece of trim that had a pretty bevel to it, and that’s what I ultimately decided on. Also consider if you think you may continue this to other rooms. For me, I anticipate doing just that, so I’ll continue this particular style when the time comes.
Taking Measurements & Planning
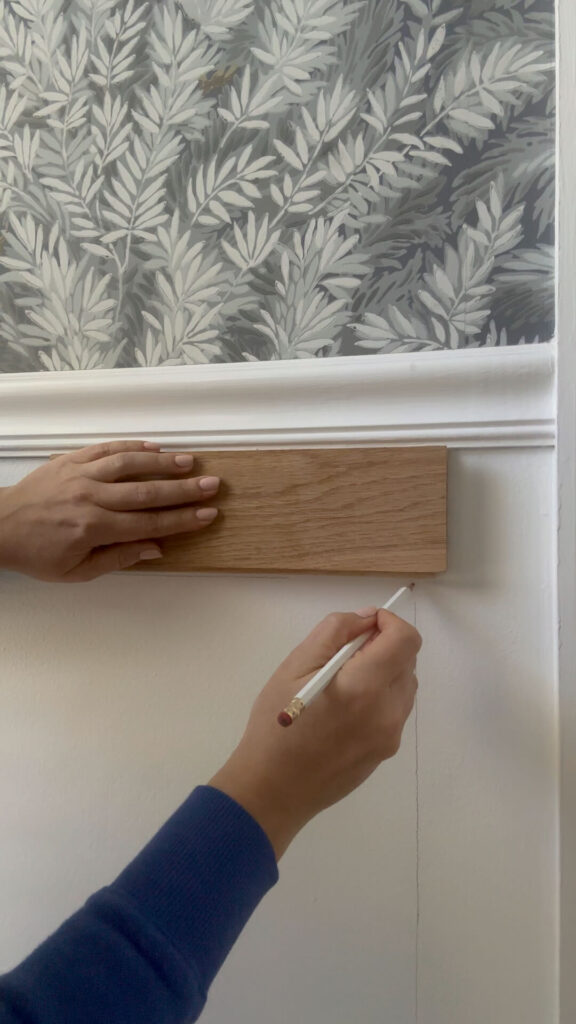
Now, let’s get down to business! You’ll need to measure your walls to determine the layout and amount of molding needed. Before you get overwhelmed by this step, I’ll let you in on a little secret. The measurement that matters the most is the distance between the top of your boxes, bottom of your boxes and sides of your boxes. You want that to be consistent throughout the entire room.
A time saving measuring method I utilized was finding a “spacer” to help draw the boxes on the walls. I used a spare piece of flooring which was 3.5″ wide and that was my distance around all sides of each box. This pre-determined width helps create those perfectly proportioned “boxes” on your wall.
Drawing it Out:
Using your spacer of choice, grab a pencil and level to lightly sketch out the molding layout on your wall. This gives you a visual representation and helps ensure everything is nice and balanced. To get visual you can even put painters tape up first to visualize the thickness of the molding on your walls. I opted to skip this step because I felt confident and I’m also a bit impatient!
Measure the lines on your walls and add anywhere from 10-15% more to the linear total. This is how much you’ll need to buy from the hardware store.
Cutting with Confidence:
What you use to cut your trim will depend on the type of molding you select. An MDF style molding will work great with miter shears (I have these ones), and you won’t need any power tools. It will be as easy as using scissors!
For me, the molding I chose was oak which is a thicker cut of wood. Because of that, I needed to purchase a miter saw to do the job accurately. This trusty tool makes precise angled cuts for those crisp corners. Double-check your measurements and practice on scrap wood before tackling the actual molding.
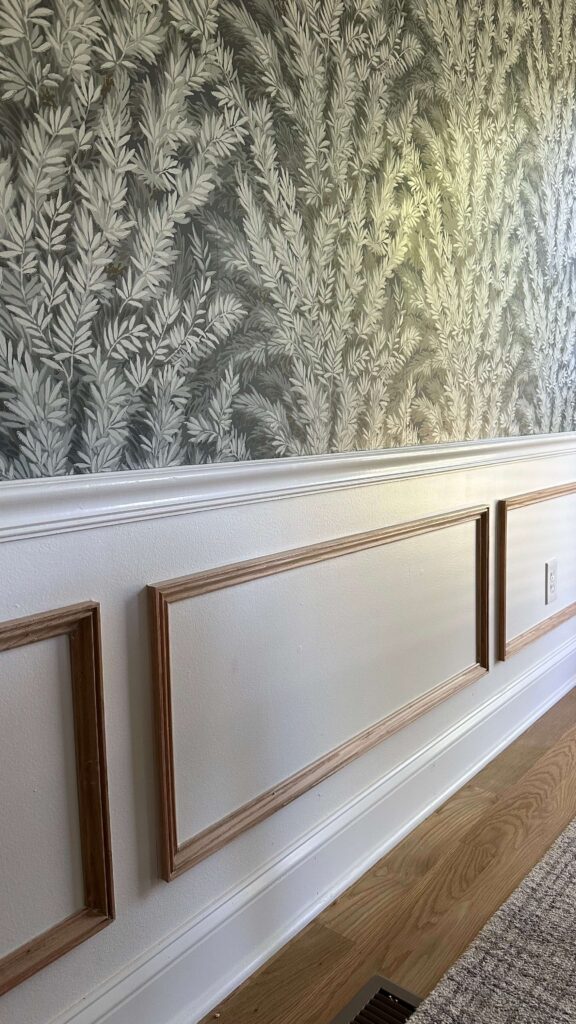
Mock Up Magic
Here’s the magic trick that saves frustration: using painter’s tape, tape the cut molding pieces onto the wall to mimic the final design. This lets you visualize the layout, adjust spacing if needed, and ensure everything looks stellar before permanently attaching anything.

Nail It!
Time to secure the molding to the wall. A brad nailer is your best friend here. It uses tiny nails that disappear easily, leaving a clean finish. While some folks opt to add wood glue to their molding for an extra hold, I found the brad nails worked just fine. I used 2” brad nails and this Ryobi brad nailer was incredibly beginner friendly! Plus it’s battery operated!
Filling & Sealing:
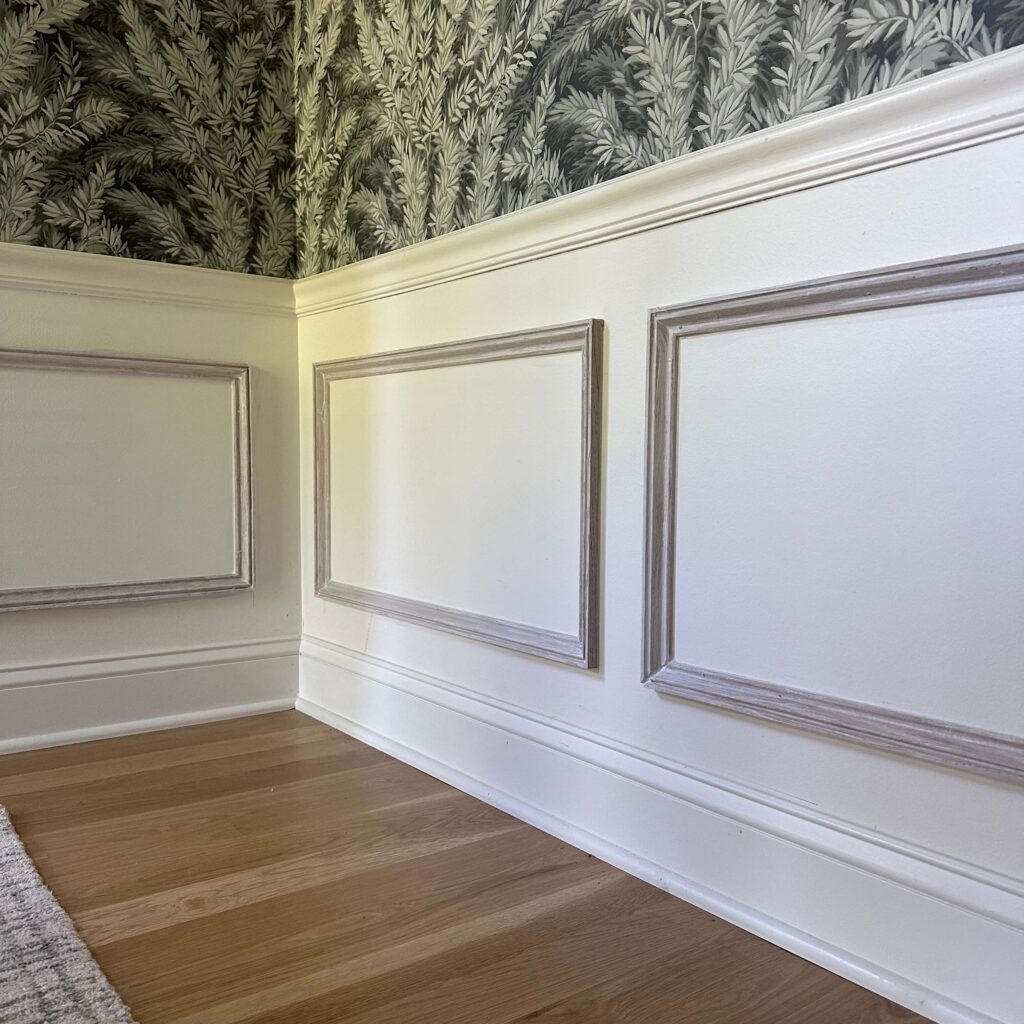
Once the molding is in place, it’s time to tackle those tiny nail holes. Use a good quality caulk to fill the holes and create a smooth surface. Let it dry completely, then apply a light coat of spackle to camouflage any imperfections. Sand everything smooth once dry (I made the mistake of not sanding on one piece – make sure you don’t skip this step!). You’ll also want to run a bead of caulk along all edges of the molding for a seamless look.
Prime Time
Now for the painting prep! Apply a coat of primer to the molding and the wall where it meets the molding. This ensures even paint application and helps prevent the molding from soaking up all the paint.
Painting Perfection
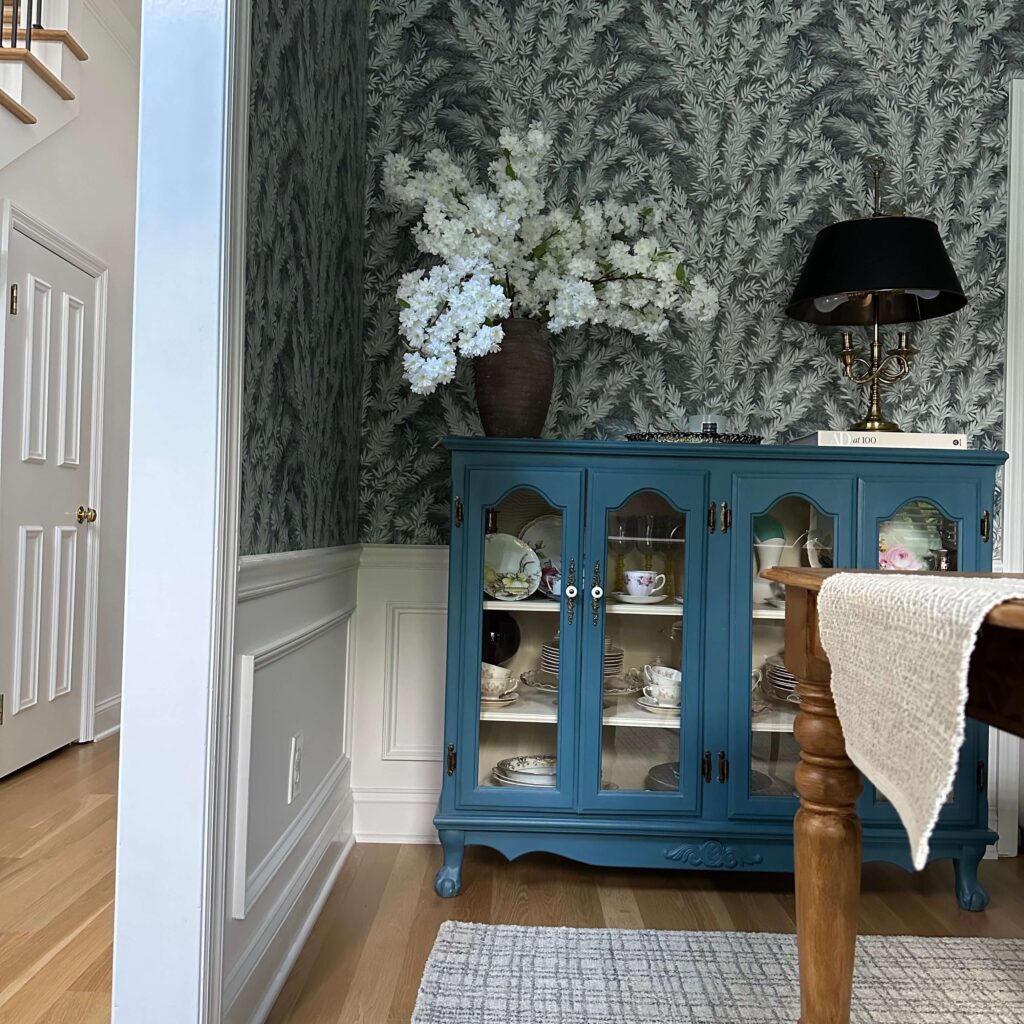
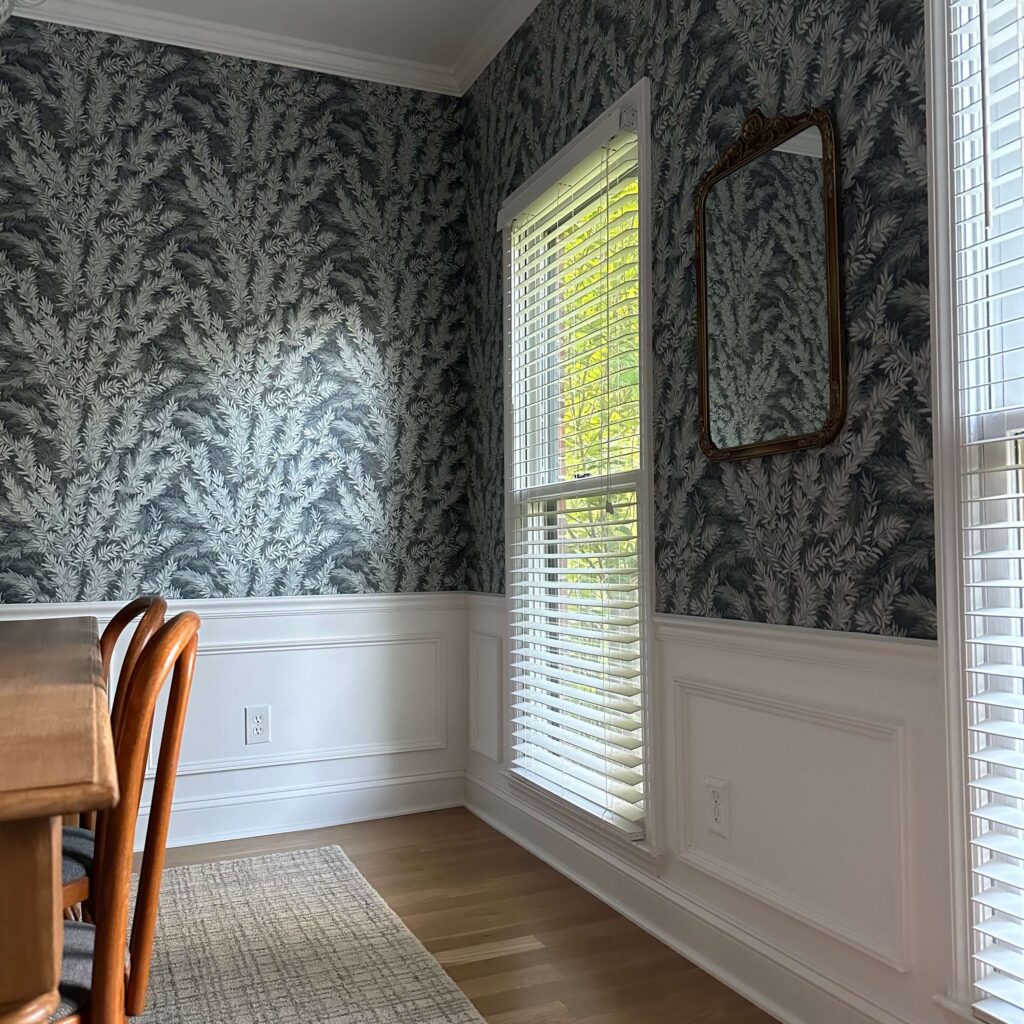
Finally, the moment you’ve been waiting for: painting! Choose a color that complements your space – either match the wall color for a subtle look or go bold with a contrasting shade. For my room, I chose to use the same white (Du Jour by Valspar) as I have on the walls. I wanted the wallpaper to still have its moment in the overall space, and wanted a seamless look on the bottom half. Because I was working with raw wood, I used three coats on the molding for a nice, even finish.
Picture Perfect DIY Picture Frame Molding
Before I started, I had the sneaking suspicion picture frame molding could be addicting, and I’m here to tell you it is. It instantly elevates the space and adds a touch of elegance and architectural detail to the room. Given my house is a traditional style home, I think it feels timeless and classic.
This project was one where I advanced some of my skills. I’ve never done any type of woodworking, and never operated a power tool outside of a drill, so I’m having quite a proud moment right now. I have plans to add a chair rail and molding in the primary bedroom later this year (with some fun wallpaper on top) as well as beadboard in the laundry room, so I know this is just the beginning!
What do you think? Do you have picture frame molding in your home? Would you try this project? Let me know if you have any questions!


How would I place a box under my window?
The key is to have all spacing be the same. So if you’re boxes are 3″ from each other and the baseboards in the rest of the room, you’d measure for the same spacing underneath your window. I hope this helps!