


A funny thing about my 1989 brick colonial house: it has the traditional crown molding you’d expect to see in a home like this — but only in some rooms. It’s always puzzled me, and lately, it’s started to bug me. The entire upstairs has zero crown molding, while the downstairs rooms — the cozy TV room, dining room, kitchen, living room, and now my primary bathroom — all have it. So when 2025 kicked off and I started planning my project list, I decided one long-term goal would be to make the trim work throughout the house cohesive. But before I could do that, I had to learn how to measure, cut, and install crown molding. Now that I’ve completed the process twice (hopefully you saw the install in the primary bathroom), I feel confident enough to share my best tips, tricks, and lessons learned along the way.
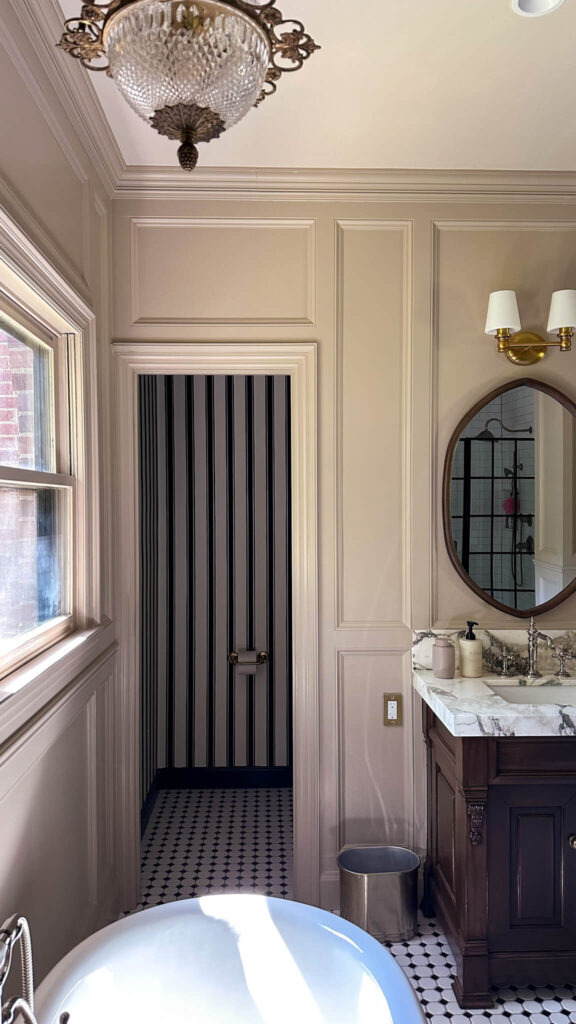
Freshly installed crown molding in my primary bathroom
Crown molding is one of those small architectural details that instantly elevates a room. It adds character, polish, and that finished, designer look — but it can also be frustrating if you don’t understand the basics. In this post, I’ll walk you through how to measure, cut, and install crown molding using the beautiful dentil molding I added to my home office as part of my ongoing makeover project.
Step 1: Measuring for Crown Molding the Right Way
Before you make a single cut, you need to understand your space. Here’s the thing — very few walls and ceilings are perfectly straight. Knowing that from the start will save you a lot of frustration later.
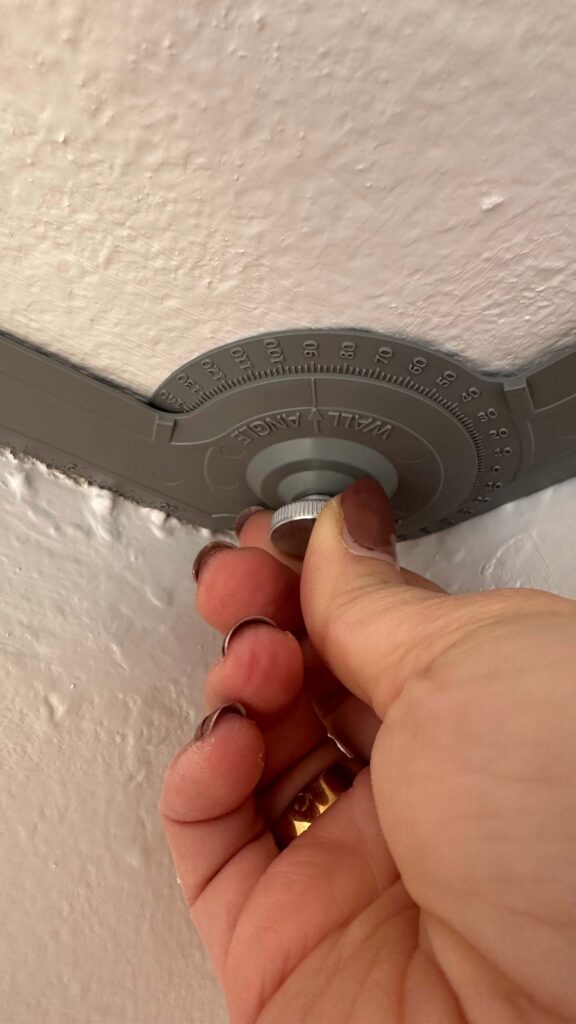
Start by drawing a rough diagram of your room and label each wall. Then grab a protractor tool (this also comes with the crown molding jig kit I mention below) and check the angle in each corner by placing it flush against the ceiling. This tells you whether your corner is a true 90-degree angle or slightly off, which will determine how you set up your miter saw for accurate cuts. We’ll get to that in a second.
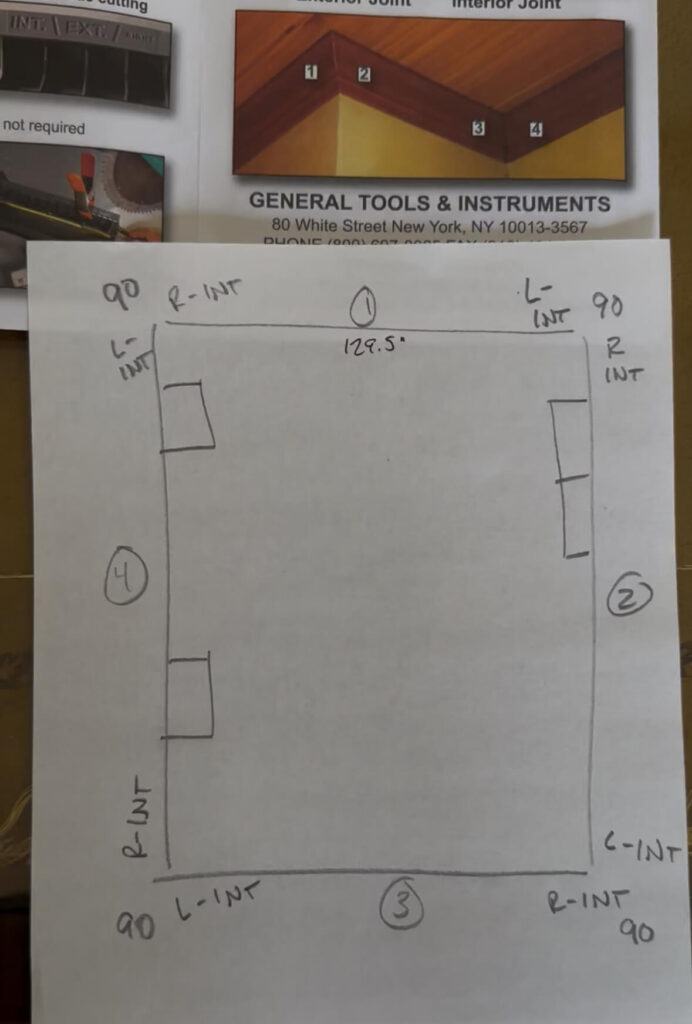
I like to draw a rough diagram of the space and then label all cuts and angles on each wall.
You can also use this opportunity to measure the length of each wall so you order enough crown molding for your project, and mark those measurements on your diagram. I’d suggest adding one additional piece of crown molding to your order, especially if this is your first time working with it.
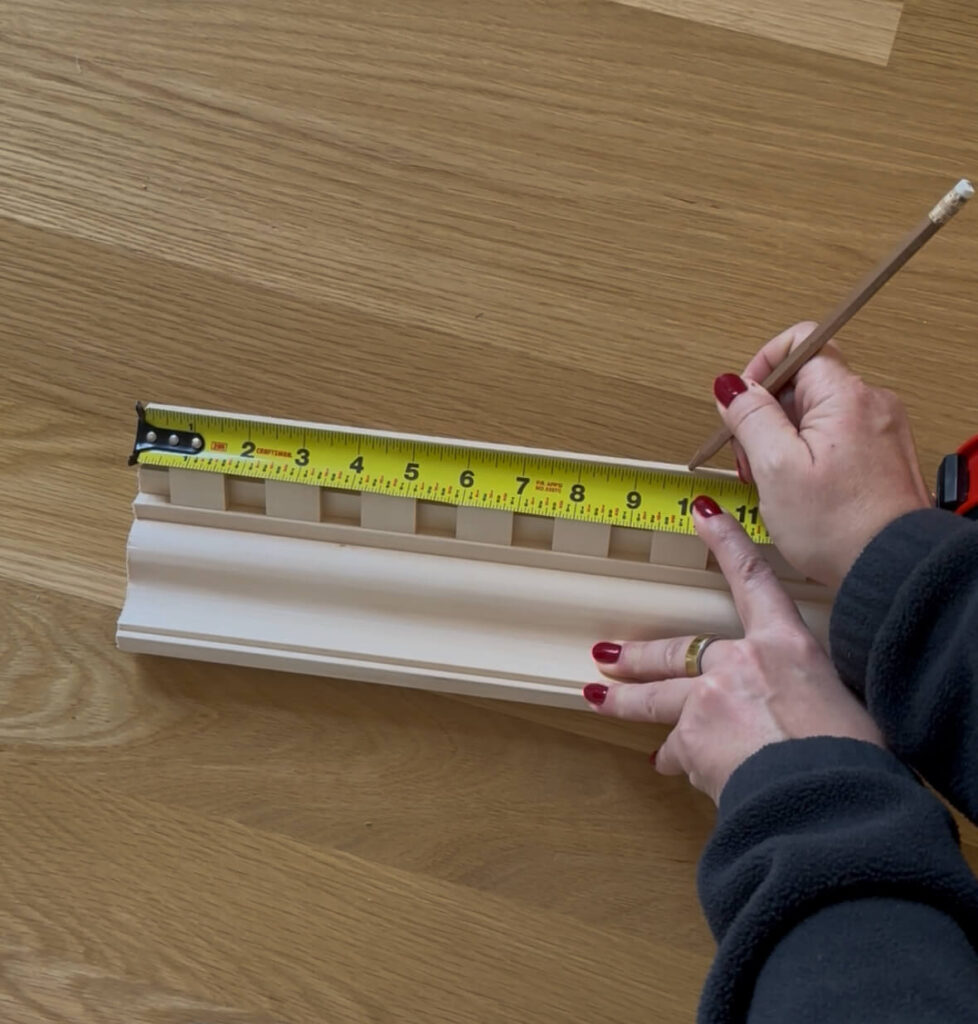
Lastly is measuring and marking the crown the proper way. You want to measure from the corner and then mark this on the bottom piece of your crown molding. See a photo of me doing this below with my dentil molding: the dentil is pointing up and that’s where I’m marking my measurement. This is how we’ll place the crown on the miter saw when we’re ready to cut.
Step 2: The Tools You Need to Cut and Install Crown Molding
If you’re learning how to measure, cut, and install crown molding for the first time, your tools will make or break the experience. I highly recommend investing in a Kreg Crown Molding Jig — it’s worth every penny and also includes the protractor tool you need which I mentioned above. I tried cheaper versions and they simply didn’t hold the molding at the right angle.
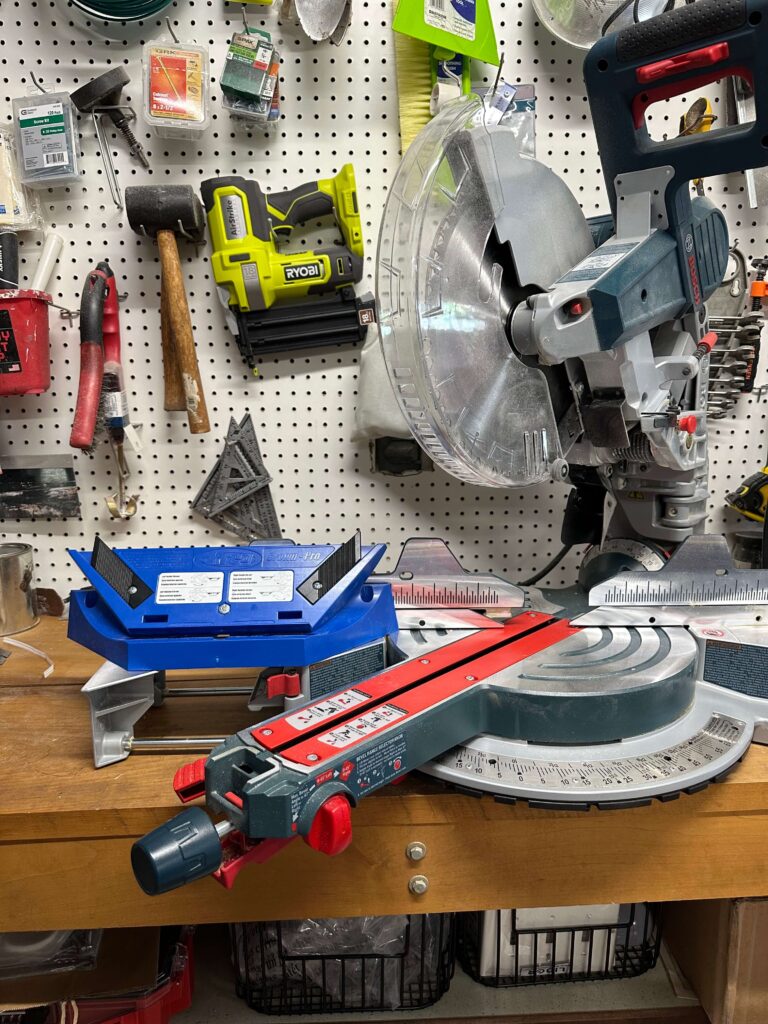
A good miter saw and the Kreg Crown Pro Jig are must haves for this job. I’ve had my Bosch miter saw for several months now and have been very happy with it.
You’ll also need a stud finder (my favorite is by Franklin Sensors) to mark your studs before installation. It detects not only studs but also hidden electrical wires, which you definitely don’t want to nail into. Go ahead and mark your studs prior to doing any cutting.
Other tools needed will be a miter saw, specifically one large enough to cut crown molding, a tape measure, triangle tool, brad nailer, two inch brad nails, ladder, safety glasses, wood filler, caulk, nail punches, a hammer and sandpaper.
Step 3: How to Find and Set Your Crown Molding Spring Angle
The next step in how to measure, cut, and install crown molding is understanding your spring angle. This is the angle between the back of the crown molding and the wall. Place your protractor flush against the back of the molding to find this measurement.
Then on the backside of the Kreg Jig, you’ll see the ability to change the spring angle. Adjust it to the proper angle and tighten the screw. This helps you set your jig correctly so you’re cutting at the proper angle every time.
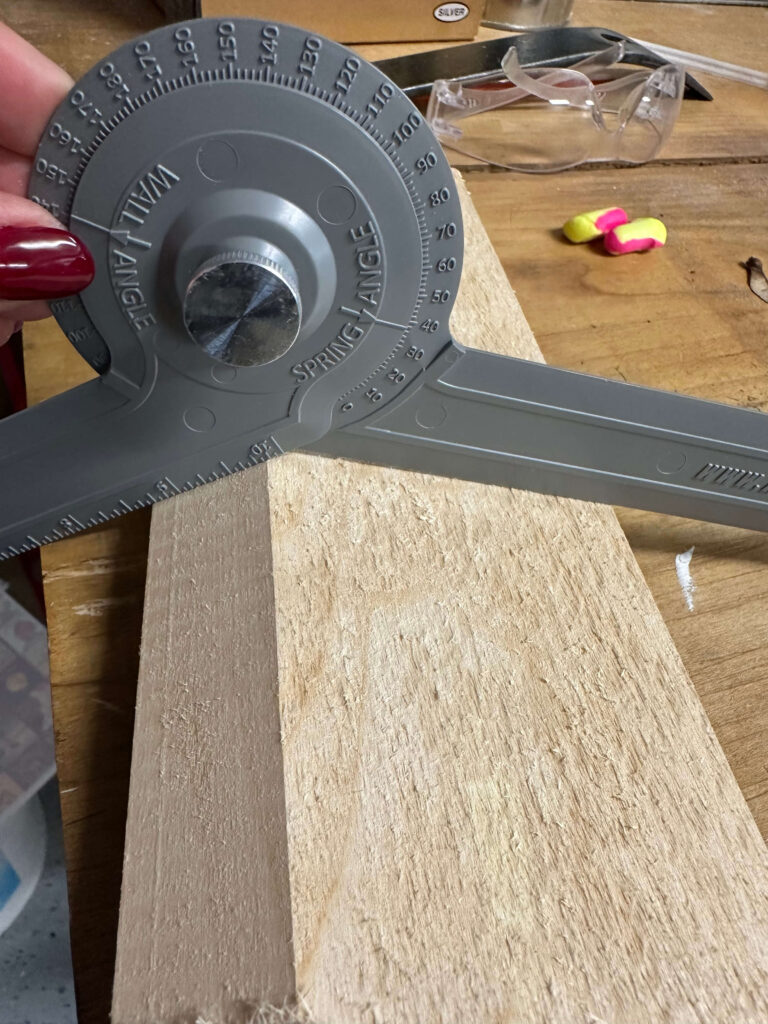
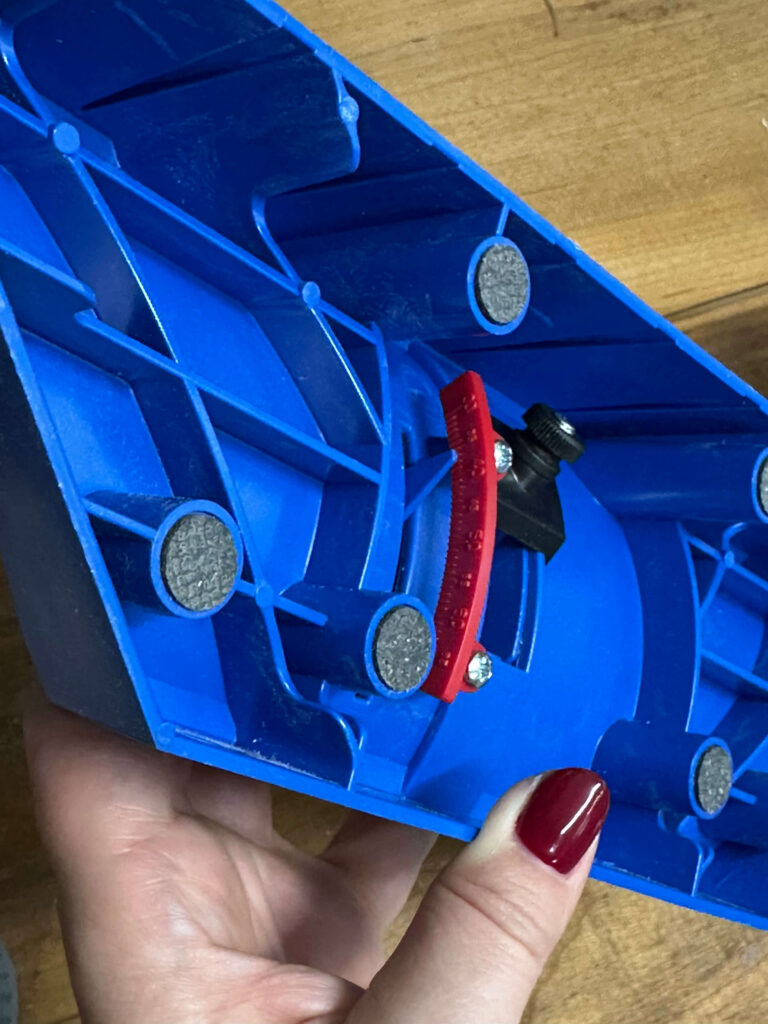
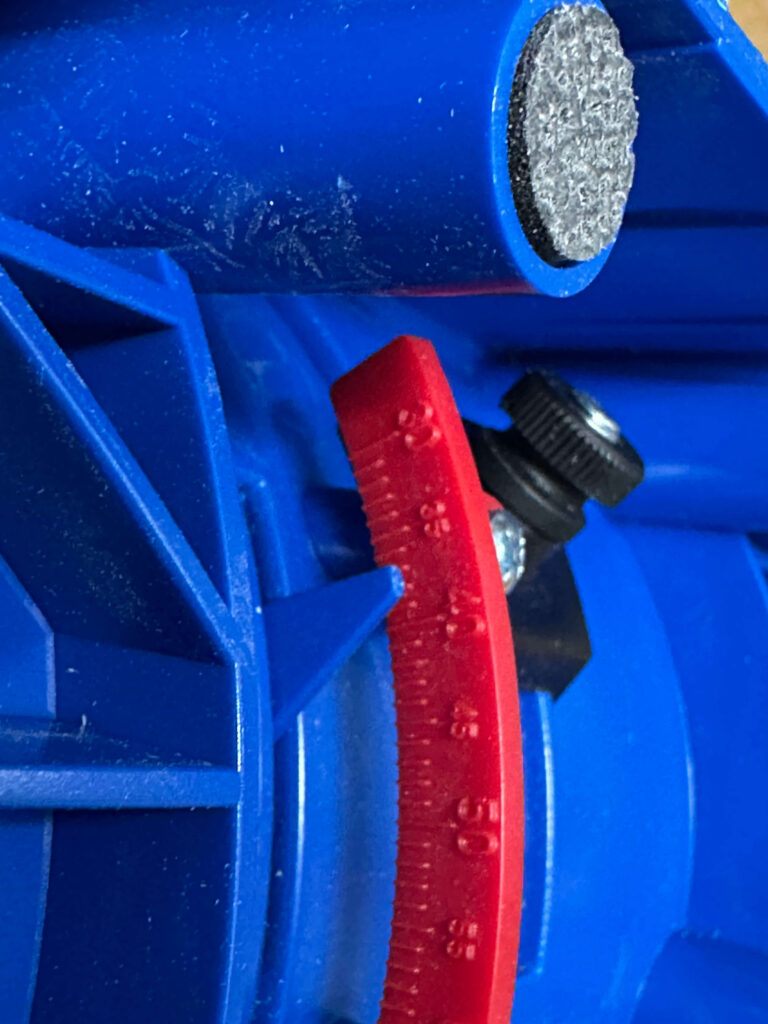
Finding & setting the spring angle: protractor & crown to the left, setting the spring angle on the jig to the right
Step 4: Labeling Cuts When You Cut and Install Crown Molding
This is the step where a little planning goes a long way. Because crown molding is cut upside down and backwards, it’s easy to get confused. It’s easiest if you print out two copies of this diagram to have on your job site, especially if you’re new at this. Keep one at your saw and one in the room.
Mark which side of your molding is the bottom (use a small down arrow) and note each wall section on your diagram. I also label each cut — for example, if I’m installing a piece on the left side of a wall, that’s called a right inside (or interior) cut. Mark this on your room diagram from the start, as keeping your cuts labeled will prevent wasted material and headaches later.
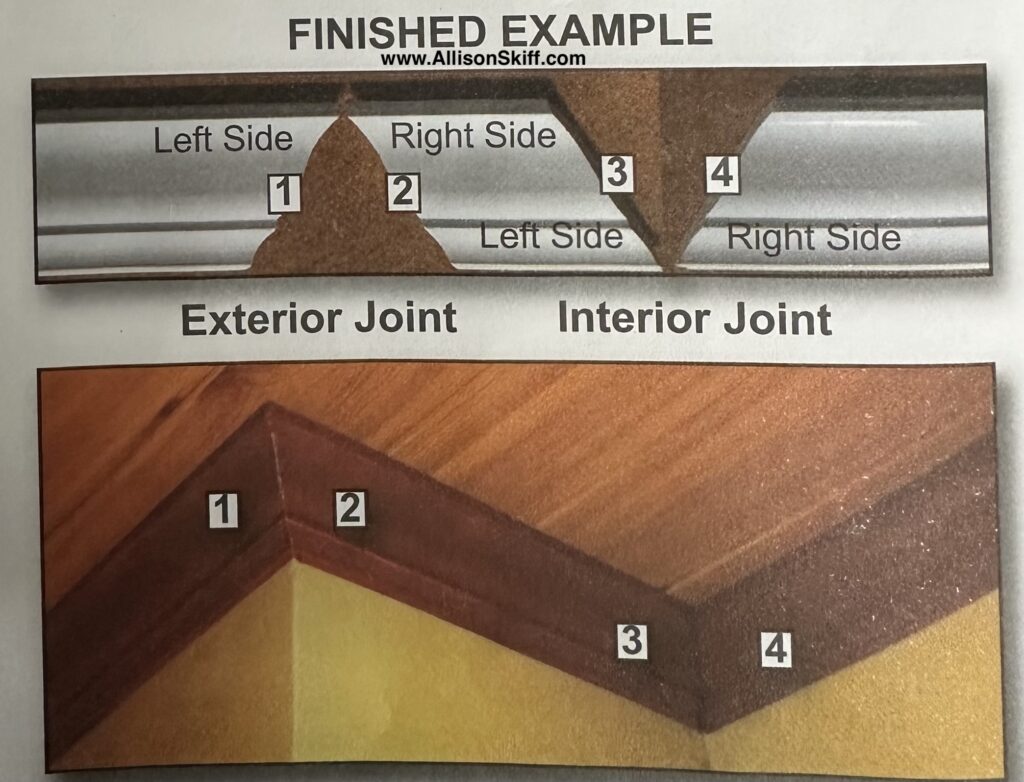
I keep a copy of this crown molding diagram handy at both my saw and in the room I’m working in
Step 5: How to Cut Crown Molding Corners Perfectly
Now that your jig is set to your spring angle (mine was 38° for this project), it’s time to start cutting. If your molding has a pattern like dental molding, remember that the decorative detail faces up when it’s on the saw (i.e. flip the crown molding upside down on the saw, so your saw is hitting the bottom of the crown first). Refer to your room diagram as to which cut you’re making, then match that to your Kreg Jig. It will tell you which direction to set the saw and which side of the saw to place the jig on for each cut.
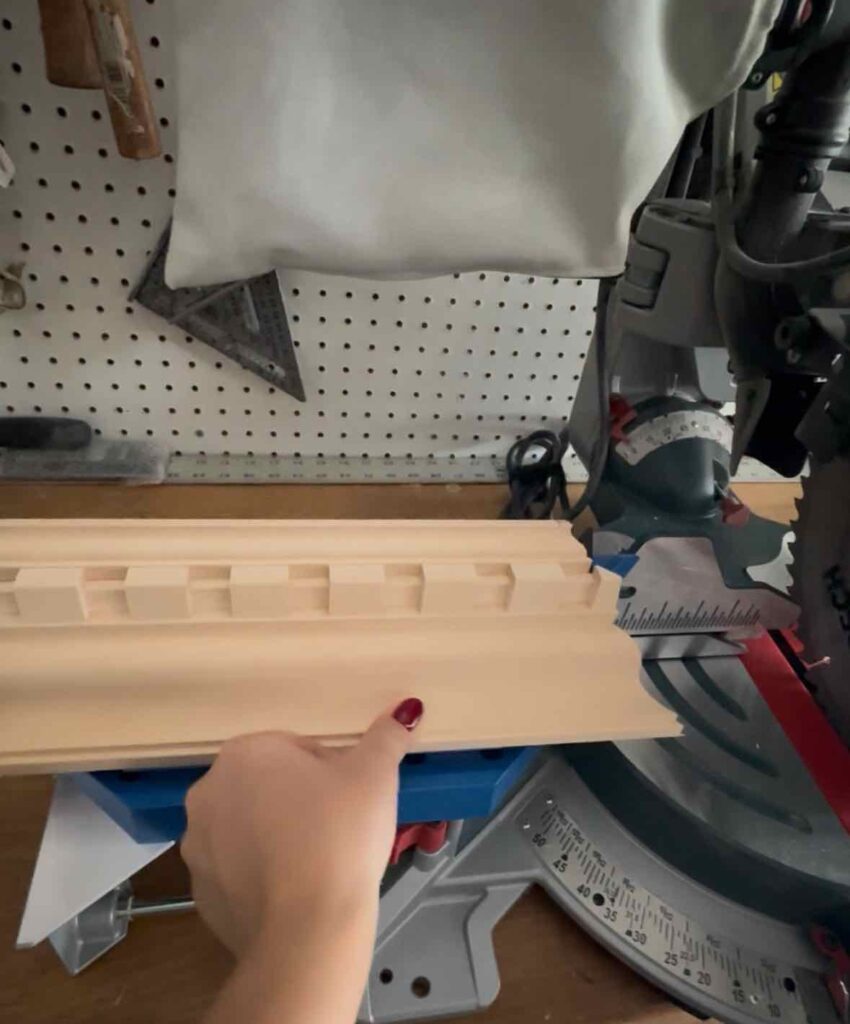
Notice the bottom of the crown molding (the dentil) is pointing up
Start by making two corner cuts that you can dry-fit together before committing to longer pieces. This will help you ensure your corners line up perfectly before moving forward. I like to do one full piece of crown on one side, and then a shorter piece on the other. When installing as one person, this is about all I can manage with two hands.
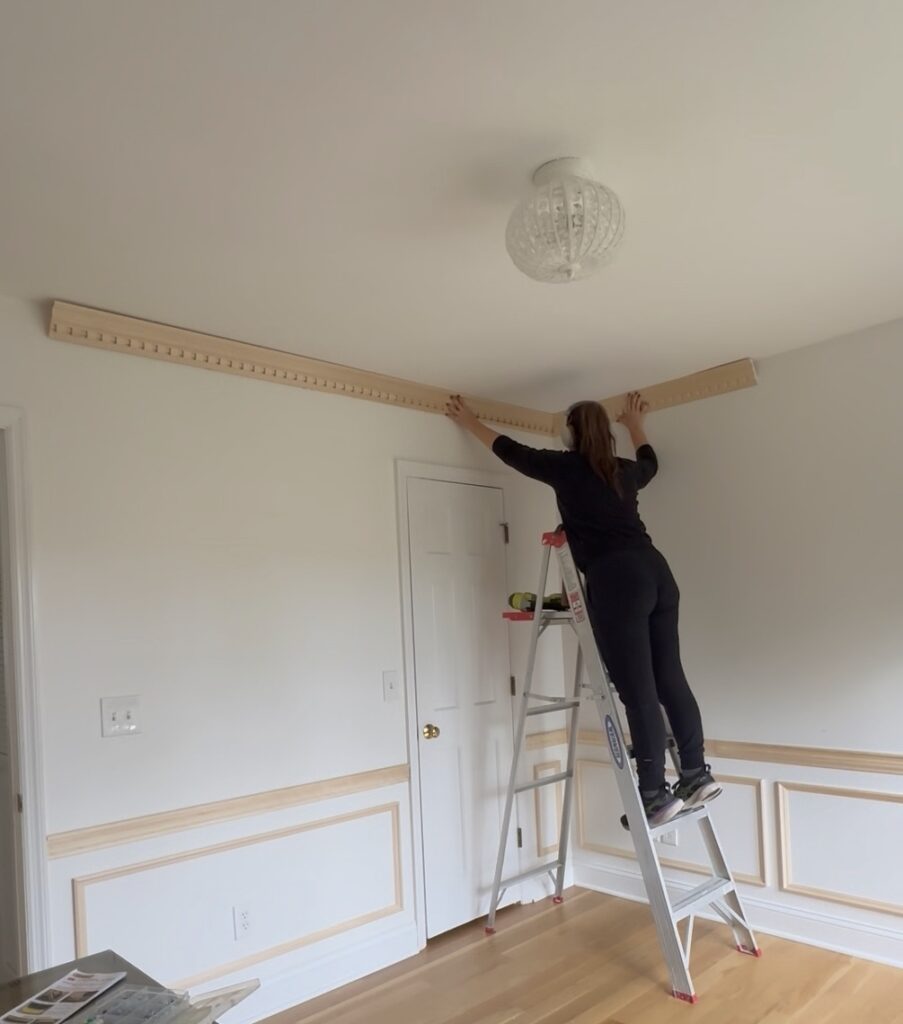
Step 6: How to Install Crown Molding Securely
Once your corners line up, you’re ready to install. Hold the molding so it sits flush with both the ceiling and wall, which is called “rolling” the crown molding. Since no one’s walls and ceilings are perfectly straight you’ll likely have some gaps, but we’ll fix those in the last step. Once your crown is as flush as it can be with both the ceiling and wall, use your brad nailer to nail into the studs — alternating between the ceiling and wall for maximum grip.

This staggered pattern provides better support and helps your crown molding stay perfectly aligned. Proper installation is just as important as cutting when learning how to measure, cut, and install crown molding.
After you install your first corner pieces, you’ll need to measure for all pieces moving forward. When it comes to measuring, you want to measure from the corner of the room to the edge of the installed piece of crown molding. Take this measurement and you’ll measure on the bottom facing side of your crown molding. Make the mark here, which is where you’ll cut.
Step 7: Caulking and Finishing Your Crown Molding Installation
Even when you know how to measure, cut, and install crown molding, small gaps are normal. That’s where caulk and wood filler come in. A couple rules I like to keep in mind when doing my finishing work:
- Use caulk along the ceiling and wall seams. This brand is my preferred choice.
- Use wood filler for corners and nail holes. I like this kind specifically in the tube.
- For larger gaps, insert a bit of backer rod foam before filling to save product.
You’ll also want to double check that your brad nails went through the wood. If not, use a nail punch and a hammer, and gently tap them in. Otherwise fill as normal and wipe with a crocodile cloth to remove excess wood filler (which makes for an easier time sanding). After the filler dries, lightly sand everything smooth.
Final Thoughts: You Can Absolutely Learn How to Measure, Cut, and Install Crown Molding
If this is your first time tackling crown molding, give yourself grace. Order extra material, practice on scrap pieces, and know that it gets easier fast.
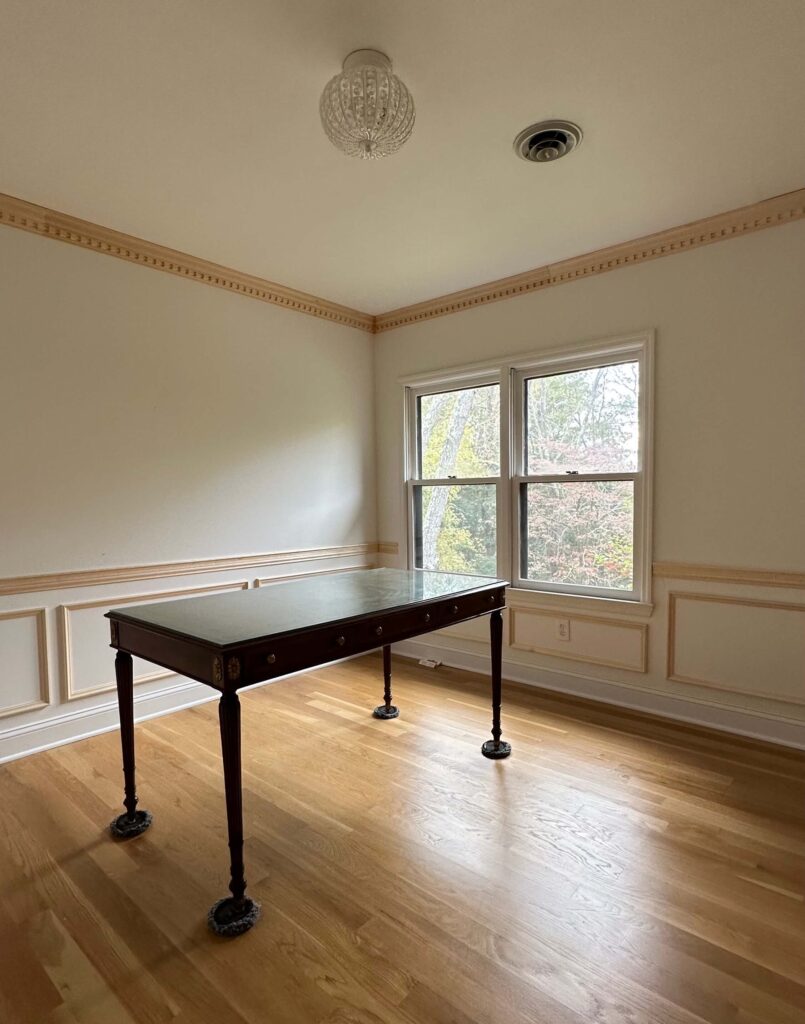
Now that my dental crown molding is up, the next step in my home office makeover is choosing a paint color to go with my new wallpaper choice (see what I picked here). From there, we’ll get to spraying all the trim for a flawless finish.
Follow along for the next chapter — and if you’ve been thinking about learning how to measure, cut, and install crown molding, I promise it’s one of the most rewarding DIYs you’ll ever take on.
Related Posts:
Installing Crown Molding in the Primary Bathroom
How to Design Picture Frame Molding: Home Office Edition
Supply List:
This project is part of the Fall 2025 One Room Challenge! You can follow along with the challenge here.


