


How to design wainscoting is one of those questions that feels deceptively simple until you actually start researching it. Height, spacing, trim sizes, doors, windows, outlets. Suddenly it feels like one wrong decision could throw the entire room off.
When I designed the wainscoting in my primary bathroom, I realized that most of the overwhelm came from thinking about it as one big decision instead of a series of small, logical ones. Once I broke it down, the process felt approachable and even confidence building.
In this post, I’ll walk you through exactly how I designed my wainscoting layout from start to finish. While my project was in a bathroom, the design approach works for any room: dining rooms, bedrooms, hallways, or other living spaces. The focus is on proportions, layering, and letting the room guide the layout so the finished result looks intentional and timeless.
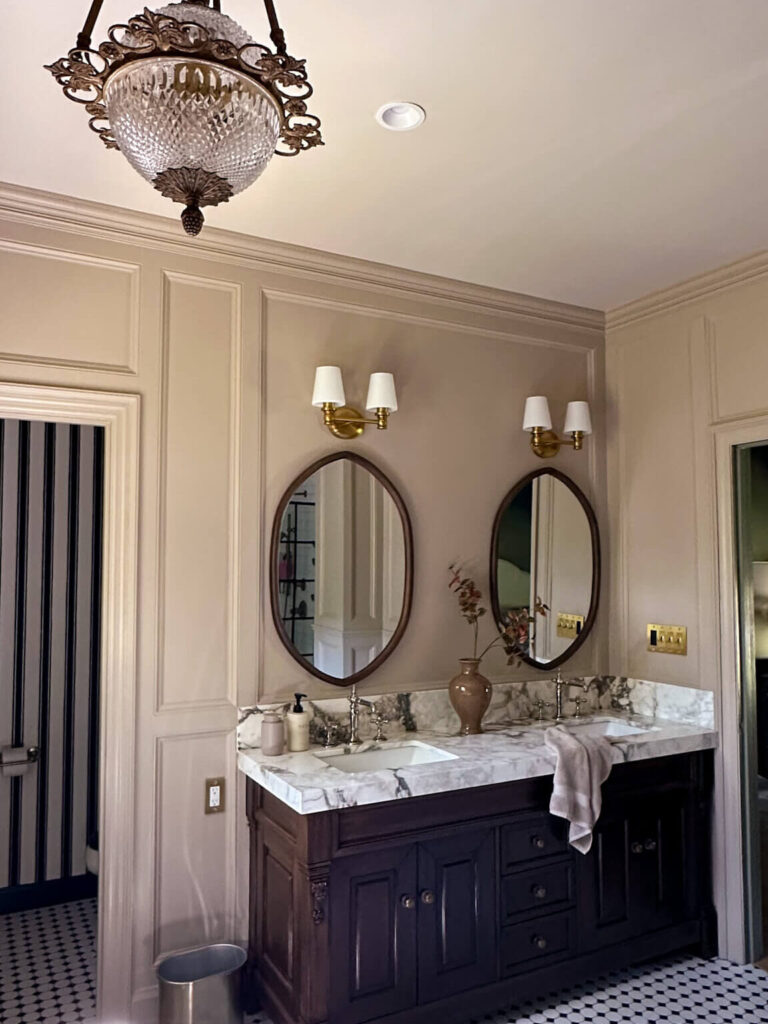
Sconces | Wall Color | Floor Tile | Brass Light Switches | Mirrors | Faucets | Vase | Vanity | Vanity Knob | Striped Wallpaper | Hand Towel | Chandelier (similar)
Start With Ceiling Height and Design From the Top Down
My ceiling height is 9 feet, and that measurement guided every decision. Instead of measuring wainscoting height up from the floor, I designed everything from the ceiling down.
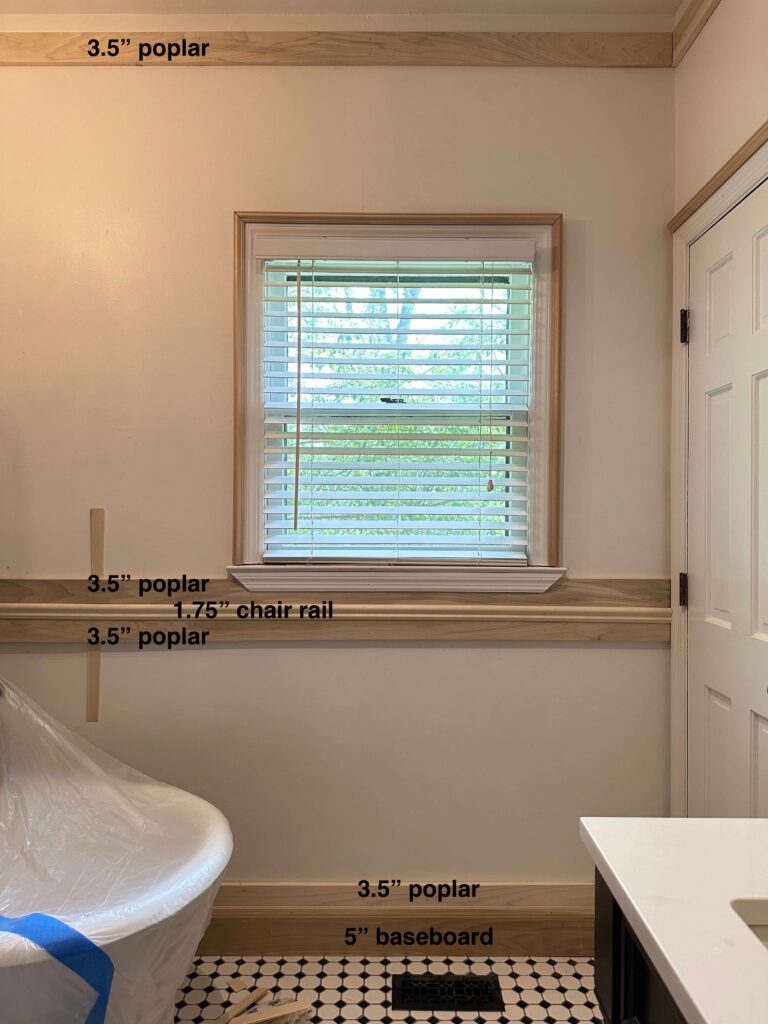
I started by measuring how far down the crown molding would come once installed. From that point, I added one inch above that line. This allowed my 3.5 inch horizontal board to sit just above the crown molding line. When the crown was nailed on top, the visible portion of that board ended up being 2.5 inches.
That 2.5 inch reveal mattered because it matched the width of my vertical boards (also called stiles). Keeping those proportions consistent made the entire design feel cohesive without needing exact formulas or rigid measurements.
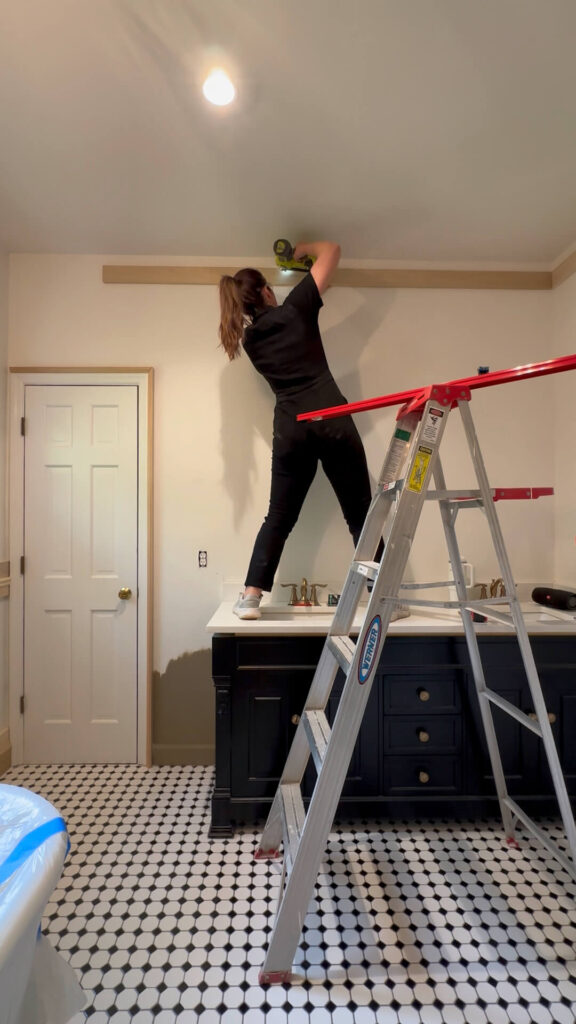
Starting with the top 3.5″ horizontal board, I marked and installed where the crown molding would over lap by 1 inch.
Use Layered Trim to Create a Built In Look
Rather than removing existing trim, I layered new boards on top of what was already there. This saved time and added depth that makes the wainscoting look custom.
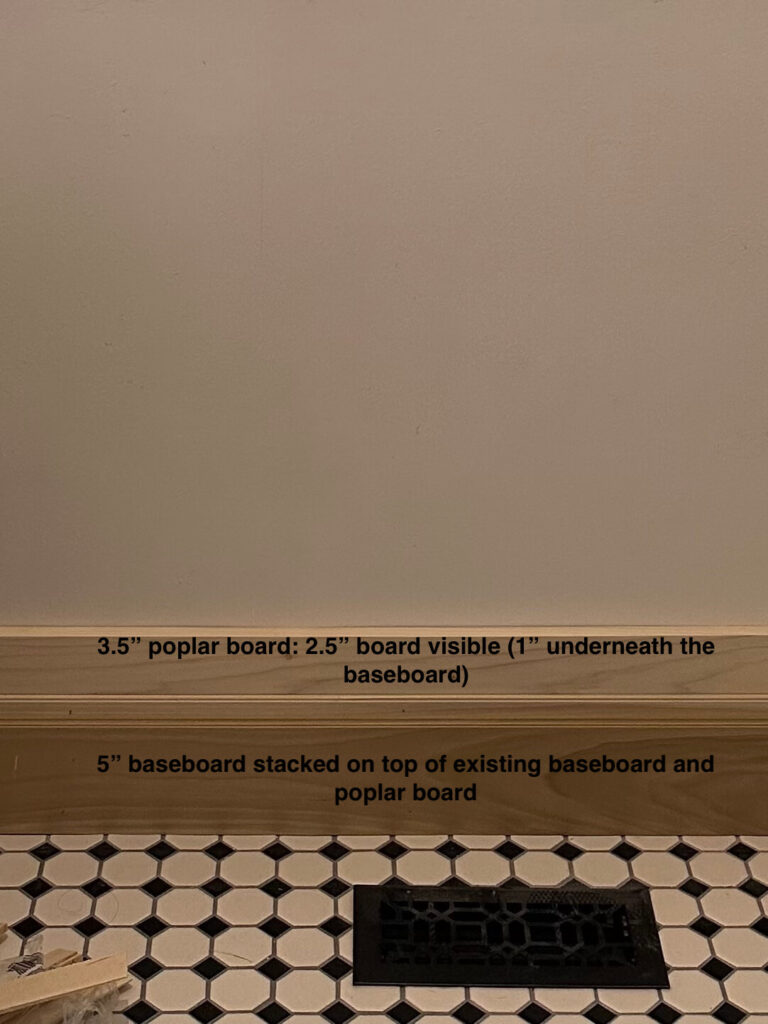
At the base, I stacked a 3.5 inch board on top of my existing 4 inch baseboards. Then I nailed a 5 inch baseboard on top of that stack. The result was a 2.5 inch visible layered section, which again matched the stile width.
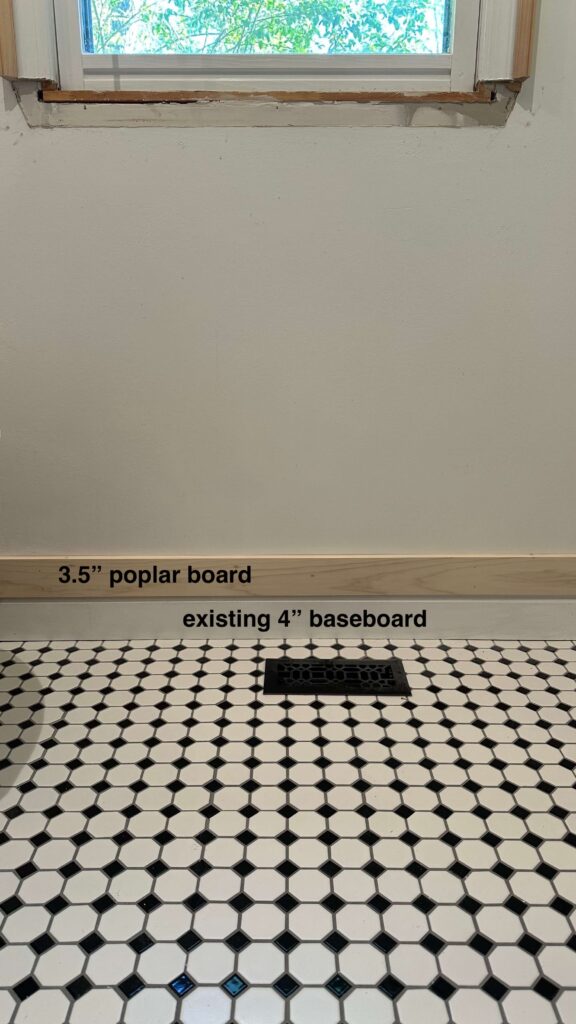
Installing the lower 3.5″ horizontal boards and new baseboards
I used the same approach for the chair rail. It sat centered between two stacked 3.5 inch boards, leaving (roughly) 2.5 inches of board visible above and below the chair rail. Repeating this dimension throughout the room created visual balance without calling attention to itself.
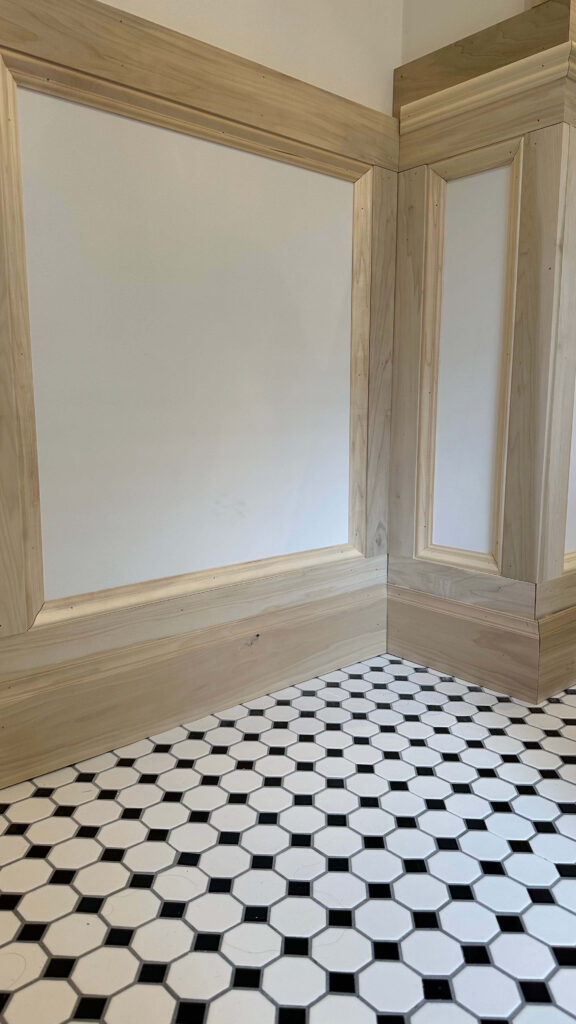
You can see how it quickly starts to create a custom layered look!
Install the Horizontal Pieces First
I did not sketch this out or mock it up digitally. Instead, I started with the above horizontal boards and started layering.
This was one of the best decisions I made during the entire process. Nearly all of the horizontal elements were already determined, with the exception of the chair rail height. I used the vanity and new countertop height as my reference point, since I knew I would be adding box trim above the vanity backsplash. Designing around that fixed element ensured the chair rail lined up cleanly with the box trim throughout the room.
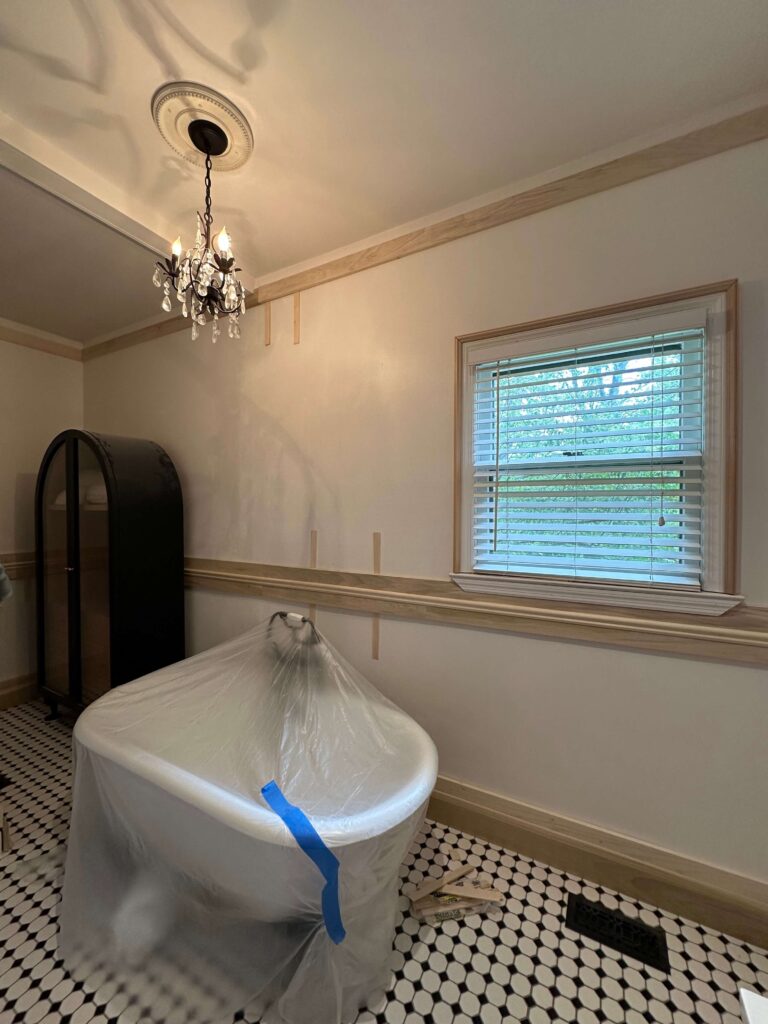
All horizontal woodwork installed! From here we can begin to visualize how big we want our boxes to be.
Let Doors and Windows Dictate Box Spacing
When it came time to design the boxes, I started above doors and windows. Those widths were already decided for me based on the size of the door and window openings. I installed 2.5″ poplar boards vertically in these areas first which gave me a great visual of how the room would start to look. Did you catch the measurements here? With the overlap on the horizontal poplar boards it’s left 2.5″ of visible board, which will now match our vertical pieces!
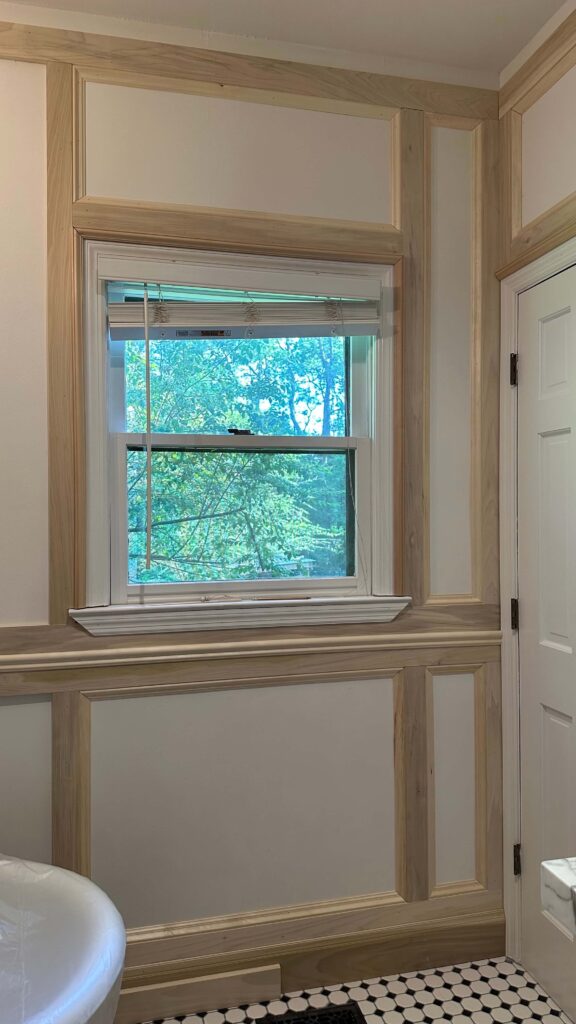
When designing and installing any kind of box trim, I find it easiest to start around a door or window first. They create pre-defined spacing which helps to get started.
From there, I worked my way around the room. The only wall that gave me pause was the large wall behind the bathtub. That was the one place where I had to decide between fewer wider boxes or more narrow boxes.
I stepped back, looked at the scale of the wall, and chose the option that felt calmer and more balanced, which for me, is a wider box. That moment reminded me that learning how to design wainscoting is as much about trusting your eye as it is about measurements.
Adding Picture Frame Molding Inside the Boxes
Once all of the horizontal and vertical boards were installed, I moved on to the picture frame molding inside each box. These pieces are cut to fit inside the larger boxes that are already built.
Horizontal 3.5″ Poplar | Vertical 2.5″ Poplar | 5″ Baseboards | Chair Rail | Picture Frame Molding
This step is very straightforward, and one that I had already done twice (see the dining room trim project and the primary bedroom trim project). I measured the inside dimensions of each box, cut my picture frame molding on a 45 degree angle, and nailed the pieces in place. Working inside an already defined frame makes this process feel much less intimidating, and this detail is what gives the wainscoting that finished, custom look.
Why I Installed Crown Molding Last
I installed the crown molding at the very end of the project, intentionally. Crown molding was a new skill for me, and I did not want to get discouraged early in the process. Waiting until all of the boxes were built allowed me to focus on one learning curve at a time.
During this phase of the project, the crown molding was nailed directly on top of the initial horizontal board that runs around the top of the room. Installing it last also meant I could see the full design before committing, which made the process feel much more manageable.
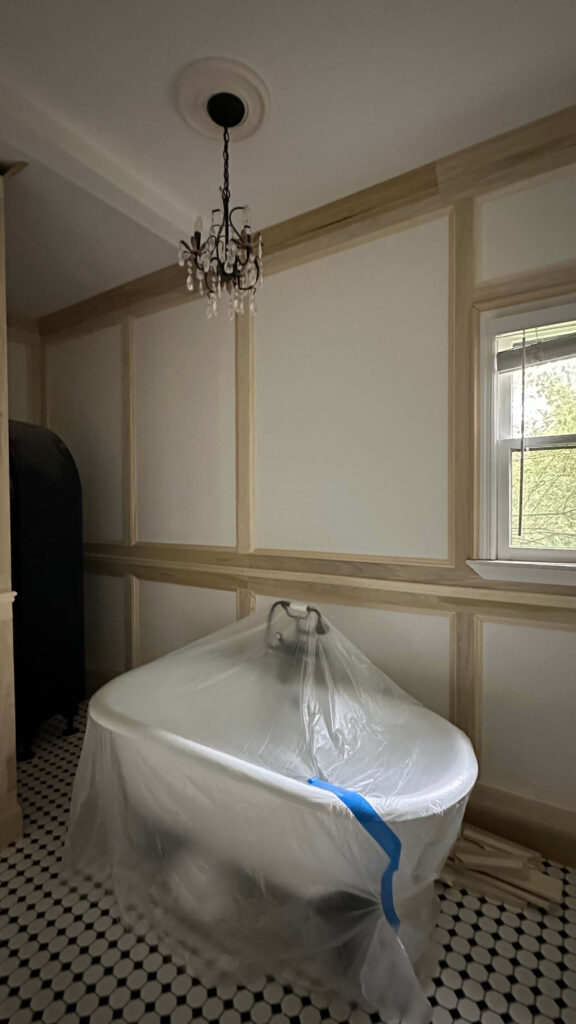
All trim installed in the primary bathroom!
I’ve since installed crown molding in my home office as well, and I put together a full crown molding tutorial that walks through this step in detail. If you’re considering adding crown molding to your house I can attest firsthand that it’s worth the trouble!
Plan Ahead for Windows, Trim Depth & Electrical
One thing I did not fully think through before starting was how the wainscoting would interact with a few existing room features.
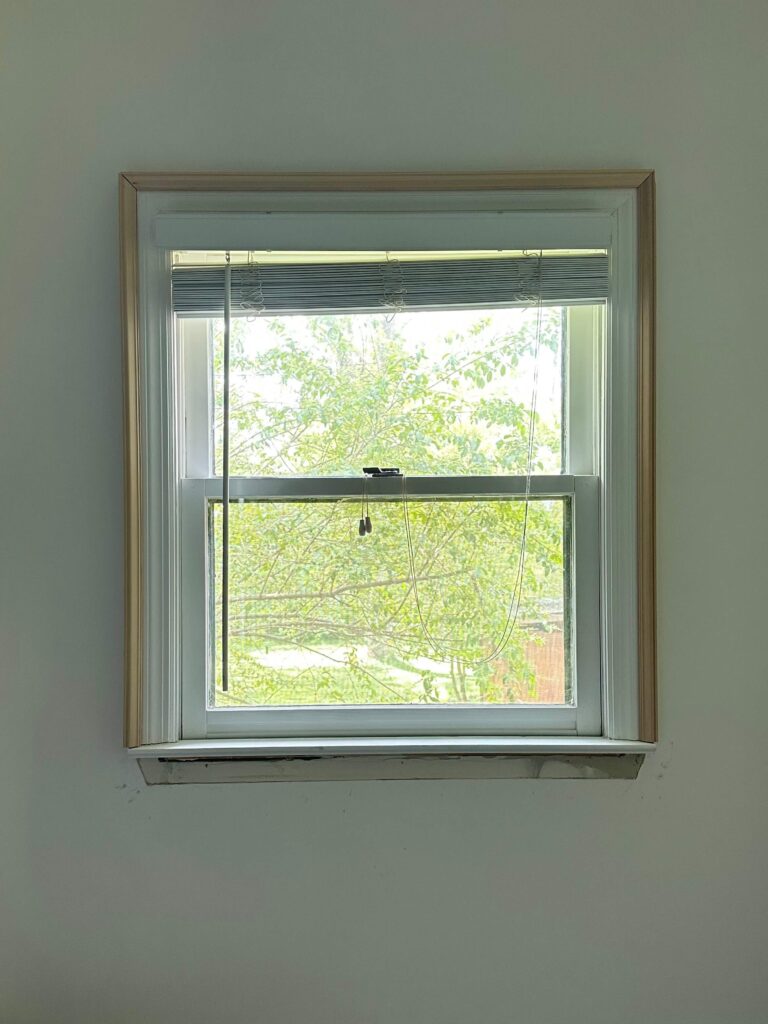
Window Sill
In order to properly layer the trim around the window, I had to remove the existing window sill, install the surrounding woodwork, and then build a new sill and trim piece. It was’t difficult, but it did add another day and another trip to the hardware store.
Door Frames
I also had to consider how the new boards would sit against the door frames. The existing door and window trim was not thick enough, so I added backband to increase the depth. This allowed the new boards to terminate cleanly without sticking out past the original trim.
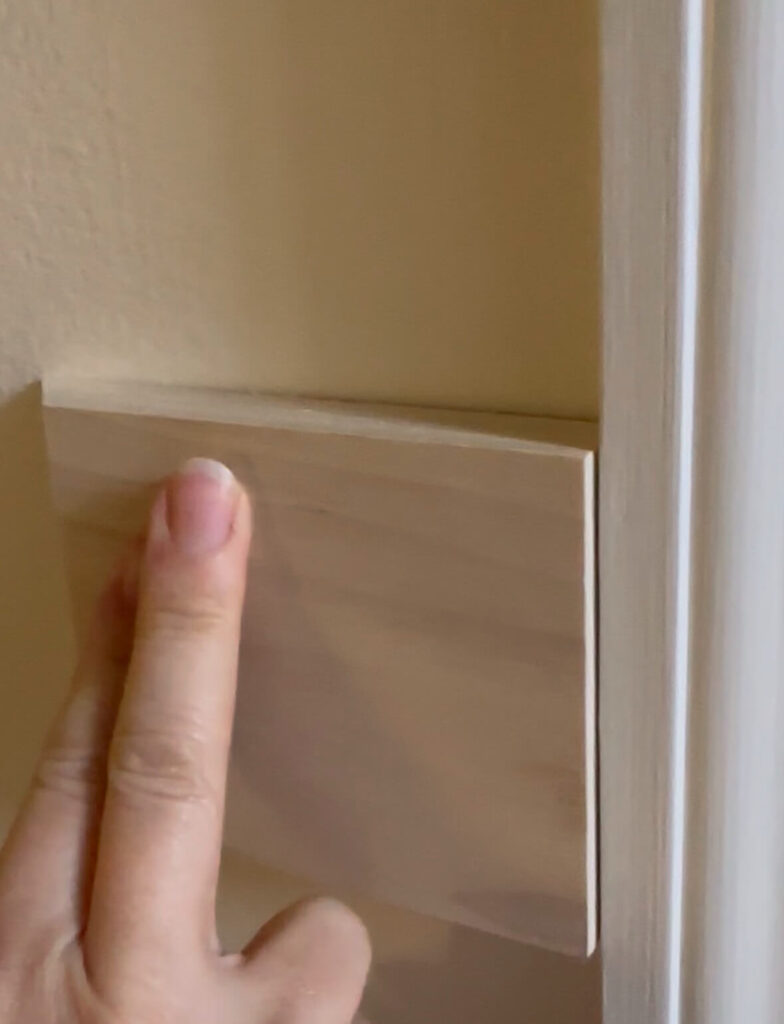
Left: an example of how the boards would extend over existing door frames & windows as is | Right: adding backband around the window frame is an easy solution to extend the profile depth
Electrical Placement
Unfortunately I also overlooked one existing electrical outlet, as it was too close to the door frame and needed to be moved. It ended up being an easy fix, but since I’m learning things as I go, this ate another day up.
A note for you: when designing take note of where your outlets and light switches are located. Some may be easy to move, but others may dictate your trim measurements and placements. Measure to make sure they won’t land awkwardly within a box or too close to a vertical board.
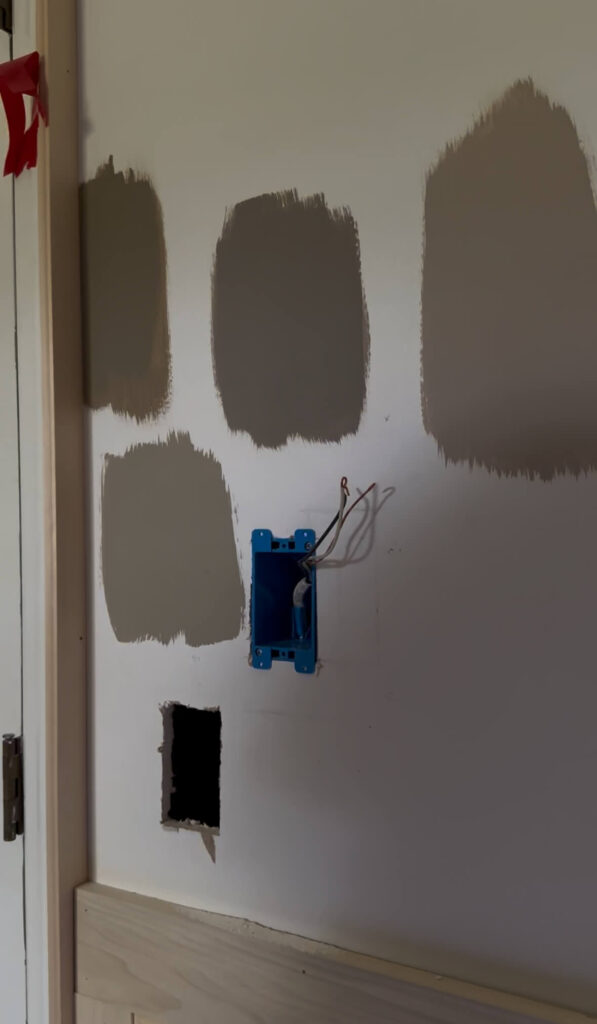
Relocating the existing light switch
Why This Project Was Easier Than I Expected
I was honestly nervous to attempt this project. My experience level did not feel advanced enough, and wainscoting can look intimidating when you see perfectly finished photos online.
However once I started, the process became repetitive in the best way. Measure, cut, nail, repeat. The design decisions felt clearer as the room filled in.
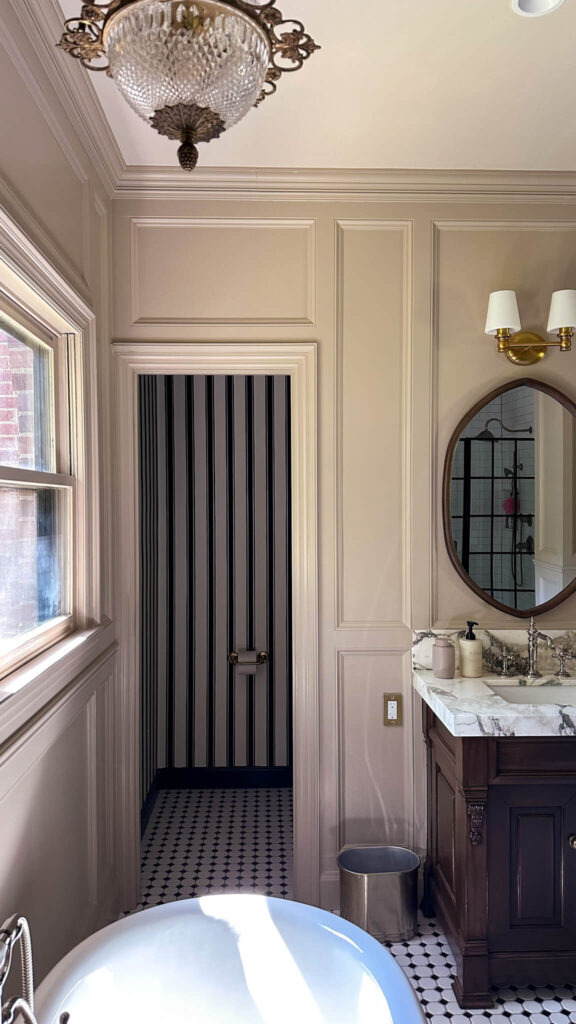
Striped Wallpaper | Sconces | Mirror | Faucet | Faucet Handles | Checkered Tile Flooring | Wall Color
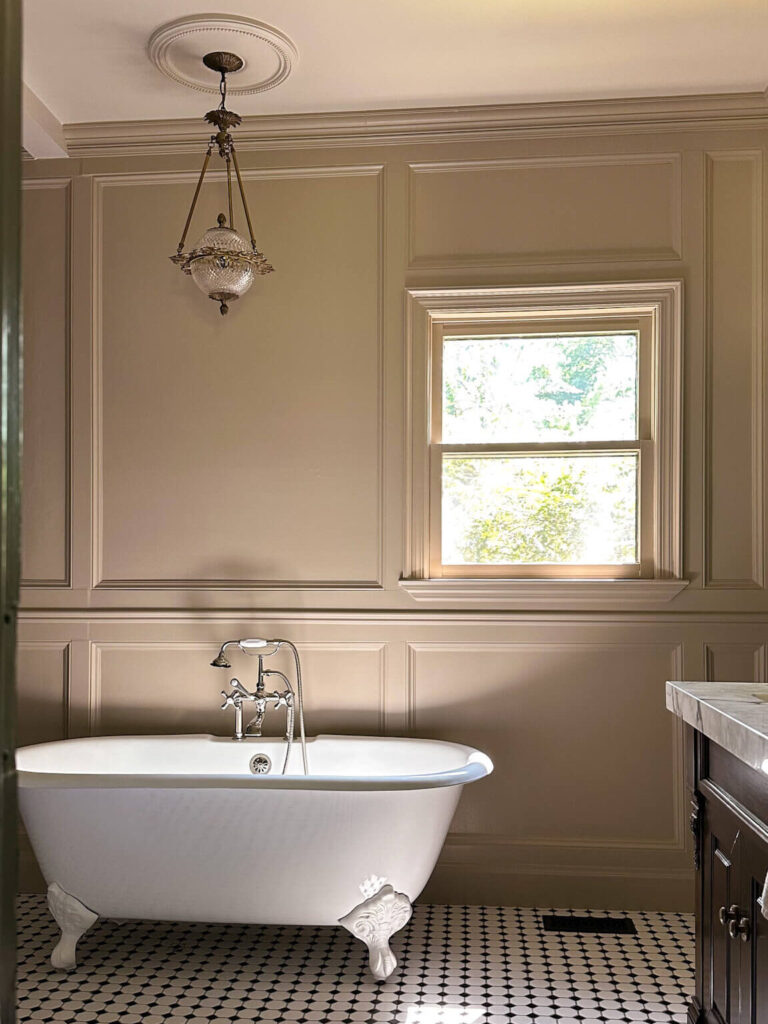
Floor Tile | Wall Color | Clawfoot Tub | English Style Faucet | Light fixture (vintage – similar)
If you’re hesitant because you do not feel skilled enough, don’t let that stop you. With some planning, measuring and determination, you’ll build confidence as you go.

Shop the Primary Bathroom
Final Thoughts on How to Design Wainscoting
Designing wainscoting is less about perfection and more about proportion and repetition. Consistent trim widths, layered details, and letting the room guide decisions make the process far more approachable than it seems at first.
If you take it step by step, you can absolutely design wainscoting that looks custom, intentional, and timeless.
Related Posts:
My Primary Bathroom Renovation Reveal
How To Measure Cut and Install Crown Molding
How to Design Picture Frame Molding (home office edition)
Designing Custom Trim in the Primary Bedroom
Designing Picture Frame Molding with an Existing Chair Rail (dining room)
Home Office Reveal (featuring dentil molding, chair rail and custom box molding)
Shop My Primary Bathroom Wainscoting + Supplies
Ornamental Mouldings Colonial Backband Moulding
Horizontal boards: Ornamental Mouldings 3.5″ Poplar Hardwood Board
Vertical (stiles) boards: Ornamental Mouldings 2.5″ Poplar Hardwood Board
Baseboards: Ornamental Mouldings Charlotte Baseboards (5.5″)
Crown Molding: Ornamental Mouldings Crown Molding
Trim inside boxes: Ornamental Mouldings Picture Frame Molding
Ornamental Mouldings Chair Rail


