If you’re searching for how to update your bathroom vanity on a budget, this step-by-step DIY tutorial will show you exactly how I transformed a black bathroom vanity into a warm walnut wood finish without sanding, stripping, or replacing the vanity.
This budget-friendly method uses liquid wood and gel stain to create a realistic wood look, making it ideal for homeowners who want a high-end result without the cost of a full renovation.
Why This Is One of the Best Ways to Update Your Bathroom Vanity on a Budget
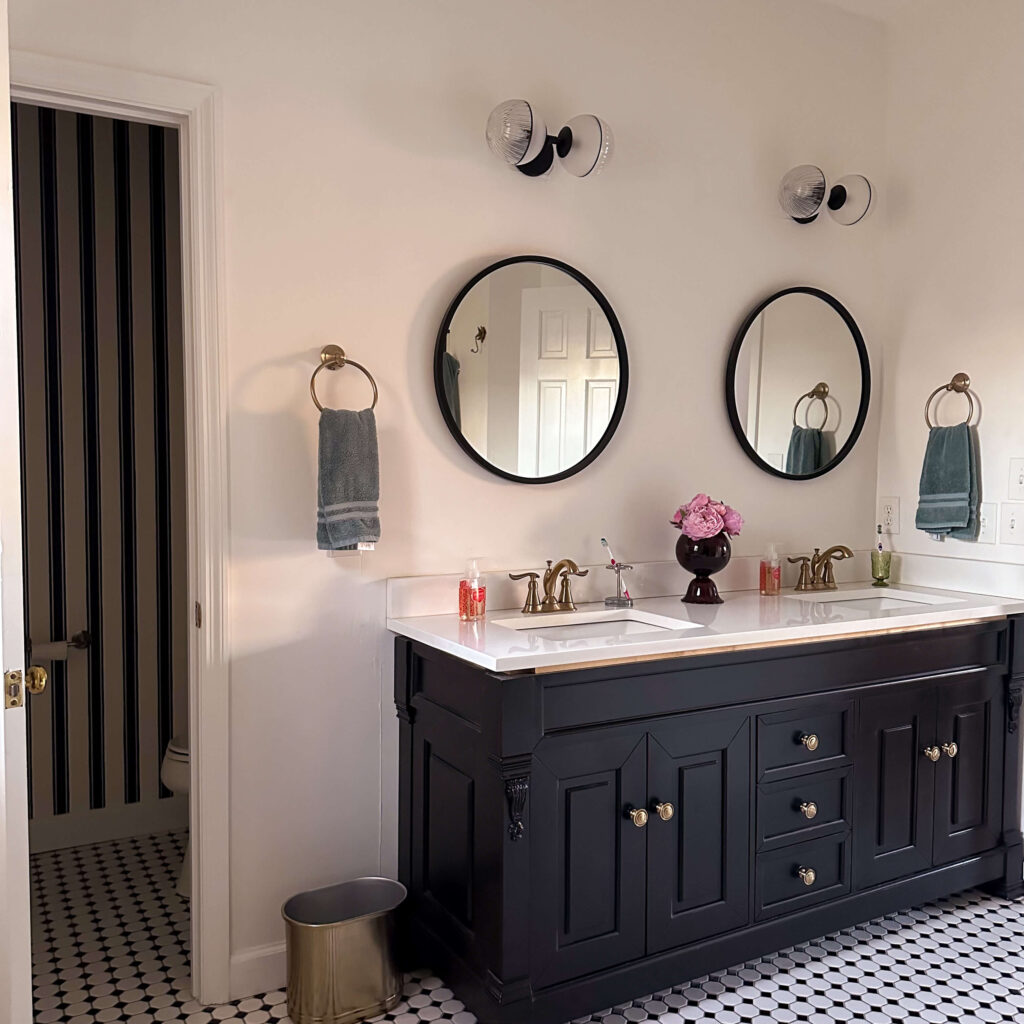
During my bathroom renovation, a countertop installation mistake permanently damaged the finish on my black vanity. Rather than replacing it, I decided to explore how to update a bathroom vanity on a budget using a refinishing method that didn’t require sanding or harsh chemicals.
As the bathroom design evolved, a wood-tone vanity felt like a better fit than black. This approach allowed me to completely change the look of the vanity while staying within budget.
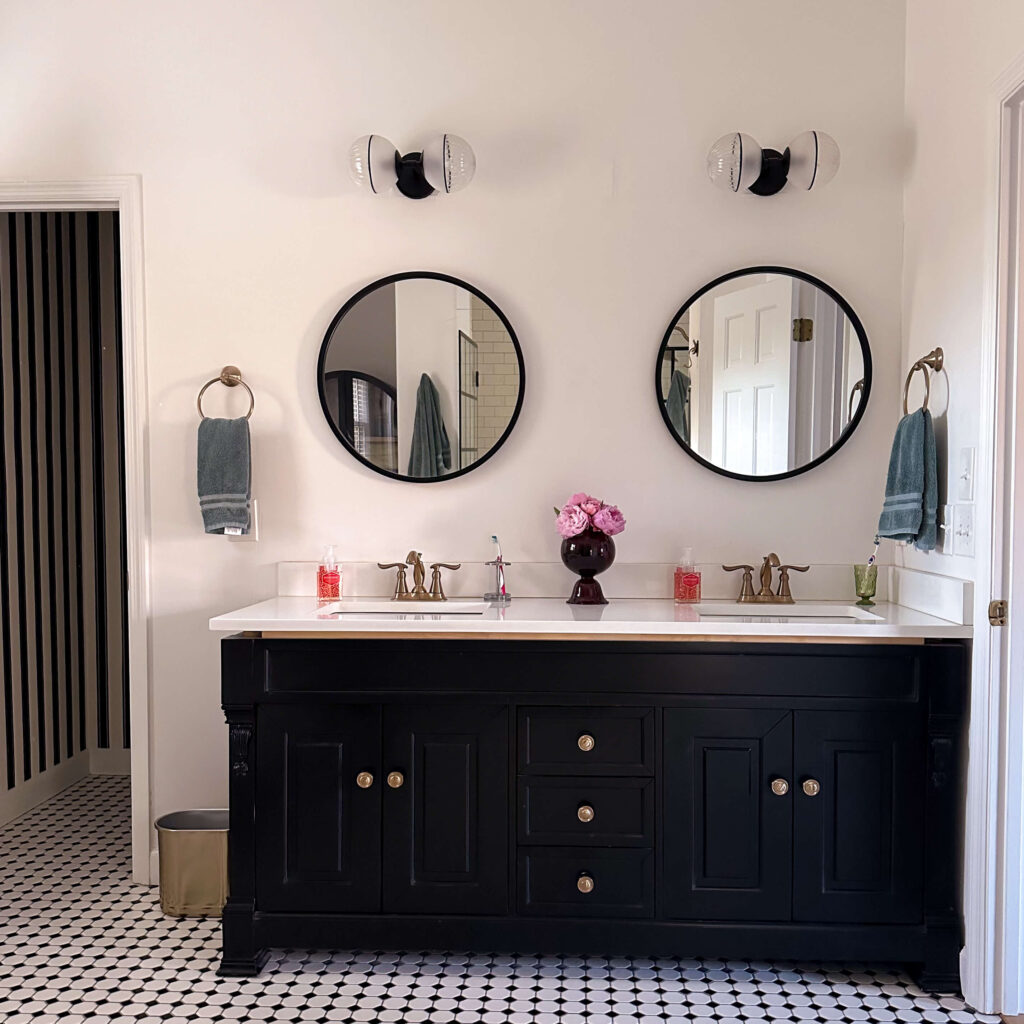
The bathroom vanity “before”
This Budget Bathroom Vanity Update Is Beginner-Friendly
This was not my first time using this technique. I previously used the same process to update a black dining table and achieved a light pecan wood finish. While I was initially nervous, once I got started I realized what a beginner friendly DIY this application really is.
A few more reasons why this method works so well for beginners:
- No professional tools required
- No stripping or heavy sanding
- Very forgiving application process
- Customizable wood tone
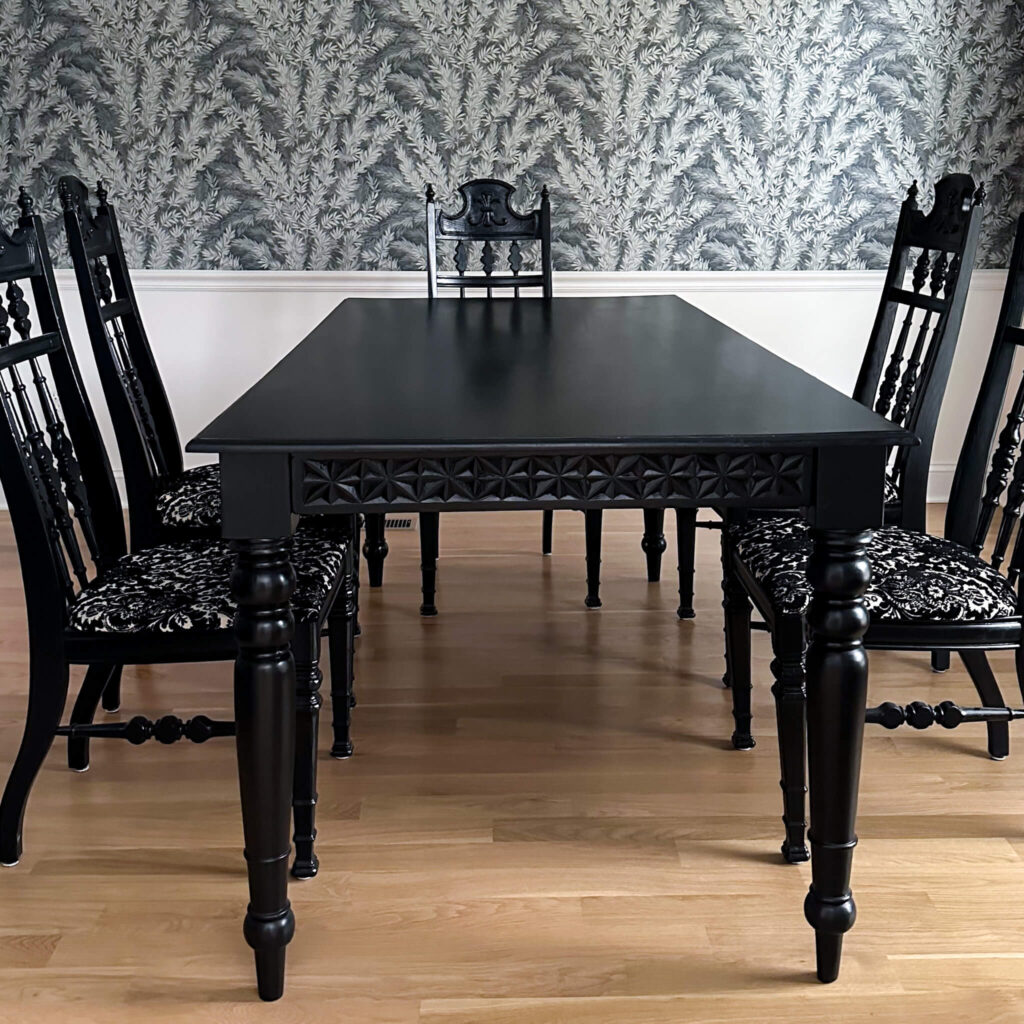
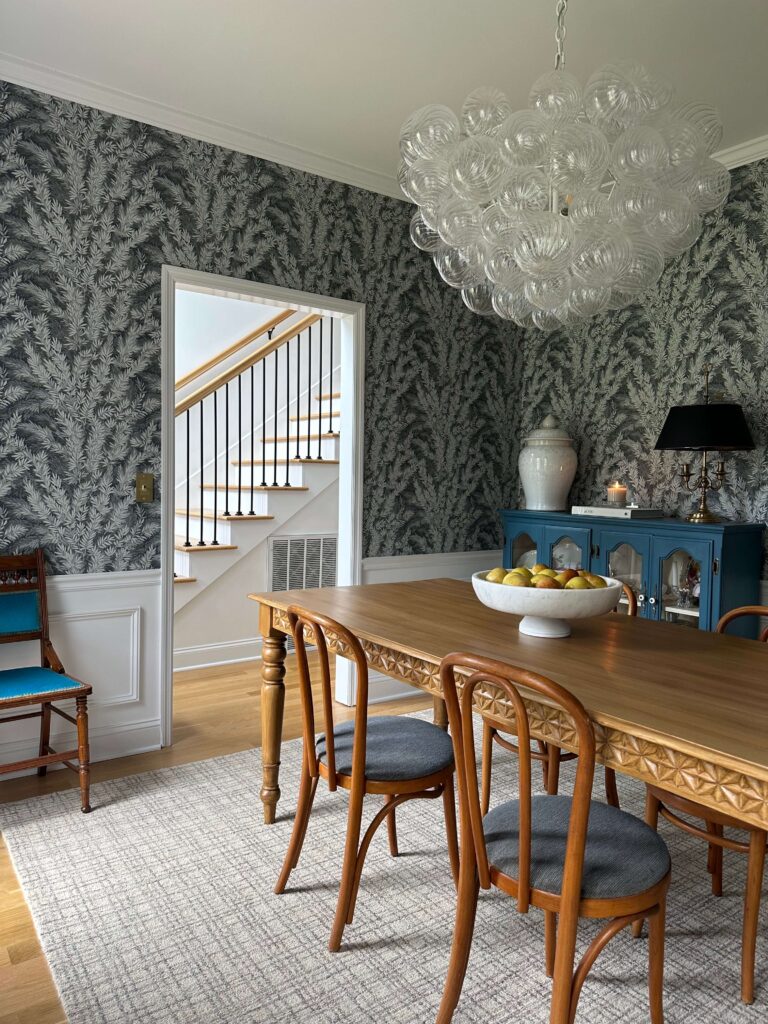
Not my first rodeo: read how I flipped my dining room table here
Supplies Needed to Update Your Bathroom Vanity on a Budget
To complete this budget bathroom vanity update, you’ll need:
- Liquid wood (light wood tone)
- Walnut gel stain
- Polyurethane top coat (satin recommended)
- Paintbrushes
- Clean rags and paper towels
- Drop cloth
- Painter’s tape
- Warm water and dish soap
- Medium-grit sandpaper (light scuff only)
- Tack cloth
These supplies cost significantly less than replacing a vanity and deliver a long-lasting result.
Step 1: Prep the Vanity
Remove all the doors, drawers, hinges, and hardware. Getting everything out of the way makes application smoother and helps you avoid drips. Next you’ll want to give everything a good cleaning:
- Dust the vanity with a microfiber cloth
- Wash using warm water and dish soap
- Avoid harsh cleaners or degreasers
- Allow the surface to dry completely
This ensures the new finish adheres properly.
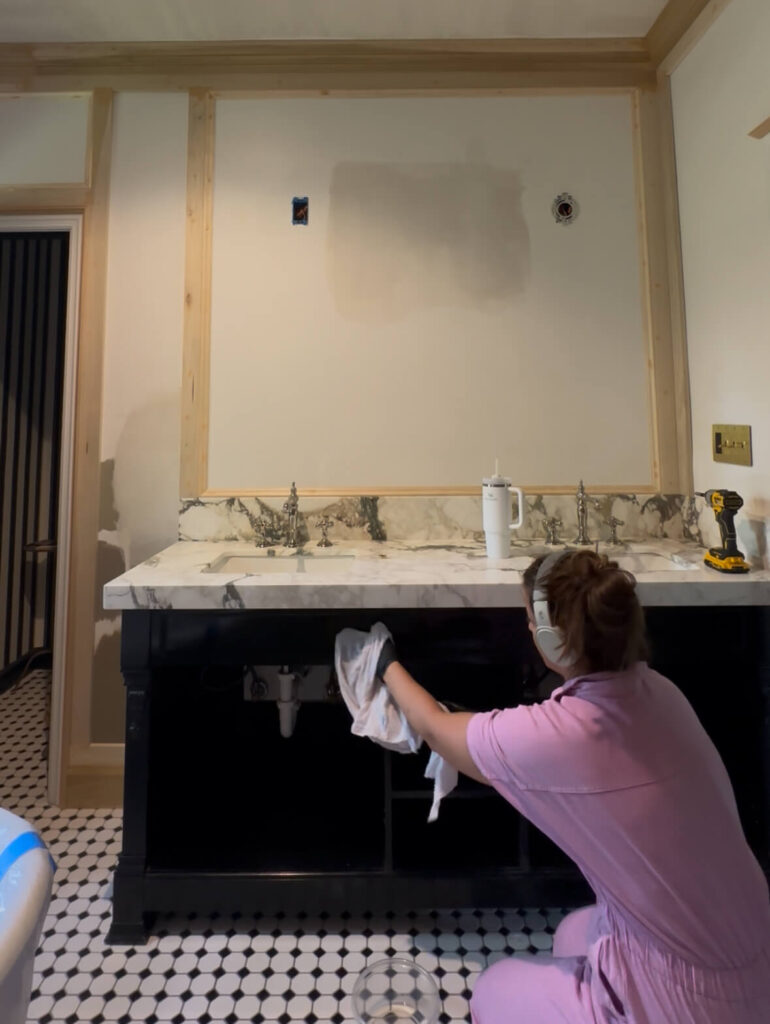
Taking the time to properly prep will give you a professional finish
2. Lightly Sand (No Stripping Required!)
All you need is a quick scuff-sand to rough up the surface. This gives the Liquid Wood something to grip onto. No chemical strippers or heavy sanding needed. Use a medium-grit sandpaper and gently rough the surface (you don’t need to remove the finish). Wipe with a clean rag, and finish with a tack cloth.
3. Apply Liquid Wood to Create a New Base
This product is the game-changer. It’s made with real wood fibers, so once it’s dry, you’re staining actual wood.
- I applied 4 thin coats with a paint brush for full coverage (because my base color was black).
- If you’re working on a lighter vanity, 2–3 coats may be enough.
- Let each coat dry for about 6-8 hours
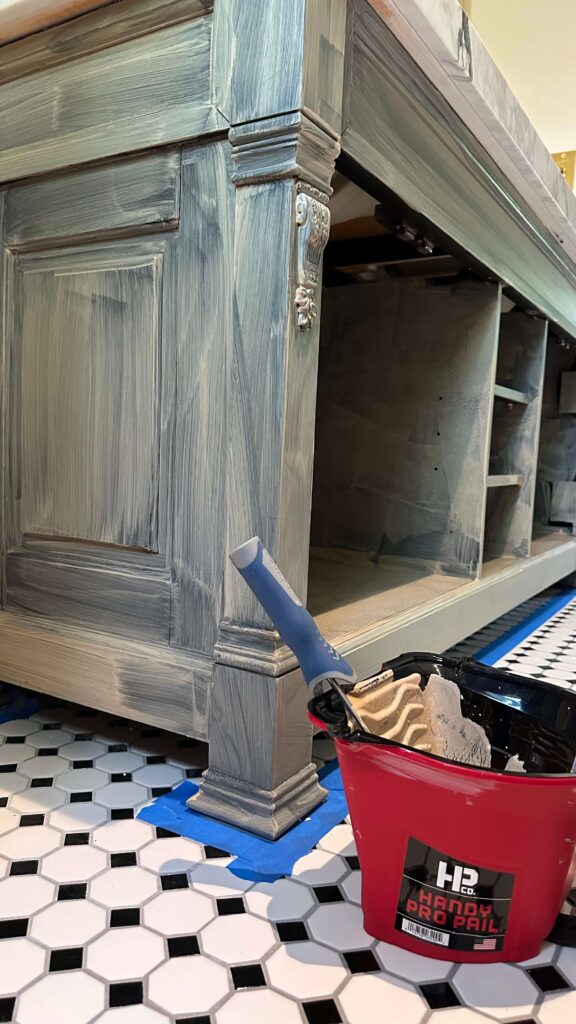
Apply enough coats of the liquid wood to get an even coverage like this
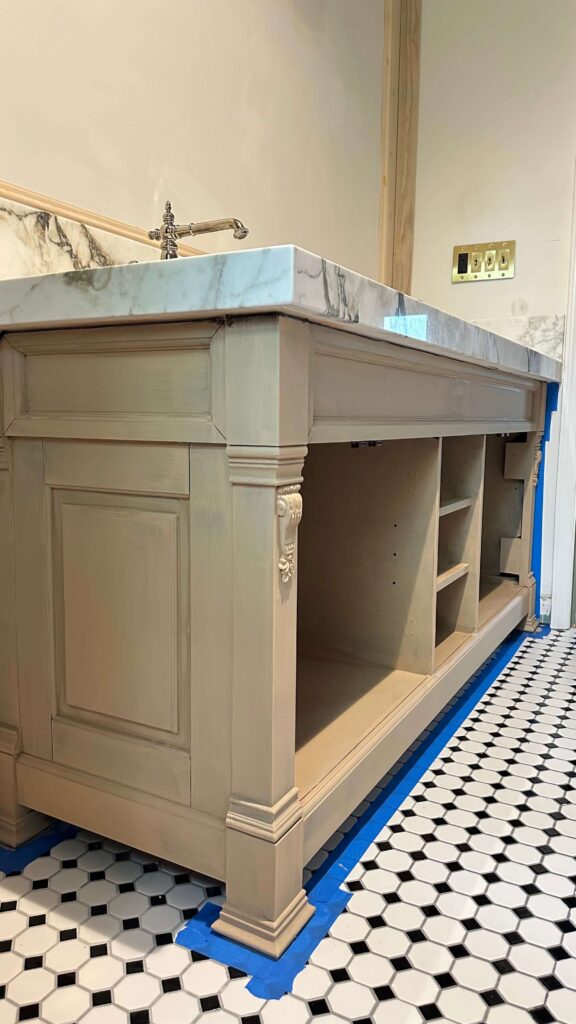
4. Apply the Stain of Your Choice
Once you have the coverage you need with the liquid wood it’s time for the stain! For my vanity I wanted something a little dark and with a warm undertone, so I chose this Varathane Gel Stain in Walnut.
How to apply:
- Brush on the gel stain and let sit for about 1 minute or more. The longer it sits, the more saturated the stain will be.
- Wipe off with a rag or paper towel
- For cabinet doors or detailed areas apply the gel with a rag to rub into crevices, then wipe back to control the color
The number of coats is a personal preference but my theory is it’s always easier to apply more, but it’s harder to go backwards once it’s on. That’s why I don’t let mine sit for very long before wiping and do multiple coats to control the color. For my vanity specifically I did two coats on the base and I needed to do 3 on the doors specifically in the crevices.

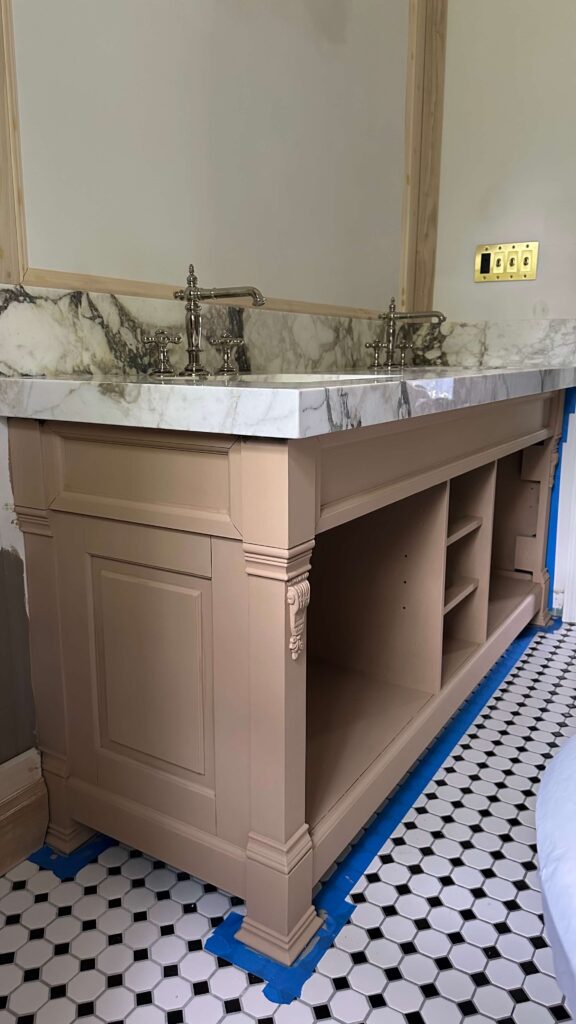
The vanity with one coat and two coats of gel stain (in walnut)
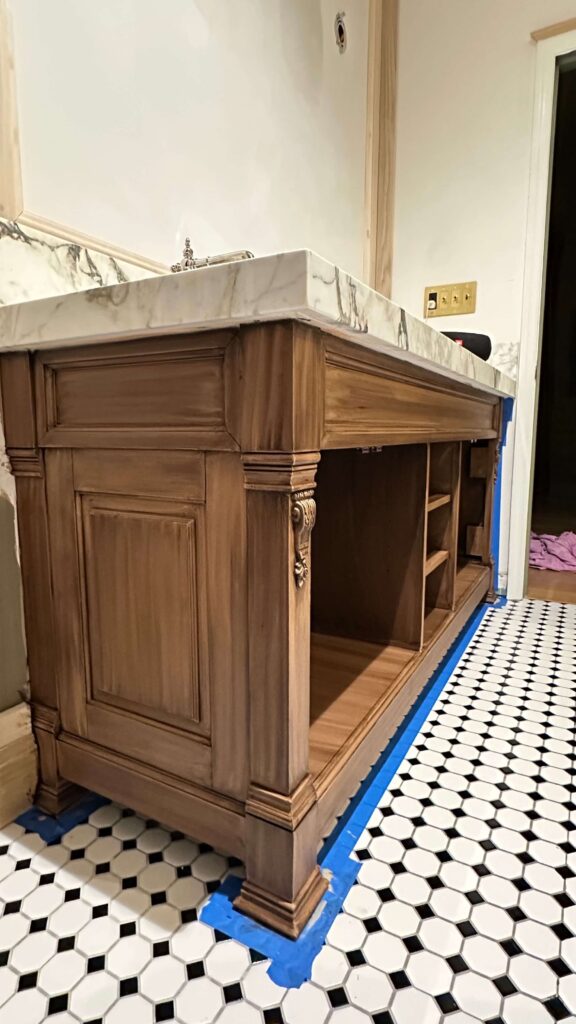
5. Seal the Vanity for Durability
Because bathroom vanities take a beating, I sealed everything with 2 coats of Minwax Polycrylic in Satin. This finish adds durability and just the right amount of soft sheen.
You don’t have to, but I chose to give everything a light scuff in between coats with a 220-grit sandpaper. Definitely do not skip this step because it protects the finish and prevents staining or color transfer.
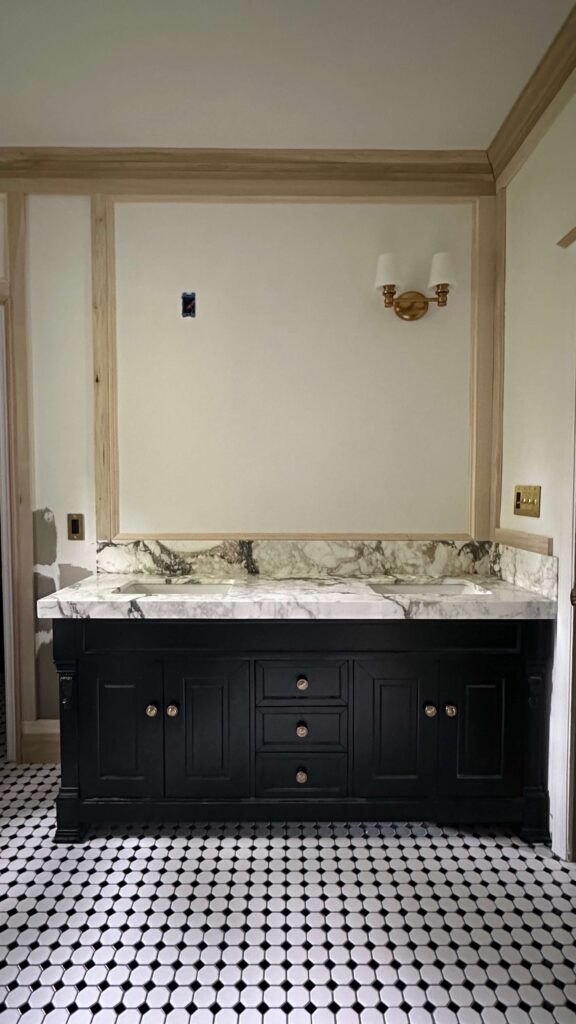
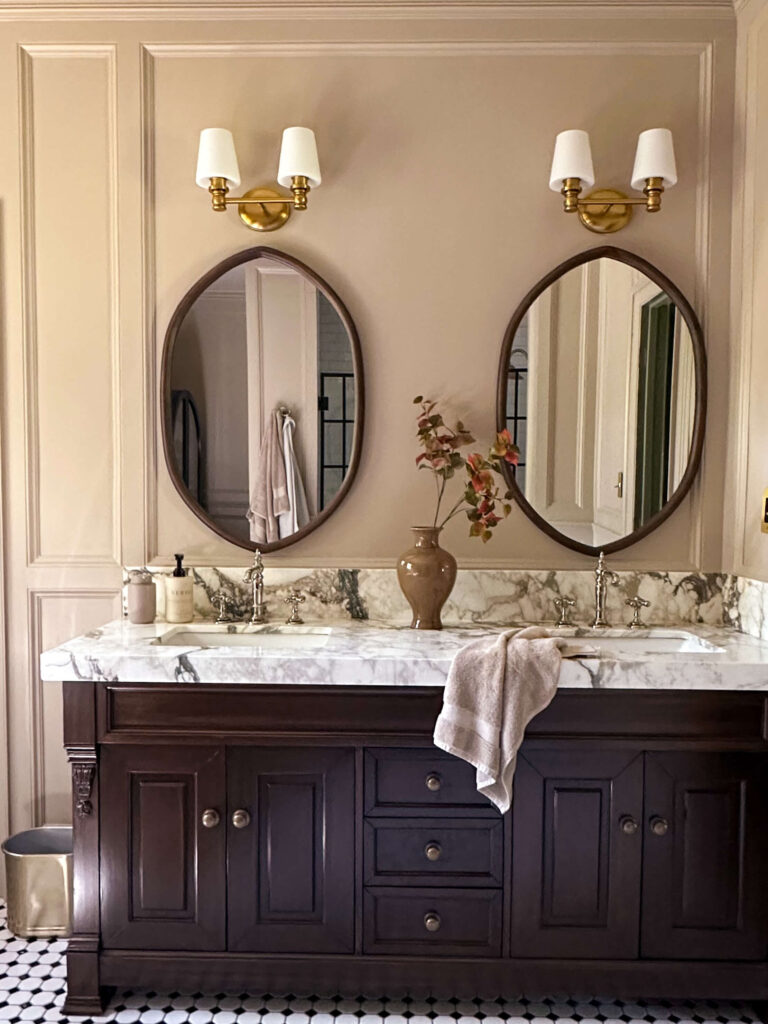
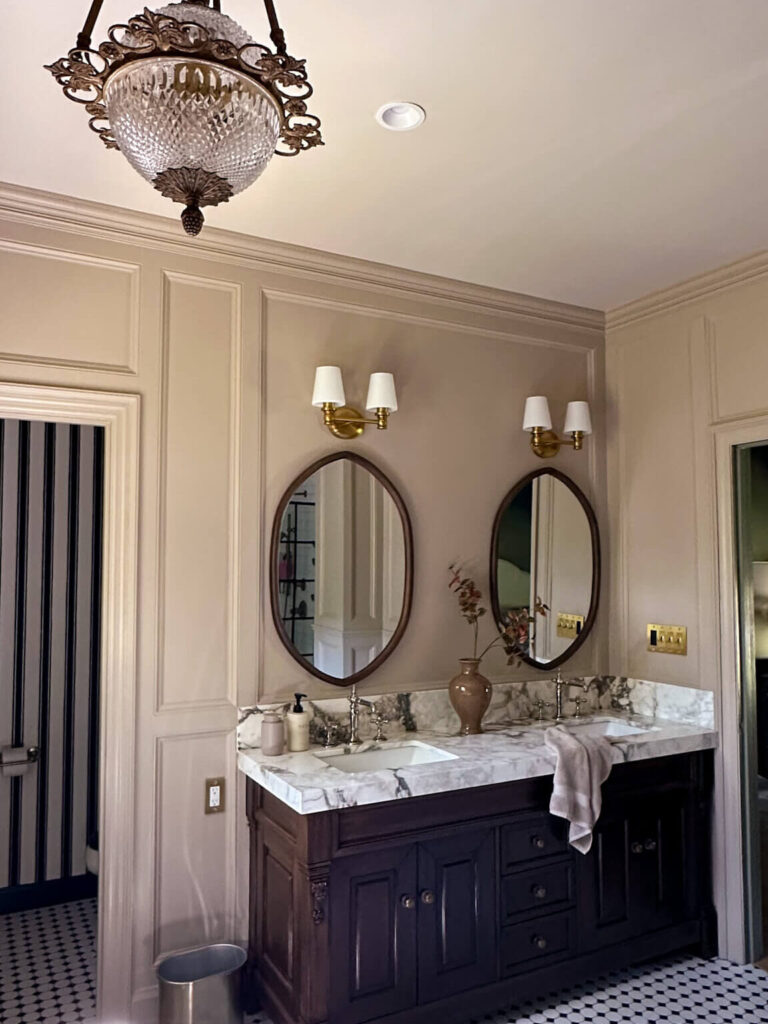
Final Result: A Budget-Friendly Bathroom Vanity Transformation
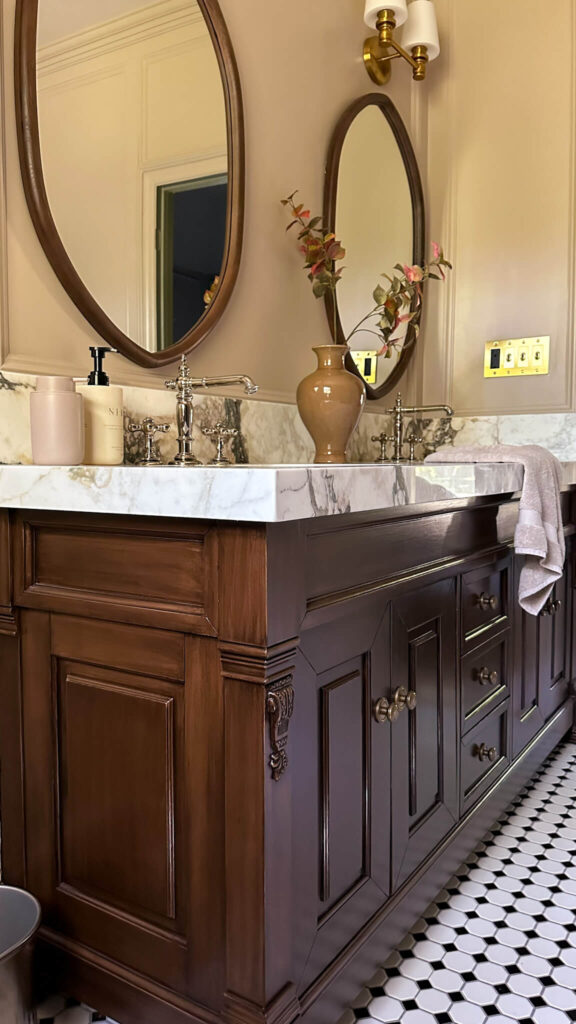
The finished vanity now has a warm walnut wood finish that complements the bathroom design and looks far more expensive than it actually was.
This project is proof that learning how to update your bathroom vanity on a budget can completely transform your space without replacing major fixtures.
If you’re planning a bathroom refresh and want a realistic, affordable solution, this method is one of the easiest ways to update your bathroom vanity on a budget.
Shop the DIY Bathroom Vanity Makeover
- Retique It Liquid Wood
- Varathane Gel Stain in Dark Walnut
- Minwax Polycrylic Satin Top Coat
- Handy Paint Pail Supplies
- Painter’s Tape
- Drop Cloths
- Sand paper
- Tack cloths
- Brass Knobs
- Brass Backplate
- Bathroom Vanity
- Faucets + handles
- Floor tile
- Mirrors
- Light Sconces
- Wall color
- Additional bathroom sources