When I bought this house, the exterior was one of those things I kept telling myself I’d get to eventually. The landscaping was overgrown. The trim was a tired yellowish cream that didn’t do the brick any favors. The garage door looked like it belonged on a different decade’s house. There was a lot to do, and every time I thought about tackling it, I felt immediately overwhelmed and moved on to something inside instead. What finally shifted things for me was deciding to approach this as a phased exterior home renovation. Not something that had to happen all at once, or even within one budget cycle. One project per year, done in the right order. That was the plan, and it changed everything.
Four years later, I’ve completed a series of projects that have the exterior of my house feeling more cohesive. Here’s everything I did, in the order I did it, and why the sequencing mattered just as much as the budget.

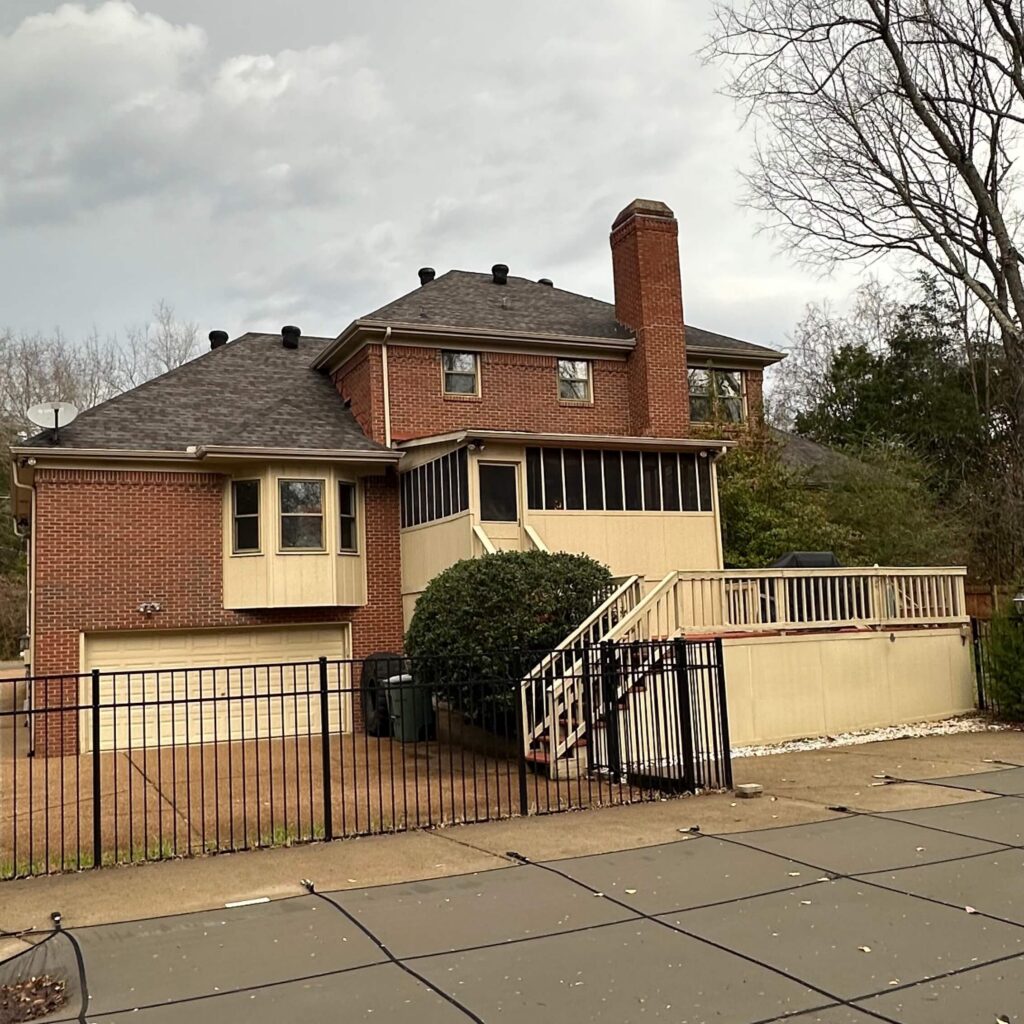
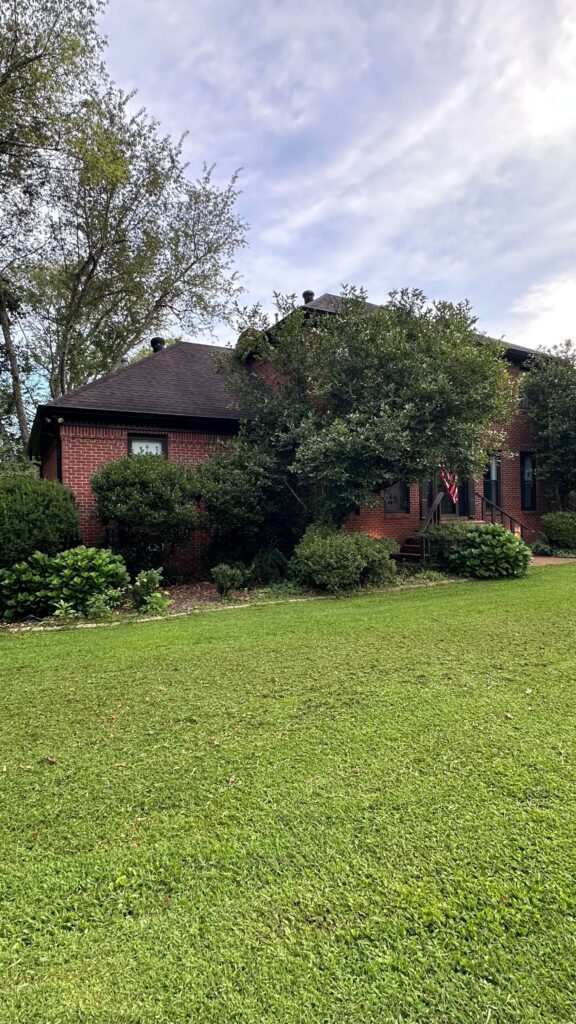
My House on Closing Day (2018)
Why a Phased Exterior Home Renovation Actually Works
I want to be upfront about something: exterior work does not come naturally to me. Interiors make sense to me intuitively — I understand how to layer a room, how to make a space feel right. But the outside of a house? It can feel like a different language, and an expensive one.
My house is three stories in the back. The original landscaping had been growing in the same beds for 30-plus years. Some of these projects genuinely required professionals, and others I just wasn’t ready for yet (financially or mentally).
Doing it in phases meant I could stay in the game. I wasn’t blowing my entire renovation budget in one season and then living with half-finished results. I could think carefully about each project, save for it intentionally, and execute it well. That approach also meant I learned as I went, which changed what I prioritized as the years passed.
Phase 1: The Garage Door
In 2023, the first thing I changed was the garage door. This felt like a small-ish decision at the time, but the impact was anything but.
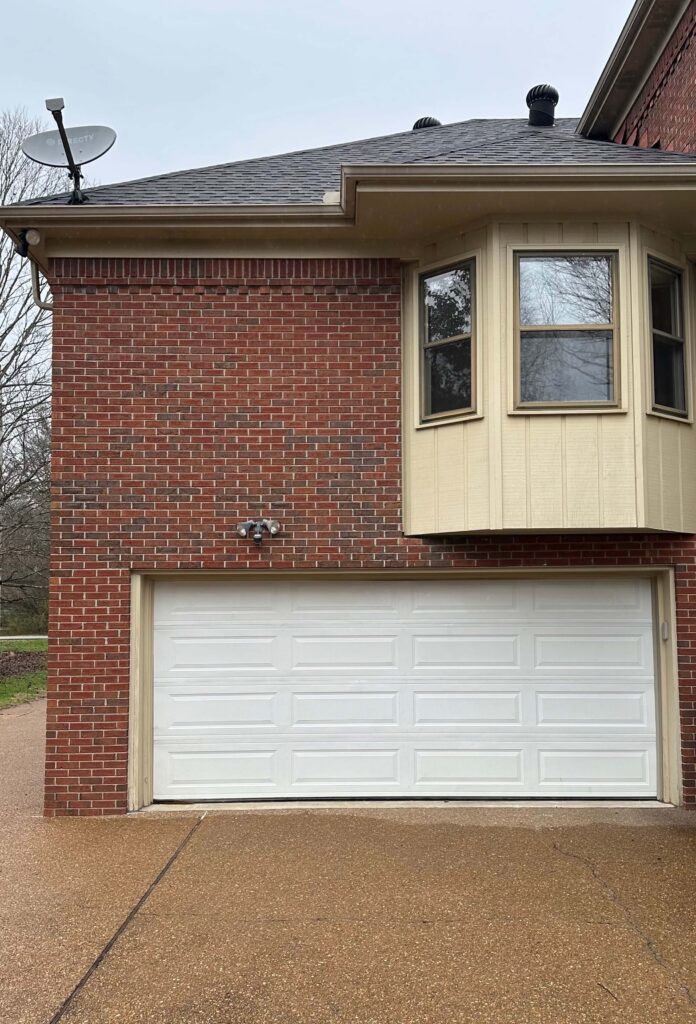
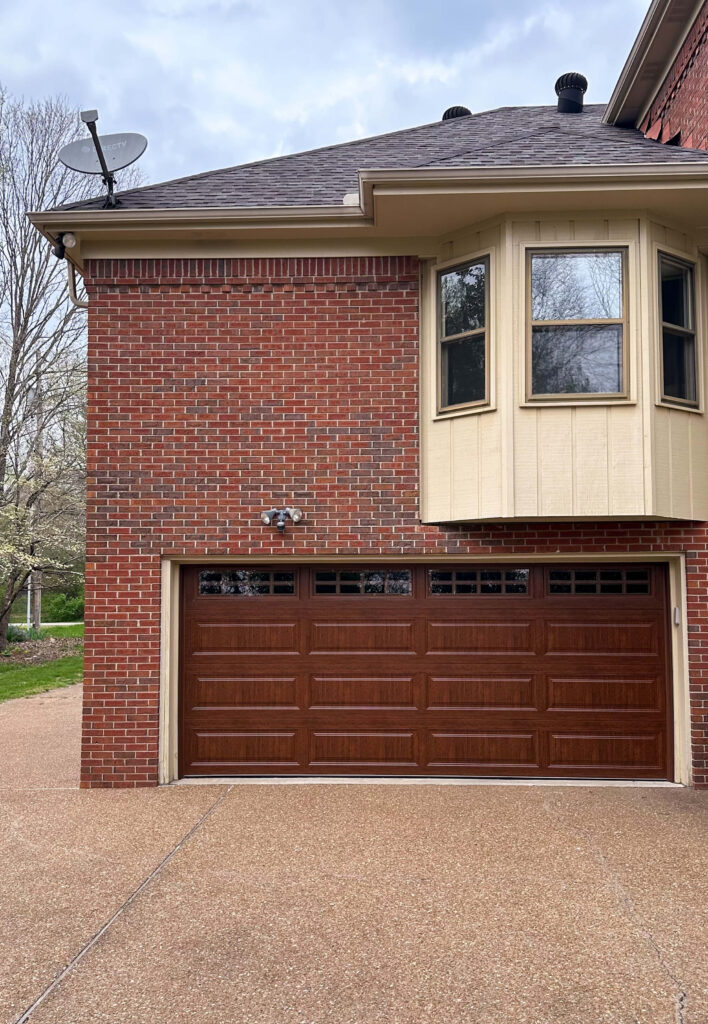
The original garage door, the band-aide door, and the final door
A garage door covers a significant portion of most homes. Luckily mine is in the back of the house but it was still dated and pulling the whole look down. Replacing it was the kind of change that made me walk outside, look at the house, and think “Oh, that’s what’s possible.”
One upgrade, and suddenly the rest of the exterior felt like it was worth investing in. It gave me the momentum to keep going.
Cost: $3,400 | Hired out
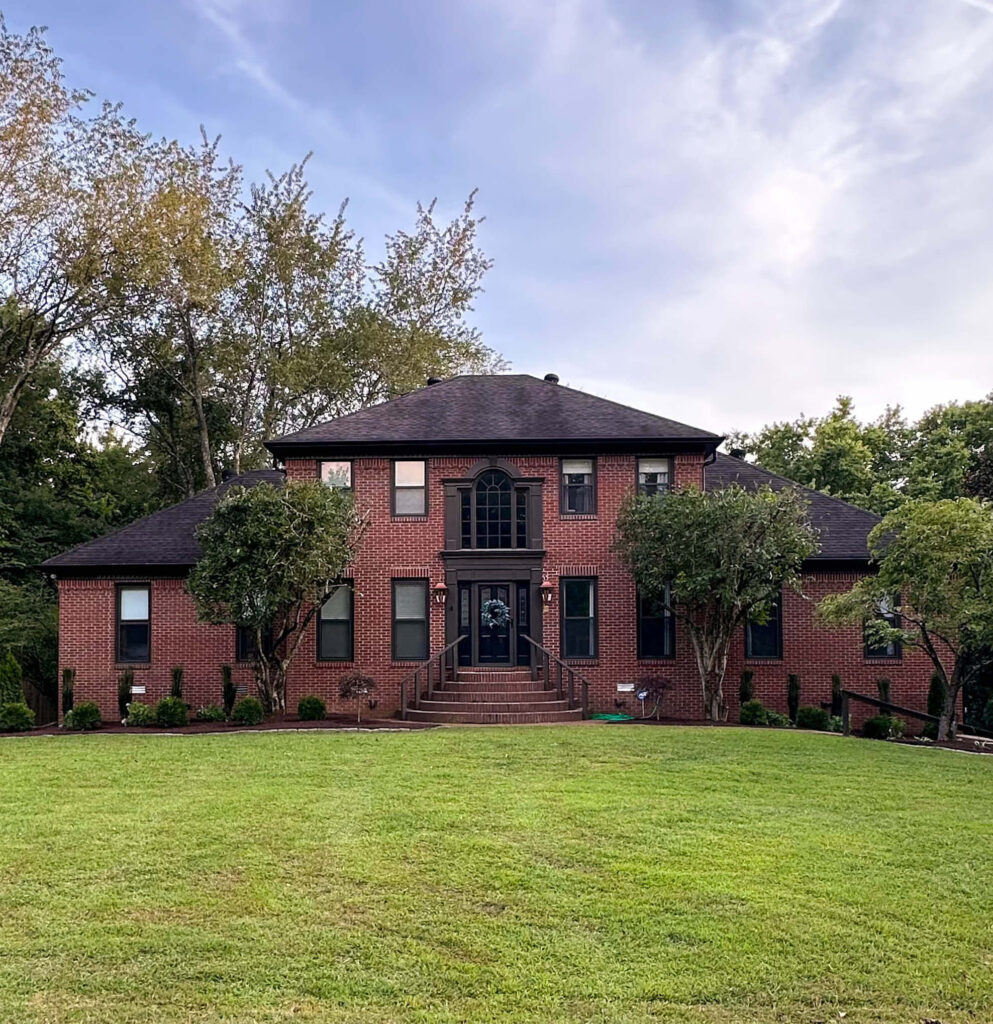
Phase 2: The Trim, the Gutters, and the Lanterns
The second year brought the biggest visual transformation, but was also the most expensive.
The original trim was that dated, yellowish cream that can make even a beautiful brick home look tired. Nothing about it was intentional. I went back and forth on colors for a while (more on that here) before landing on Black Fox by Sherwin Williams, a smoky gray-brown that reads almost black in certain light. Against the warm brick, it’s exactly the contrast I was looking for — moody without being heavy, modern without abandoning the character the house already had.
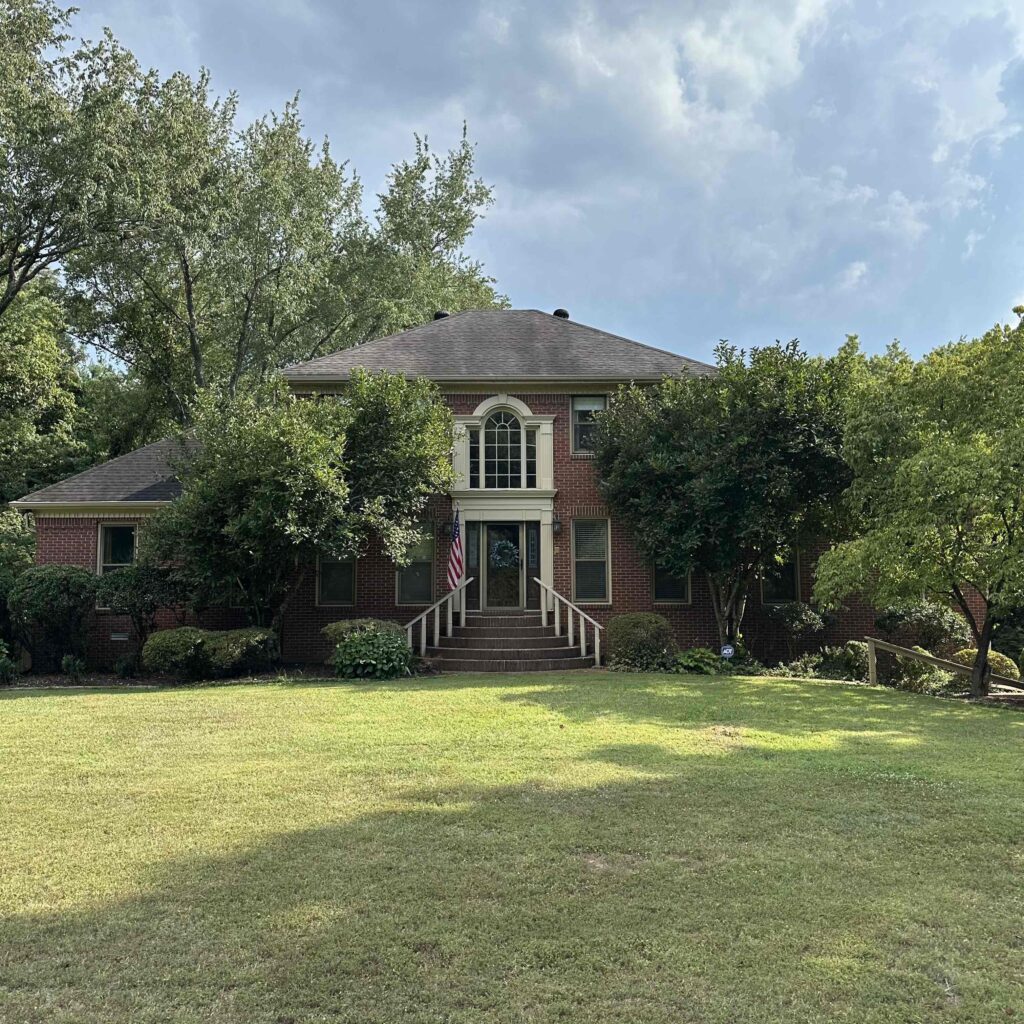
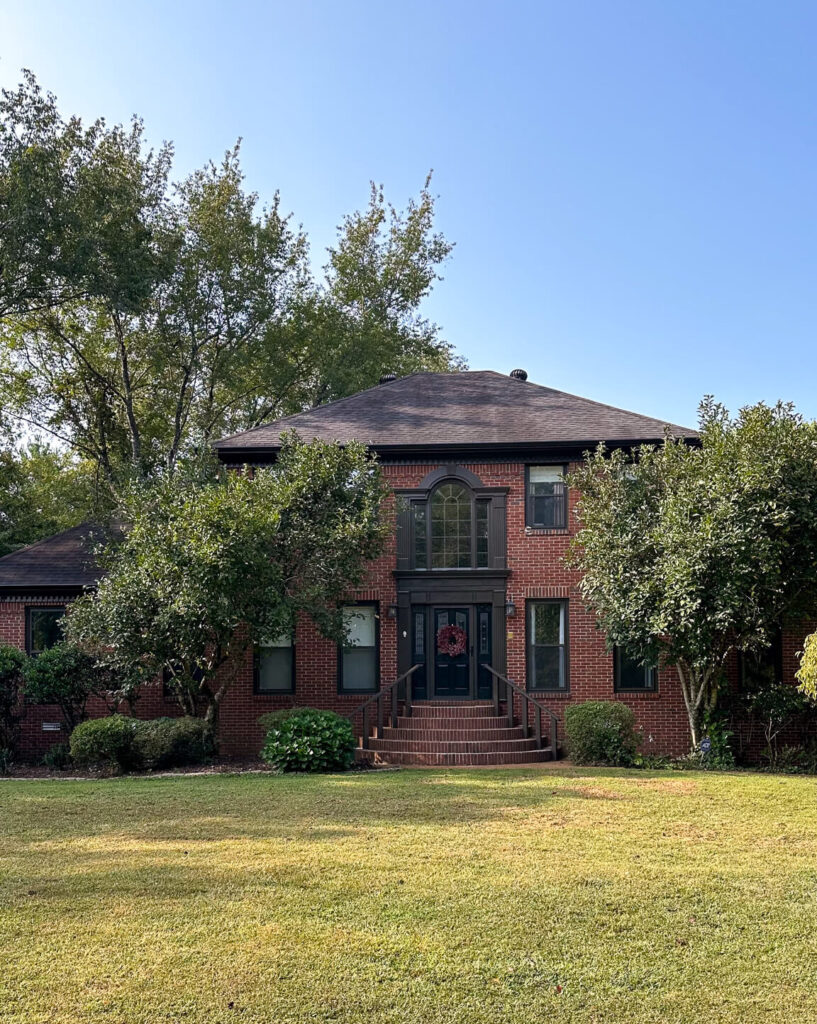
The front exterior before and after paint
One decision I felt very settled on: I left every single brick alone. No painting, no limewashing. The brick didn’t need to change, and making a permanent or difficult-to-reverse decision on it wasn’t something I was willing to do. Black Fox on the trim did all the work I needed it to do.
The front exterior before and after paint
While the painters were already on site and scaffolding was already up, I also replaced the gutters and added copper lanterns at the same entry points. If contractors are already there, make it count. Bundling those projects together saved me from paying for a separate mobilization, and the new gutters and lanterns finished the look in a way I couldn’t have planned for if I’d done them separately.
Painting: $6,669 | Gutters: $5,418 | Wood Rot repair: $1200 | Lanterns: $813 | All hired out
Phase 3: The Front Landscaping
The third phase of this phased exterior home renovation required patience more than anything else. And patience, it turns out, is one of the most budget-friendly tools available.
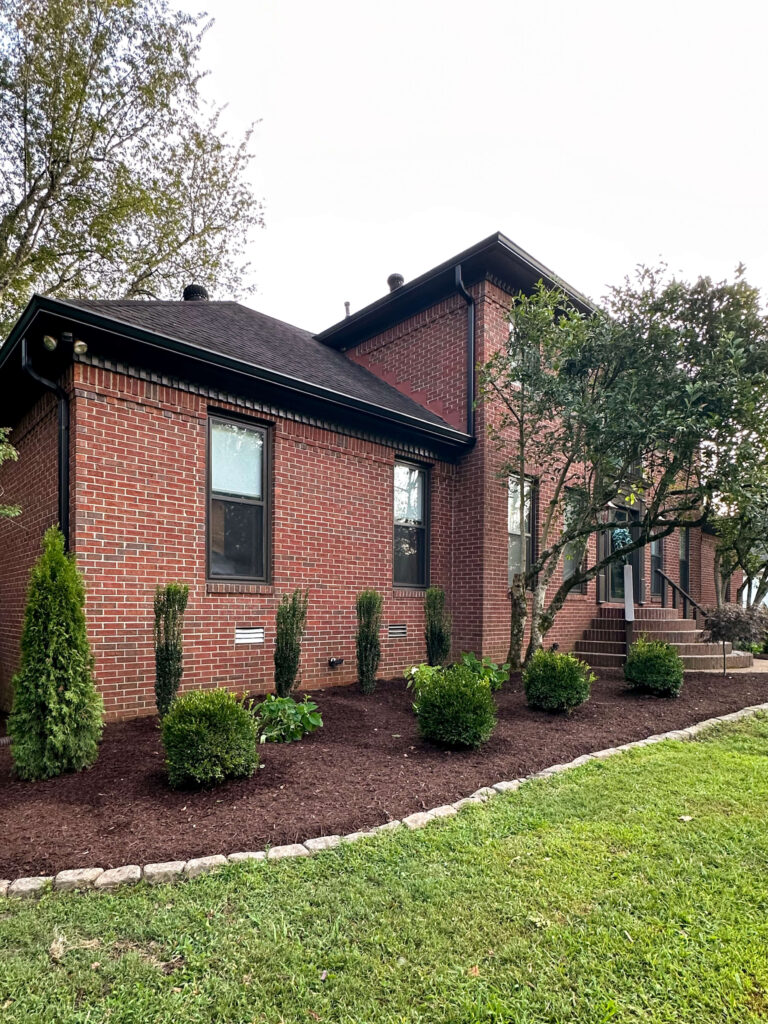
Before and After of the Front Landscaping
I waited until the painters were completely finished before I touched a single plant. That was a very deliberate choice. Contractors trample everything. If I had landscaped first, I would have watched all of it get damaged during the weeks of exterior work. Holding off protected the investment entirely.
When the time was right, I brought in professionals to completely redo the front. The original plantings were overgrown and had long since stopped looking like anything intentional. The new plan is layered and hydrangea-forward, and it works with the updated trim and lanterns in a way the old landscaping never could have. This is the phase where the front of the house stopped looking like a collection of separate decisions and started looking like one cohesive thing.
Cost: $6,800 | Hired out
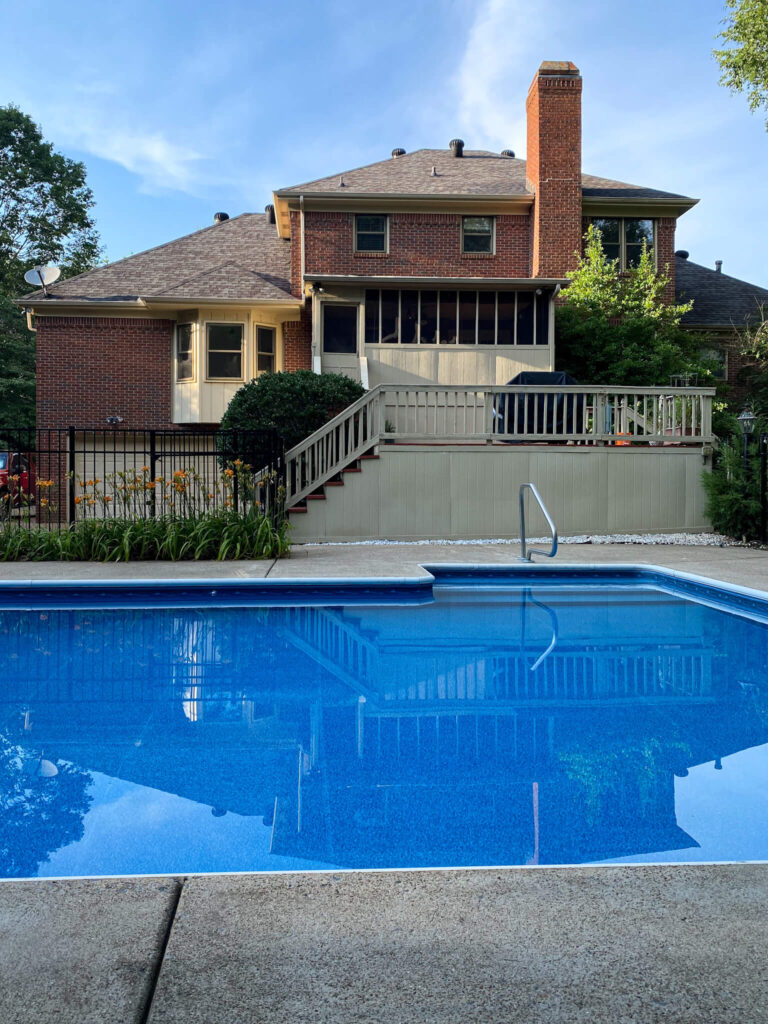
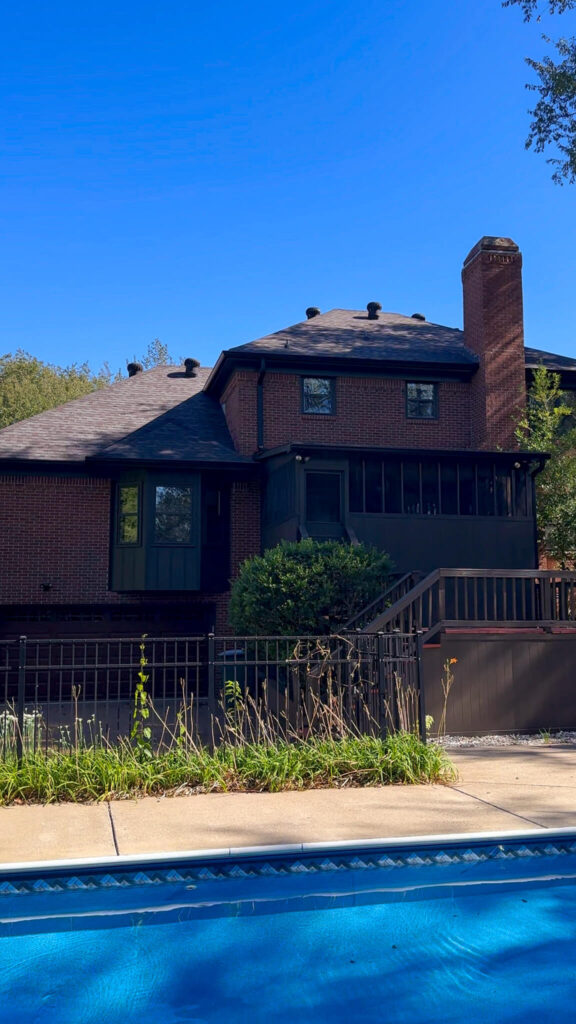
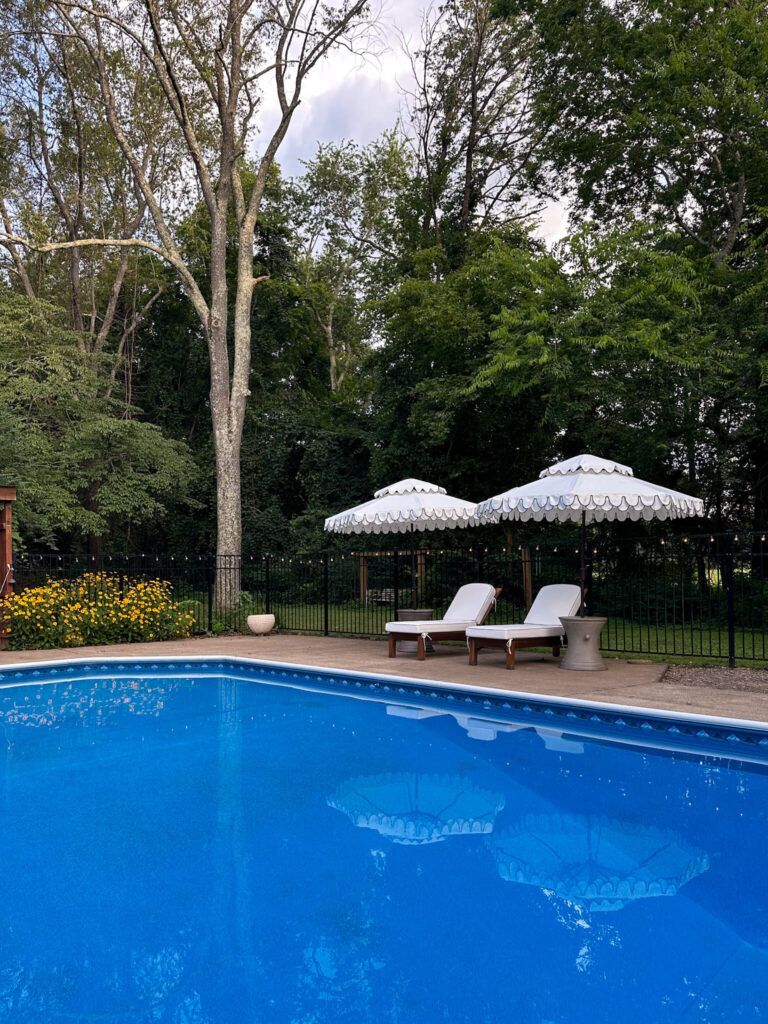
The Back Patio
The back of my property is its own ongoing chapter.
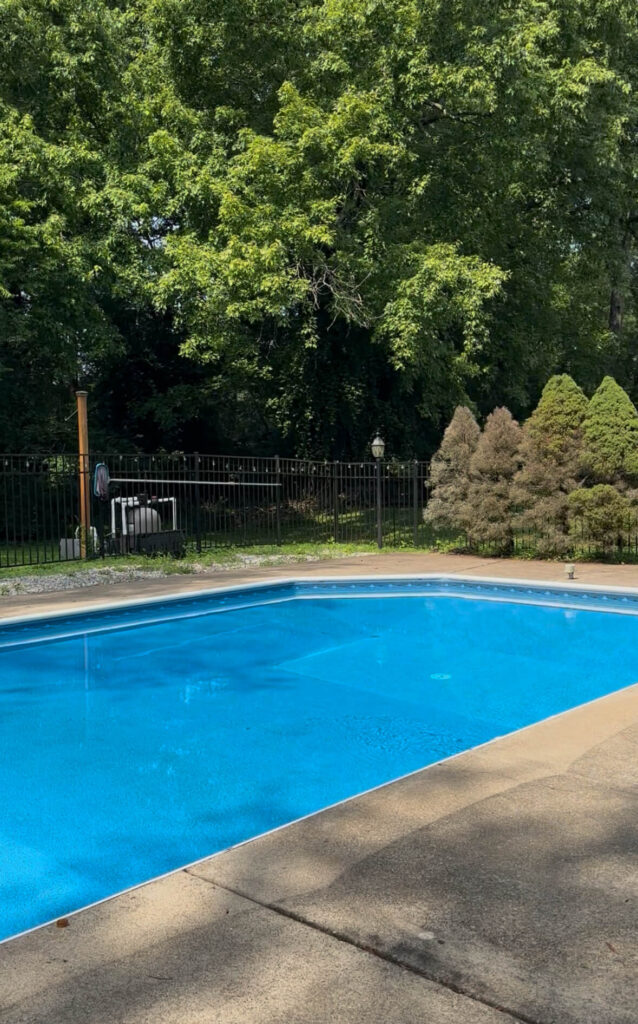
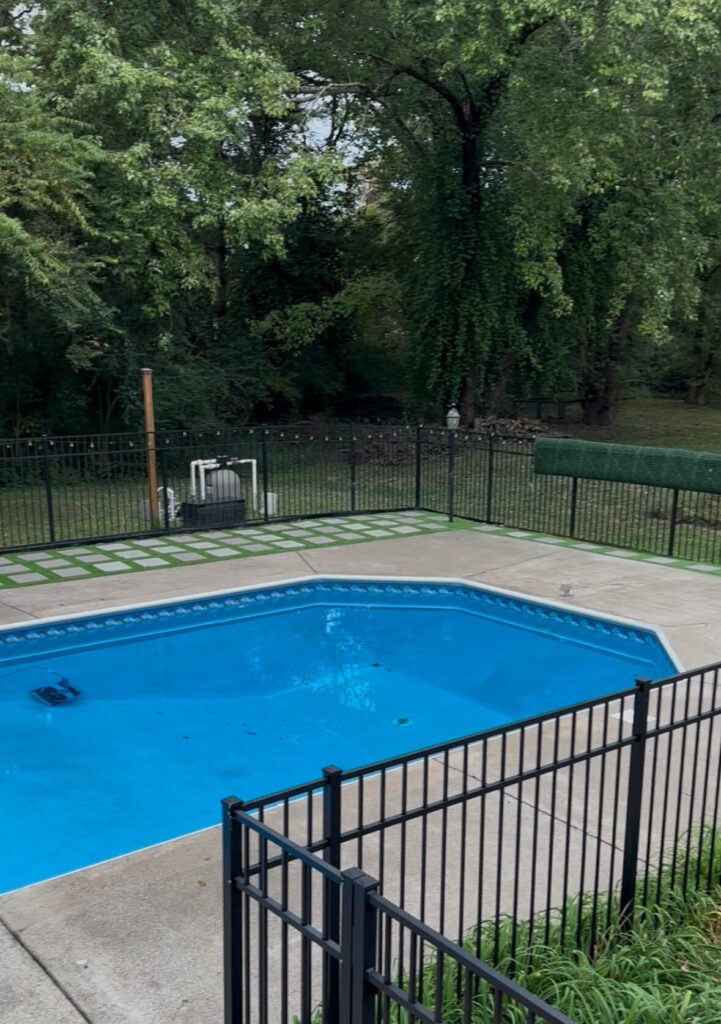
When I got here, the back was a situation: pine trees that were slowly dying, weeds, a general sense of chaos, and a deck I’ve always known I’ll eventually replace entirely. The full vision for the back is still taking shape, and there are pieces of it that are years away from being realistic. Rather than wait for someday, I decided to tackle the flower beds around the pool with pavers and faux grass to give myself a clean, low maintenance zone.
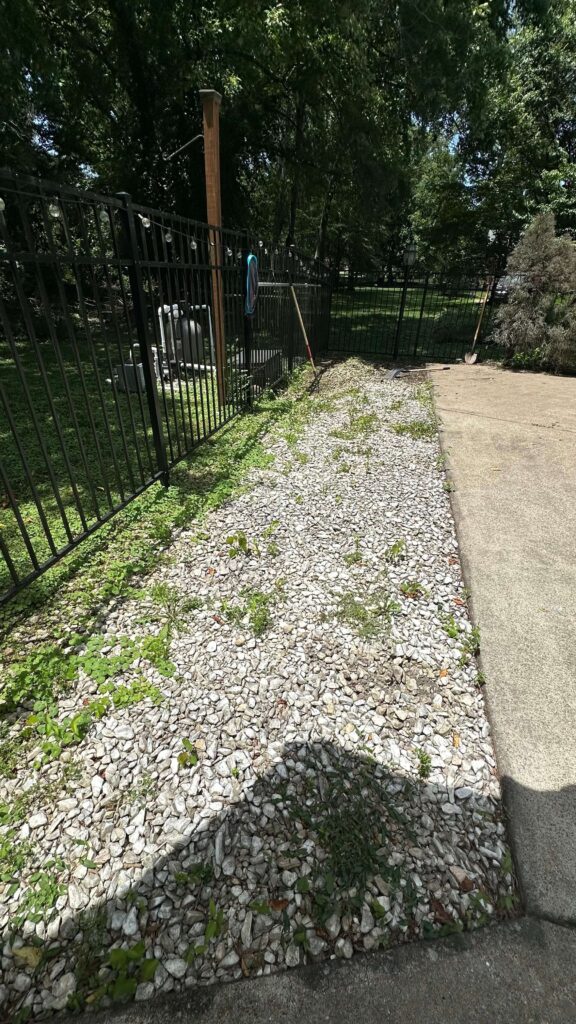
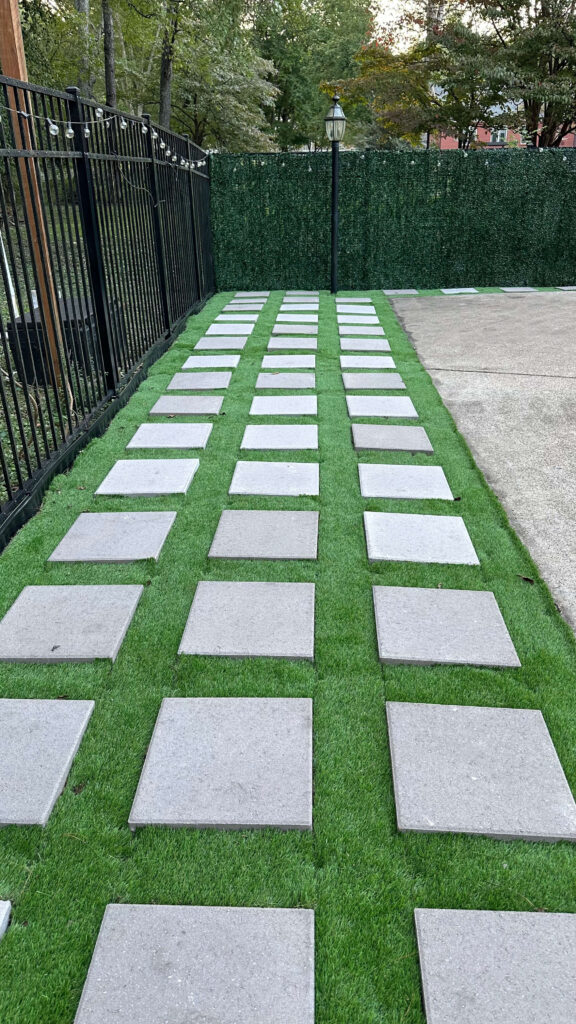
This isn’t my favorite DIY but it’s a good solution for the time being
I laid the pavers myself (you can read about it here), which kept this phase well under budget compared to everything else. Once they were in, I added some updated pool patio furniture and suddenly it felt like a posh hang. This is the first summer the back has felt like a destination rather than something I just look at through the window and feel guilty about.
The bigger vision is still out there. The deck will eventually come down and something better will go in its place. But in the meantime, this works — and “this works” is worth a lot.
Pavers: $1,748 | DIY
Full Cost Breakdown
Here’s every project across three years in one place:
| Year | Project | Cost | DIY or Hired |
|---|---|---|---|
| 2023 | Garage door | $3,400 | Hired |
| 2024 | Trim paint (Black Fox by SW) | $6,669 | Hired |
| 2024 | New gutters + wood rot | $6,618 | Hired |
| 2024 | Copper lanterns | $813 | Hired |
| 2025 | Front landscaping | $6,800 | Hired |
| 2025 | Back patio pavers | $1,748 | DIY |
| Total | $26,048 |
What’s Still on the List
There’s always a next chapter. Right now I’m working on turning the lawn from mostly weeds into actual grass — not glamorous, but necessary. The hydrangeas are getting established and need attention this season. And the back deck is still on the someday list, waiting for the right time and the right plan.
I don’t have a finished exterior. I have an evolving one, and that distinction makes it feel a lot less like a project and a lot more like a home.
How to Plan Your Own Phased Exterior Home Renovation
If you’re staring at the outside of your house feeling unsure where to begin, here’s what I’d tell you based on doing this slowly and intentionally over several years.
Start with the thing that’s doing the most damage. For me, that was the garage door. For you, it might be the front door, the trim color, or overgrown landscaping. Identify what’s dragging everything else down and start there. It builds momentum for everything that follows.
Think about order, not just budget. Sequence matters. If you’re planning exterior paint and landscaping, do the paint first. Contractors on site are an opportunity. If projects make logical sense together, bundle them.
Wait to landscape until after any major exterior work is done. Plants are the most vulnerable piece of the equation, and they don’t need to be sacrificed to the construction process.
Give yourself a long runway. One project per year, done thoughtfully, will get you somewhere beautiful. You don’t have to do it all at once, and trying to may be exactly what’s been keeping you stuck.
Your exterior doesn’t need to be finished. It just needs to be started.
Related Posts:
My New Copper Lanterns + Tips on Exterior Lighting Scale
Budget Friendly Pool Patio Refresh
How to Install Pavers & Artificial Turf Yourself