


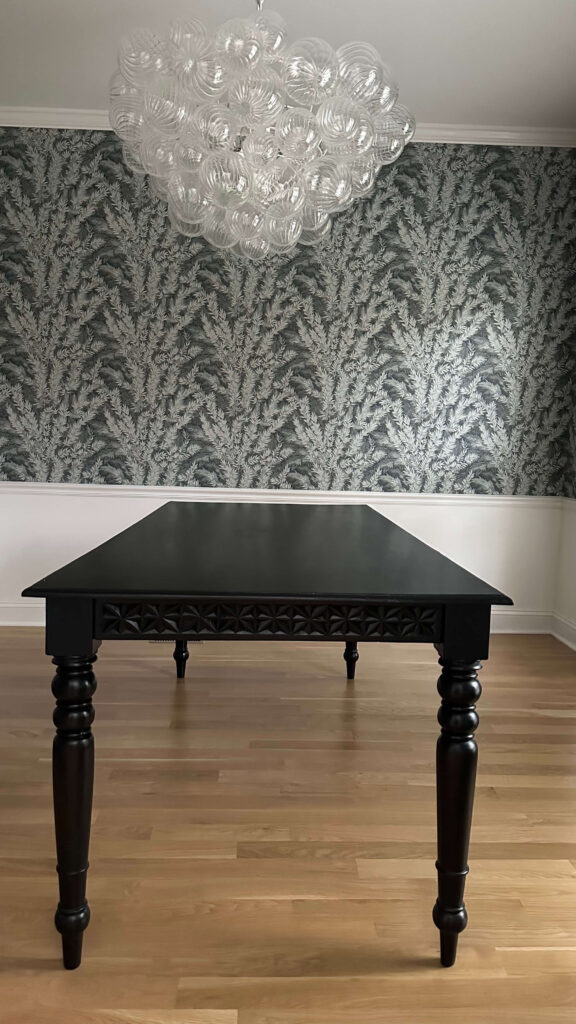
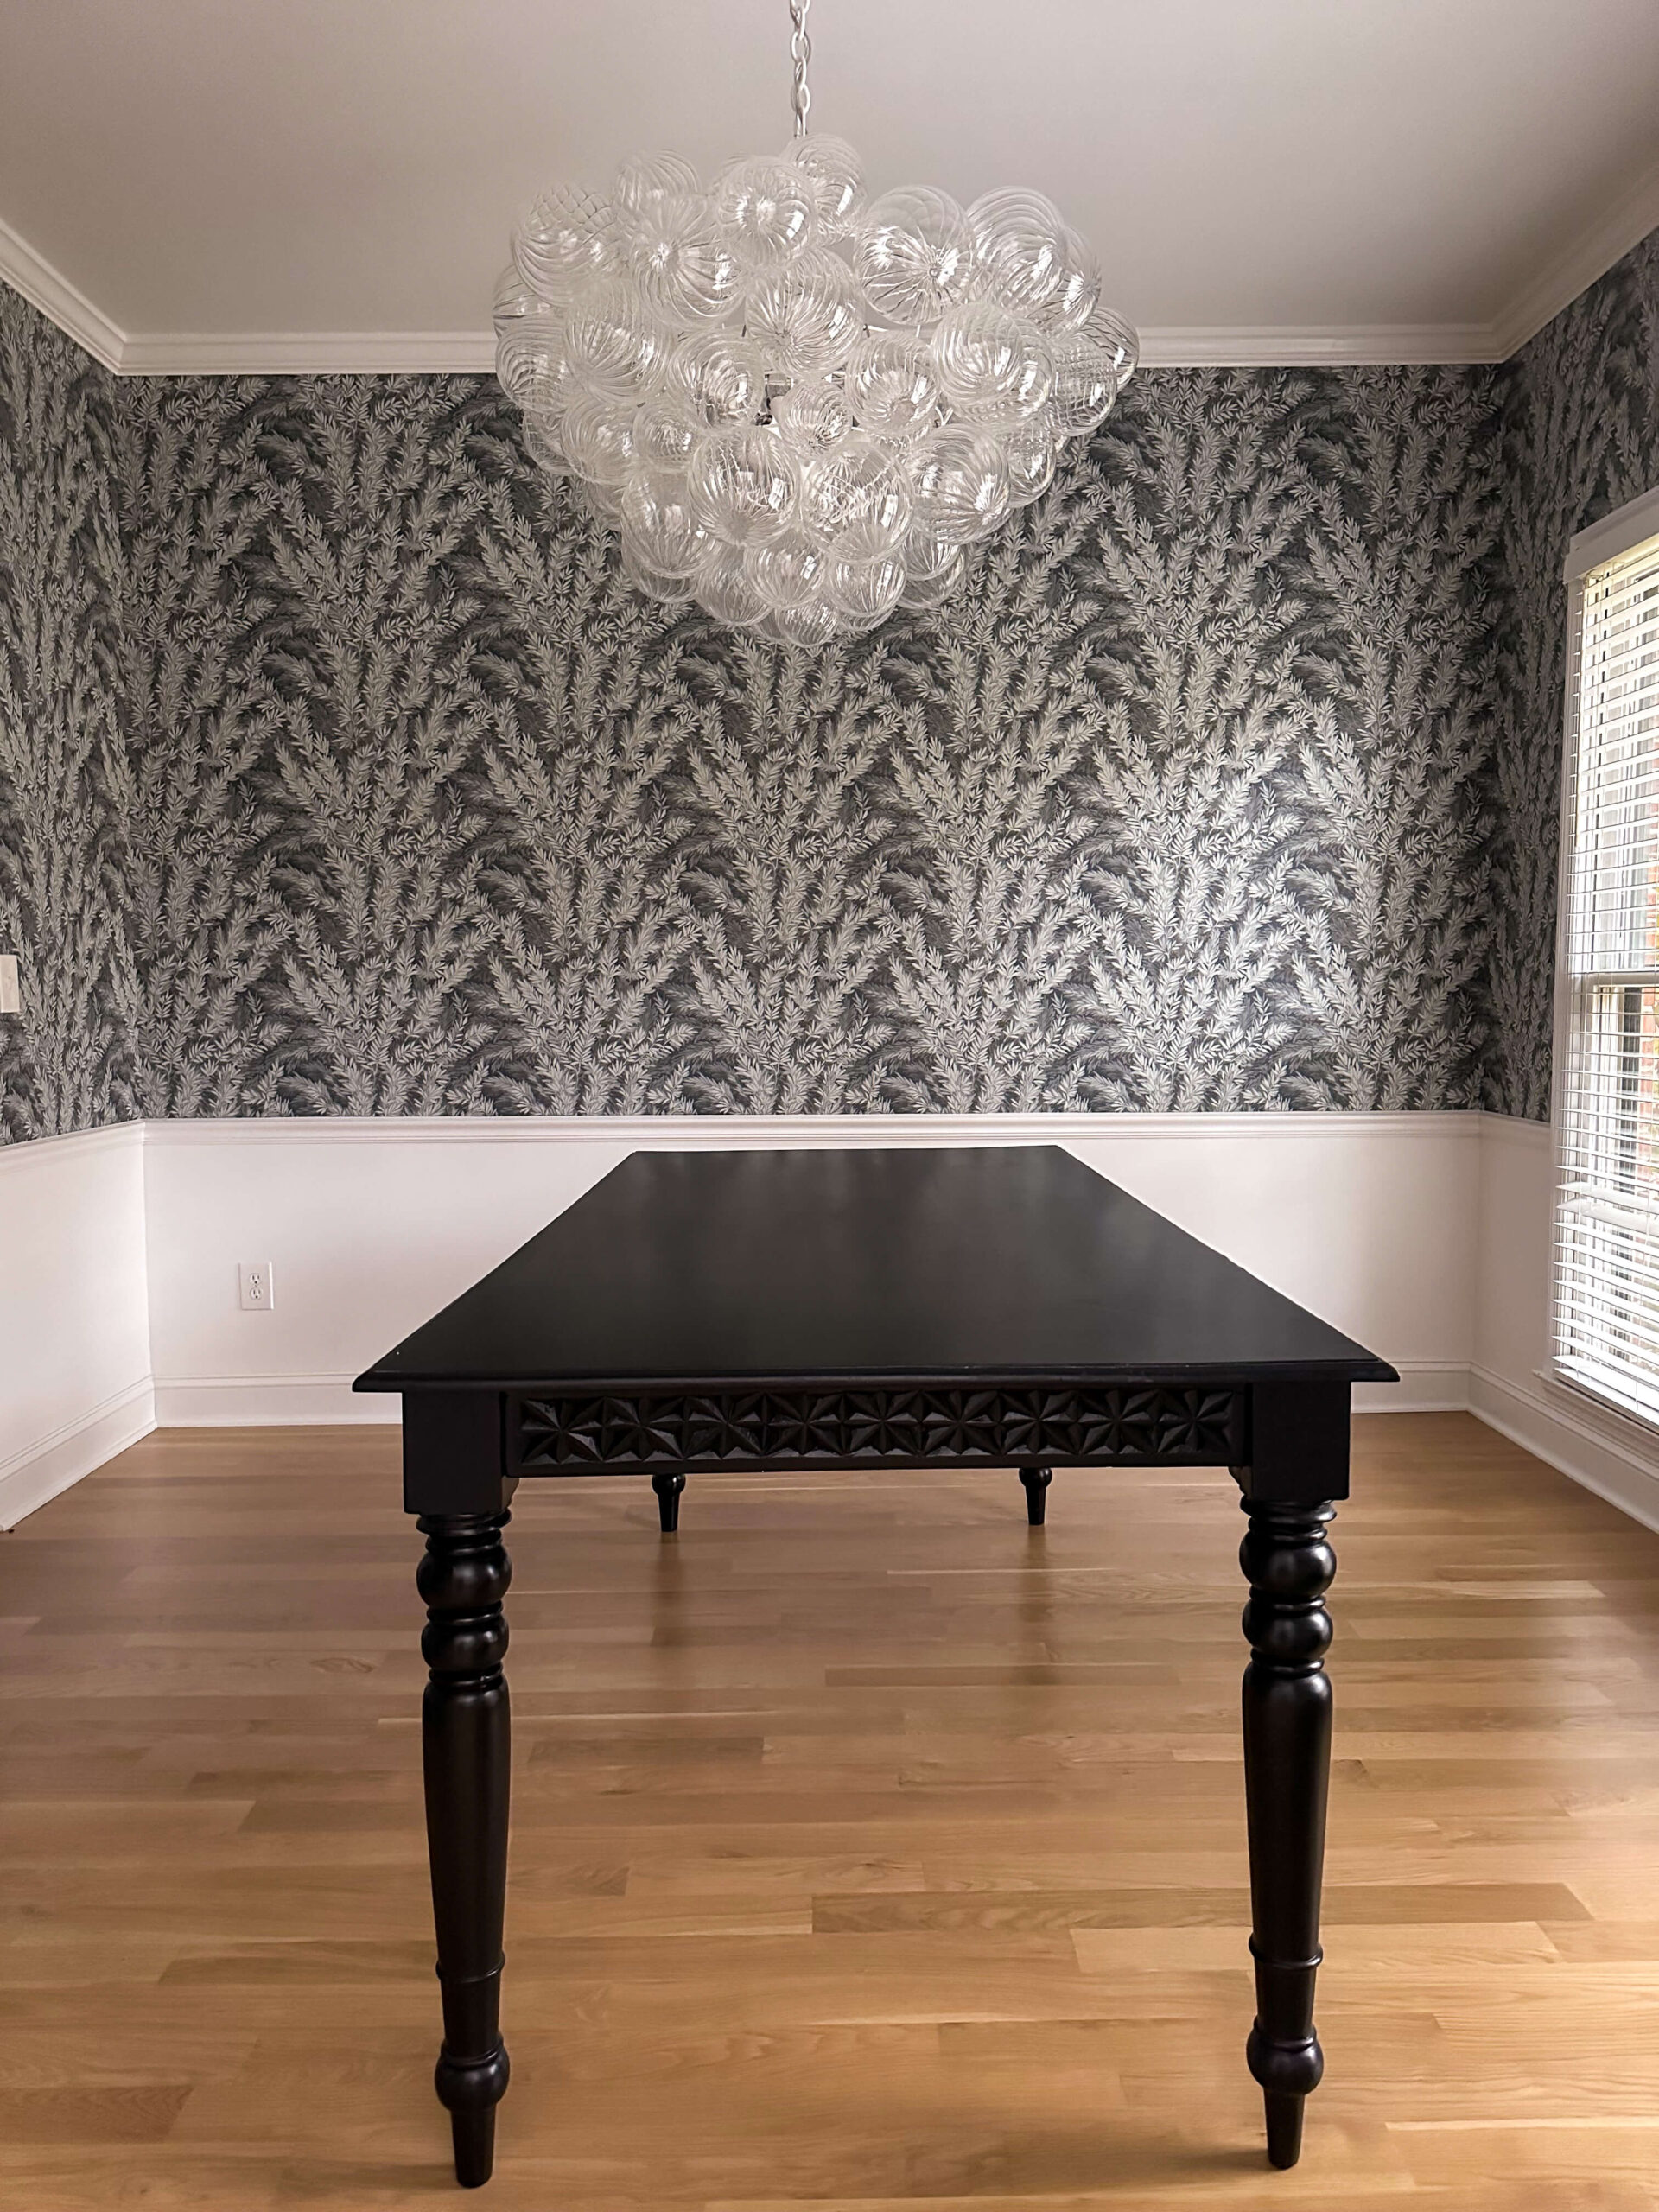
The dining room flip has been one of my most exciting projects to date in this house, however I truly reached a sticking point when it came time to make decisions about the furniture. If you remember, I got a bit tripped up with the design plans for the dining room because of this black dining room table. I loved the table itself, but the black finish didn’t fit the style of the new dining room, nor would it go anywhere else in the house. Rather than buy new, I wanted to see how I could transform my existing dining room table.
I’ve always loved the look of a pecan dining room table, but they can be so expensive! So when I heard about Retique It, I was intrigued and started thinking about the idea of transforming my black dining room table to a pecan finish rather than buy new. I’ll admit, I was a little nervous at first, but the process was actually really easy and I was amazed by the results.
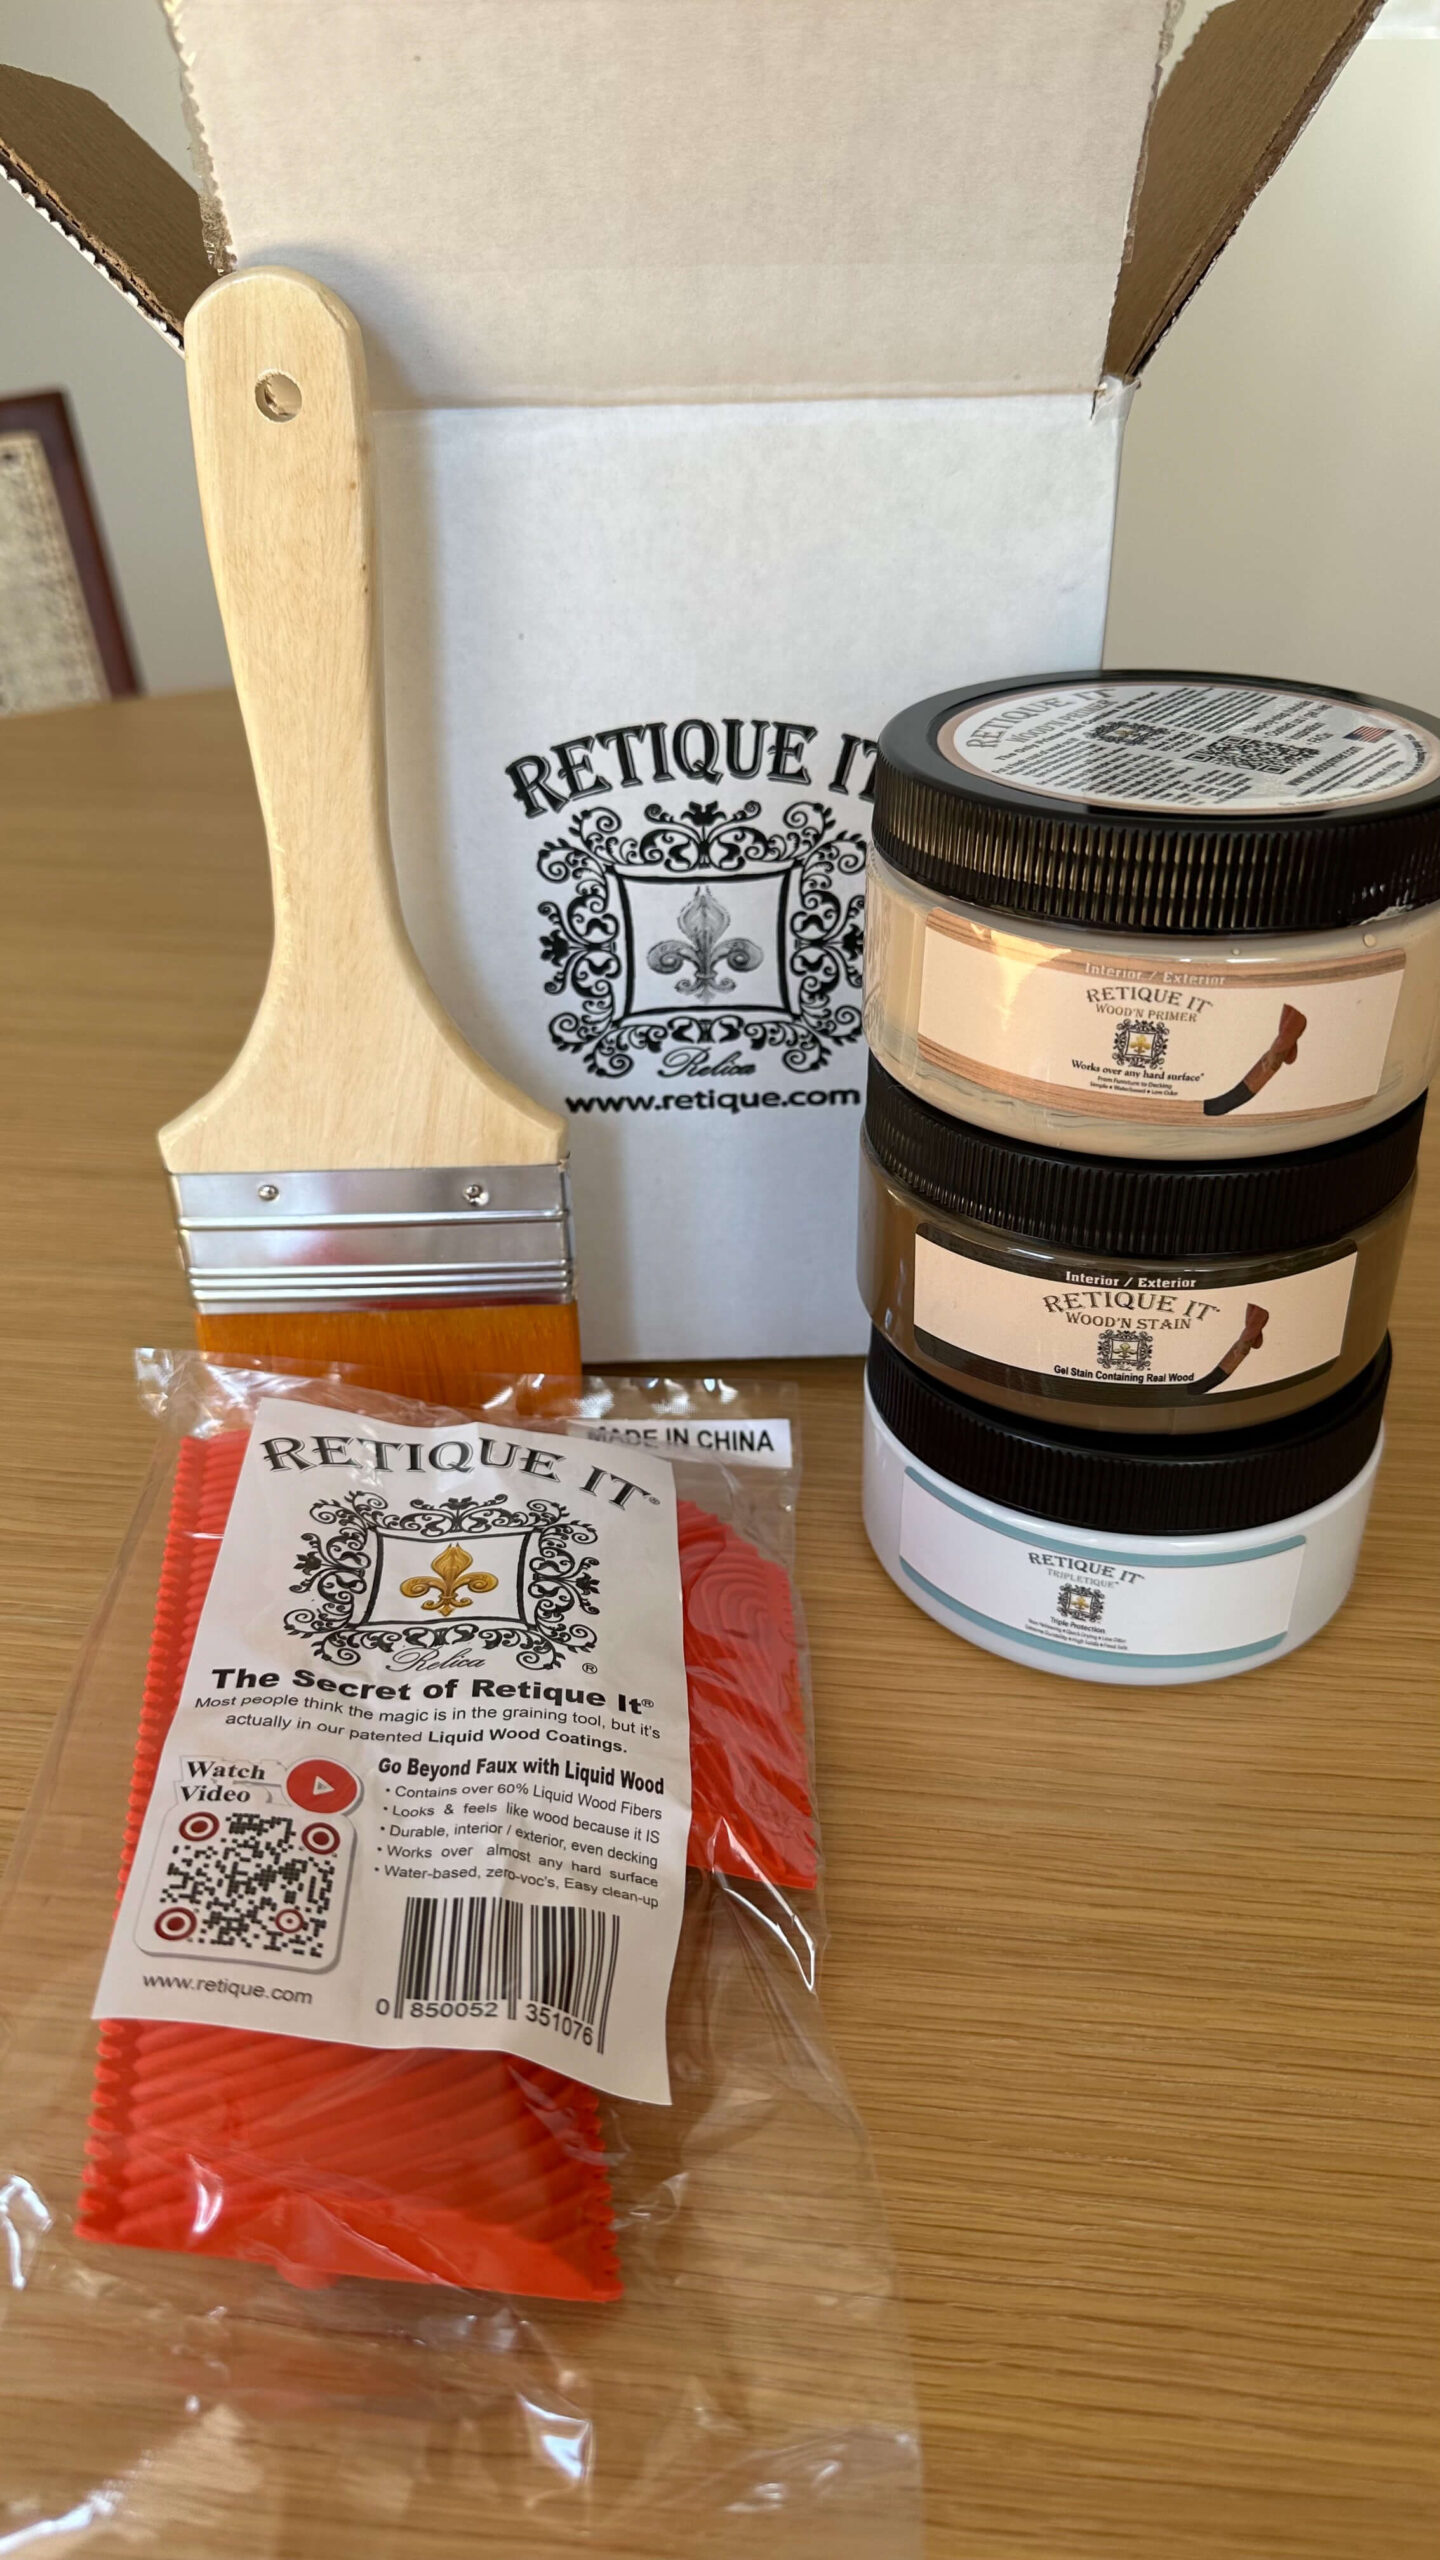
If you’re not familiar, Retique It is a product that includes actual wood fibers and allows you to refinish furniture without the need for sanding. It’s available in a variety of wood finishes ranging from light to dark, and also comes with a graining kit. What’s even better, it’s is non-toxic and water-based, and also has a low VOC content. This means it emits very few volatile organic compounds into the air making it safe for use around children and pets.
After even more online research about the product, I opted to buy the Retique It Table Top kit from Amazon. This kit included everything I needed for the project and also came with very clear instructions, as well as links to watch more online videos. I strongly recommend you determine how much coverage you need and order the corresponding kit. I ended up needing 16 oz of the Wood’n Primer to coat my table three times (more on that below).
Here’s how I transformed my dining room table:
Step 1: Clean Your Surface
Wipe your surface with a damp cloth to remove any dirt or debris. Go over it a second time using either Dawn dish soap, Krud Kutter or denatured alcohol + water. The instructions for this product were very clear not to use products with TSP, as this will prevent the wood based coating from adhering properly.
Step 2: Lightly sand or scuff
While the promise of Retique It includes no sanding, I was working with a pretty lacquered surface. I decided to give it a light sand just to be sure the product would properly adhere. I went over all surfaces (top, sides, legs, edges) with 220 grit sandpaper, then wiped down again with another round of Dawn dish soap.
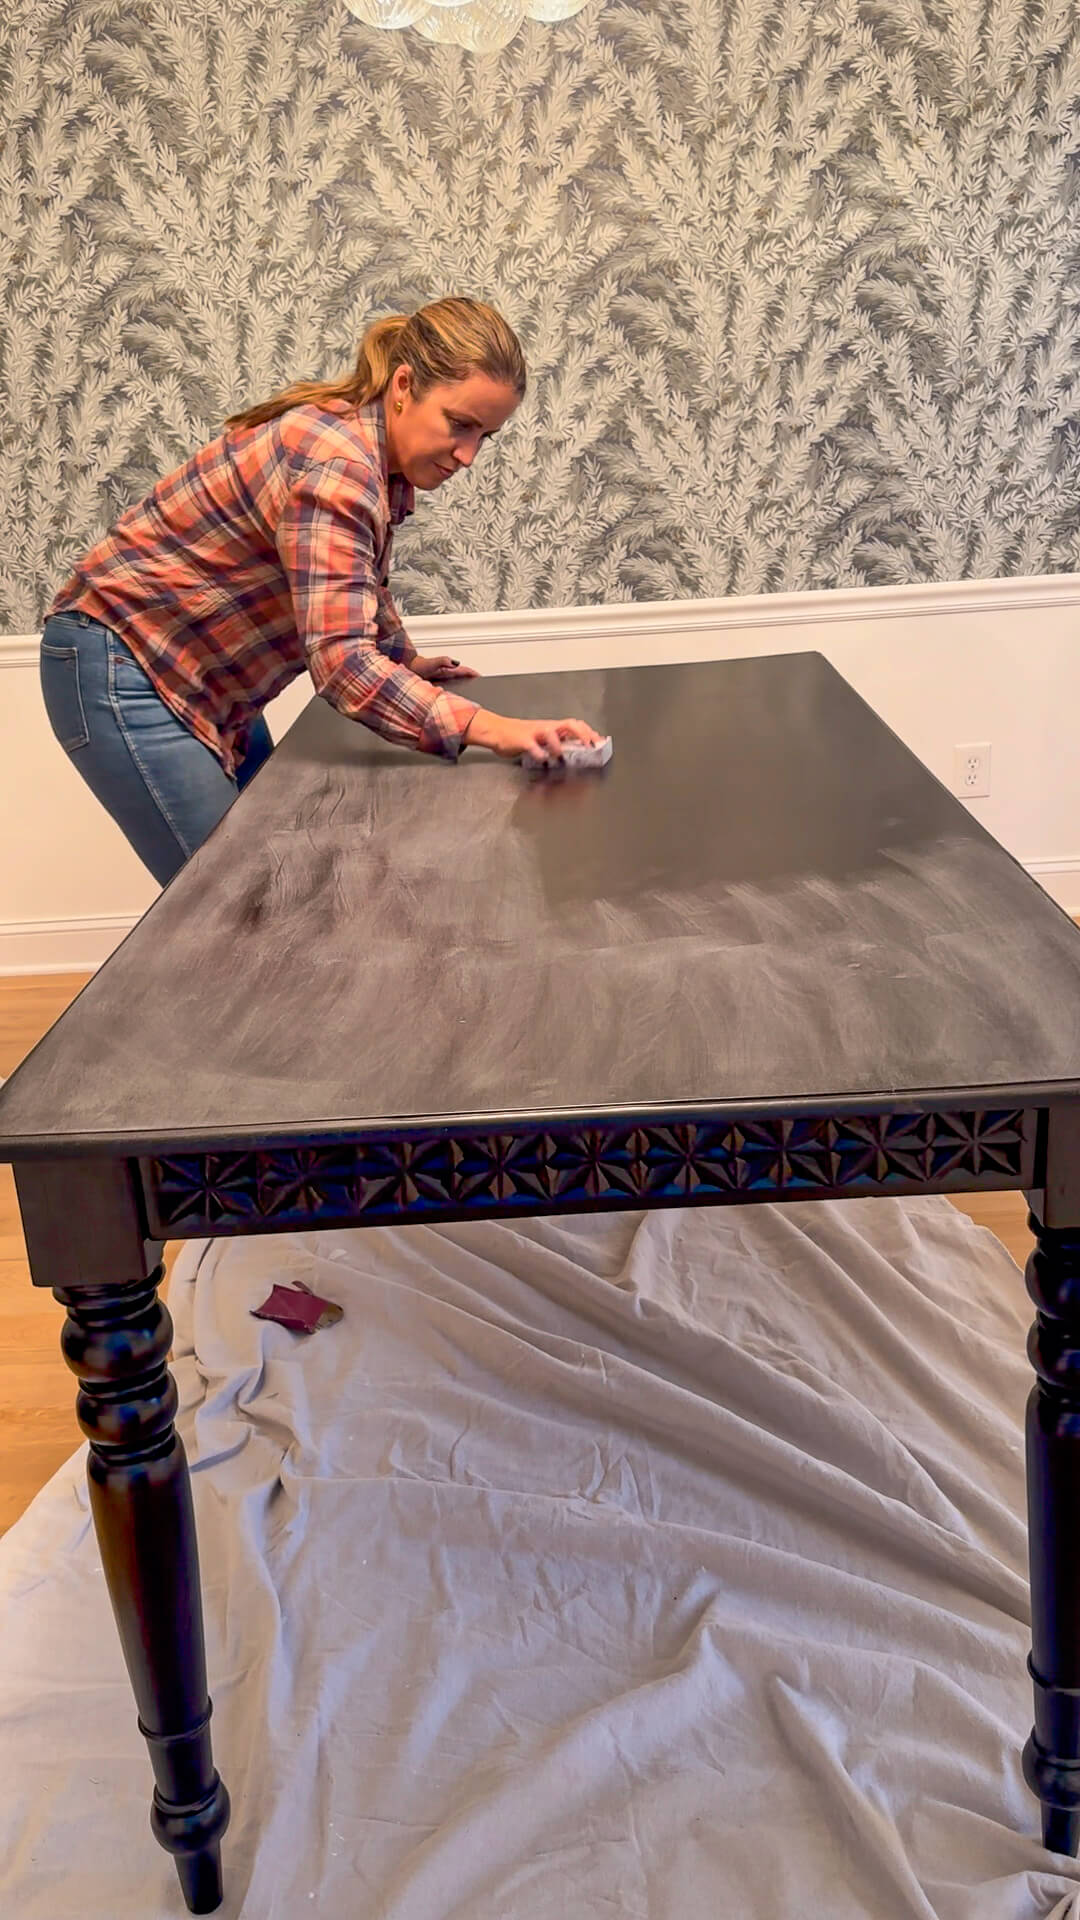
Step 3: Prime Time
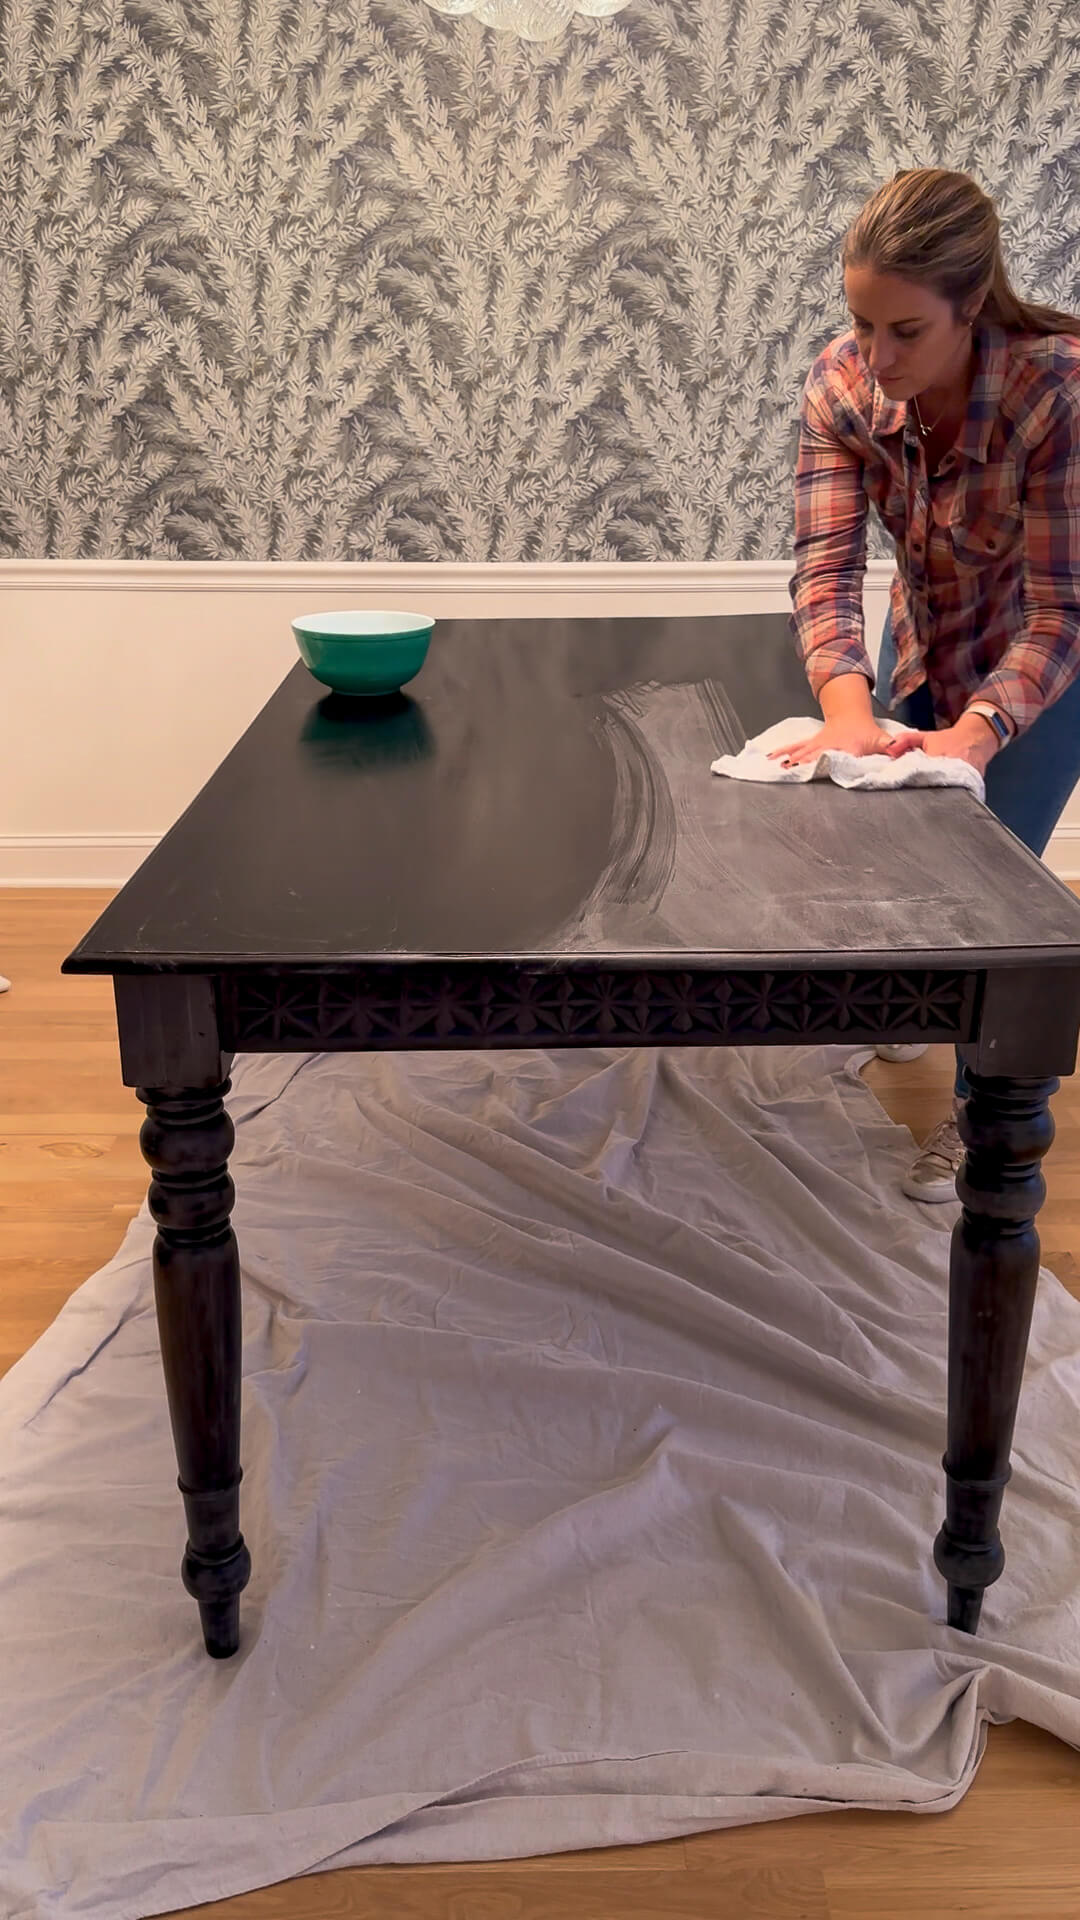
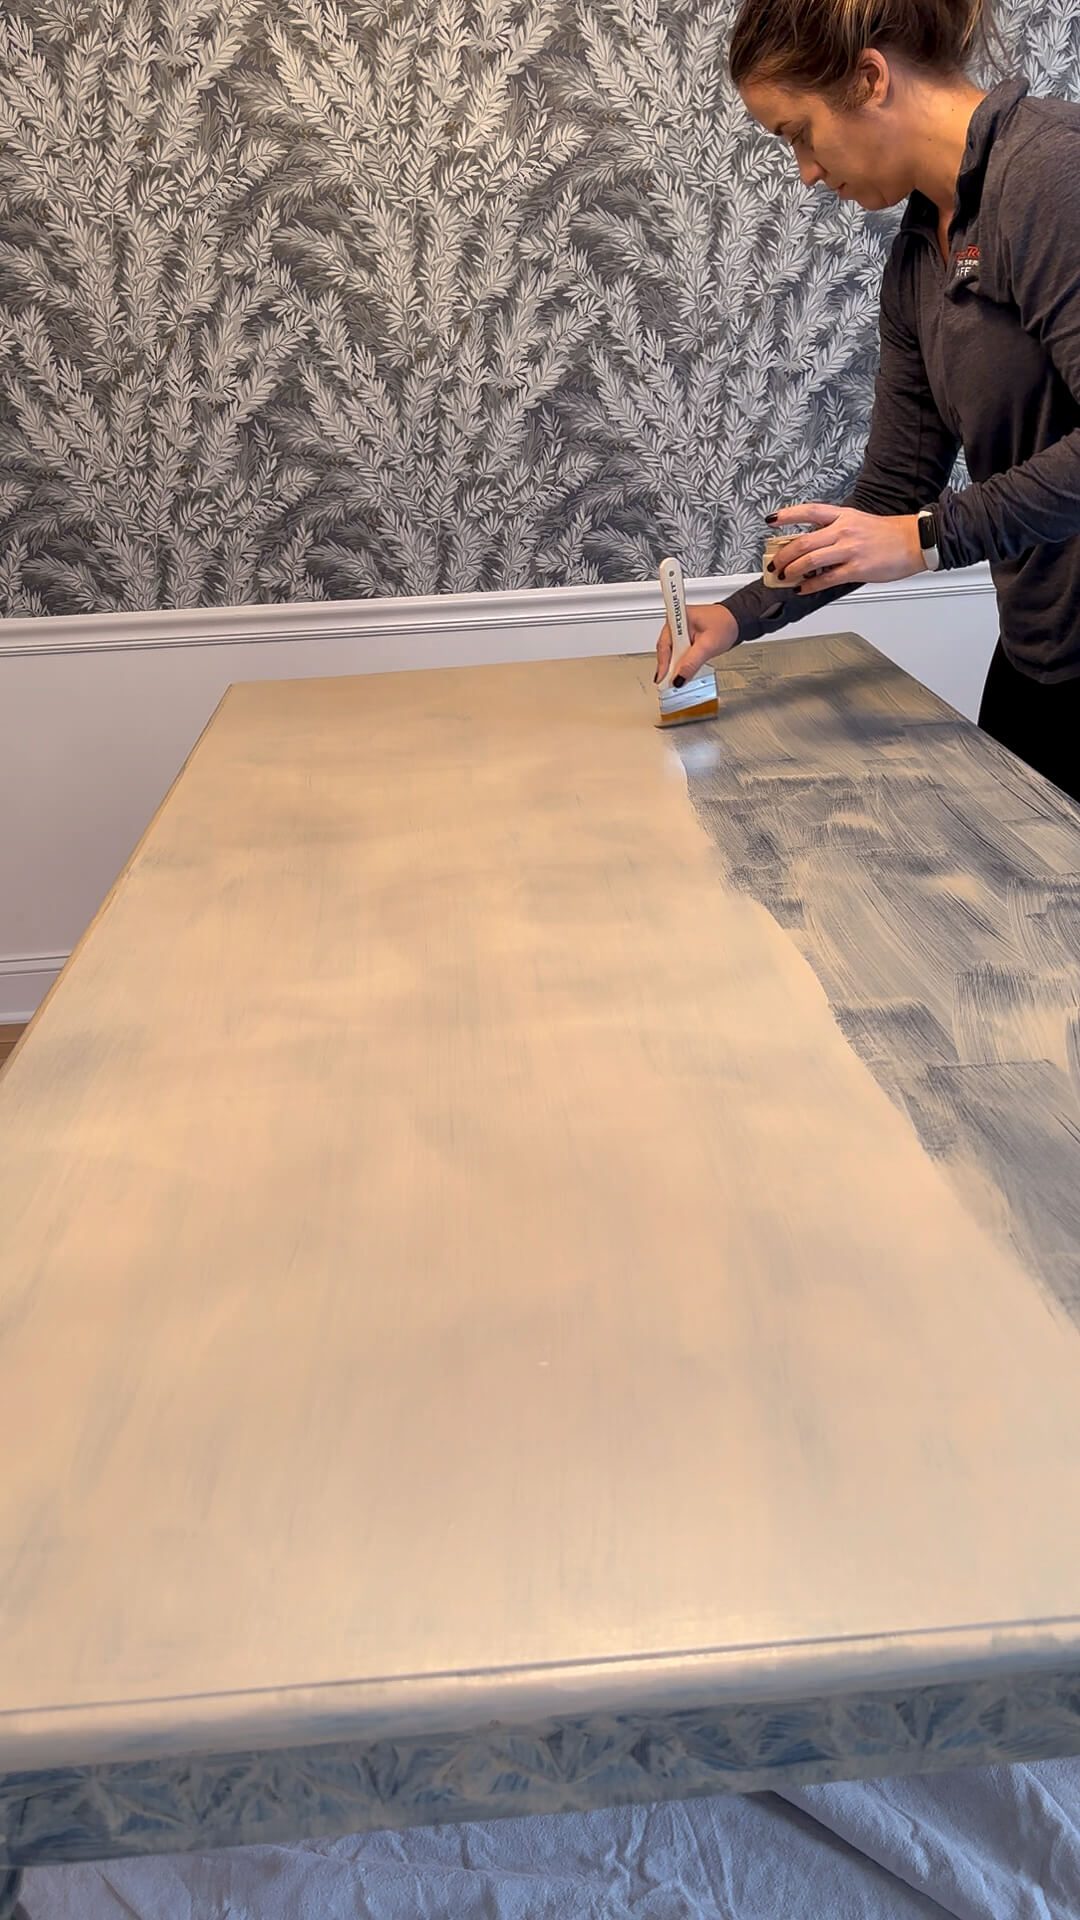
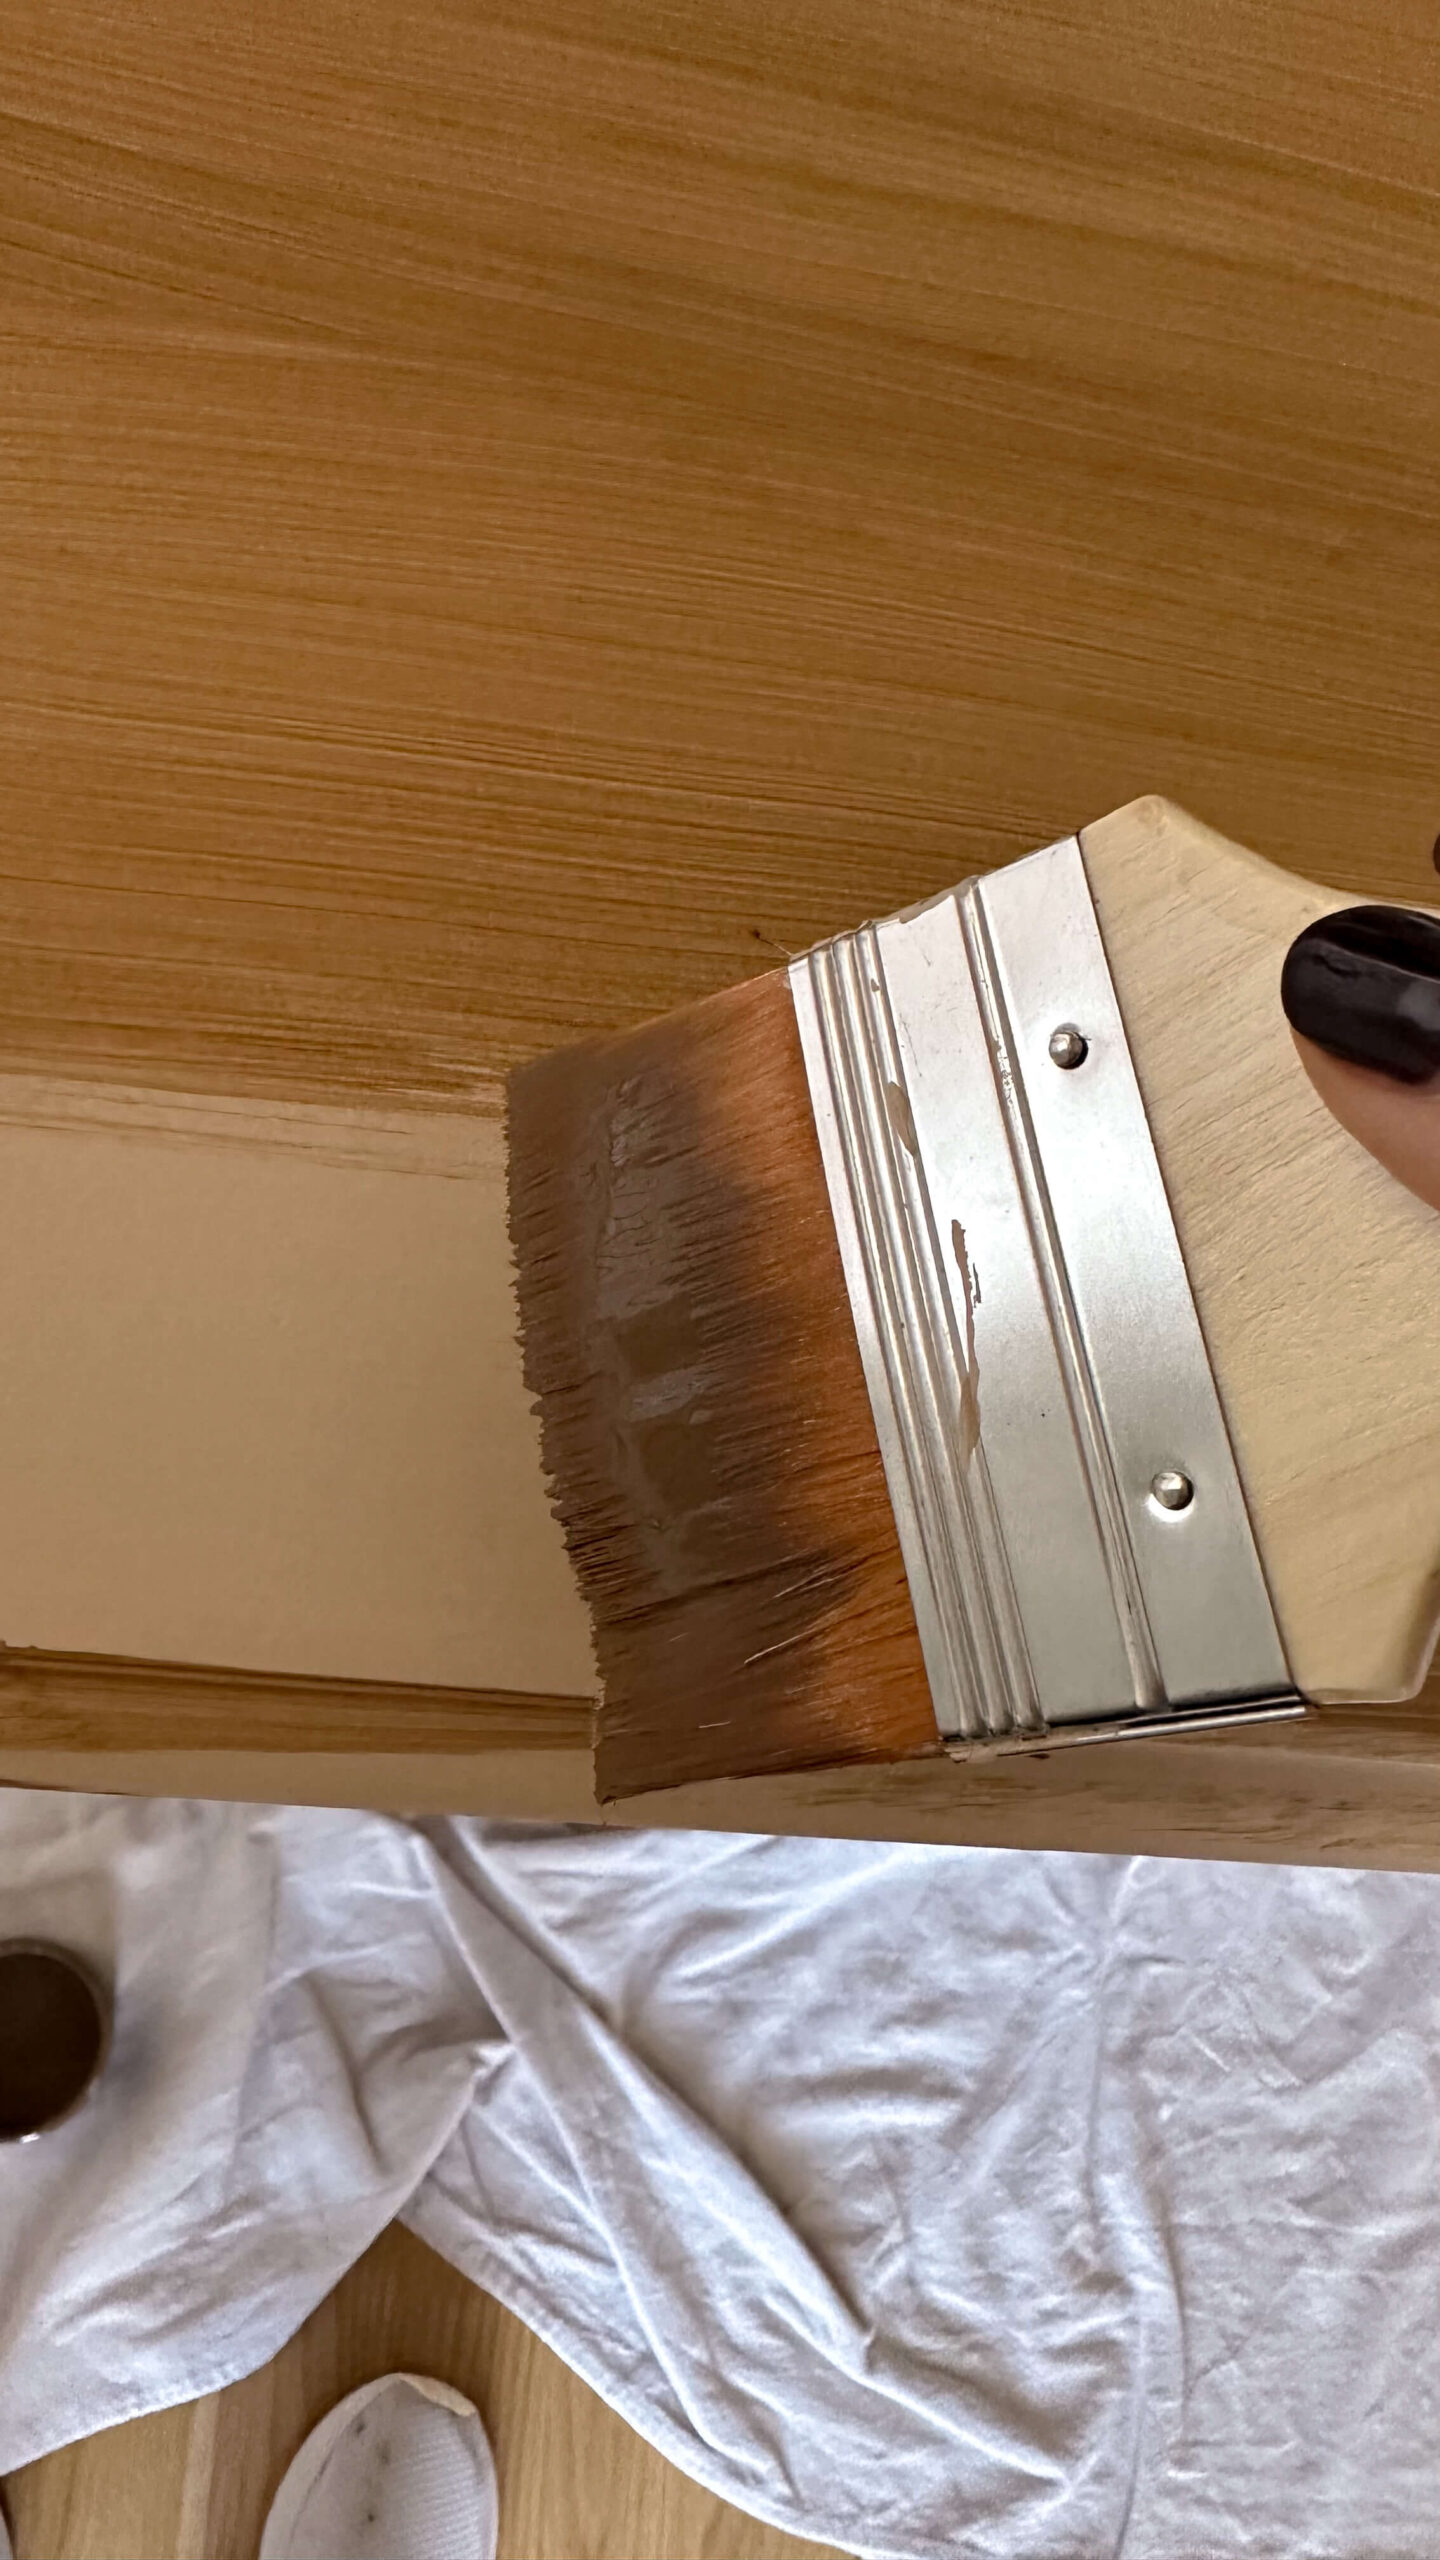
I opted to order the table kit, which came with Retique It’s own paint brush. This brush is designed to create a slight wood grain, so while I have plenty of my own paint brushes I went ahead and used what was provided in the kit. I started with the Wood’n Primer that was included in the kit and painted a thin surface on all areas of the table. My recommendation would be to go light on this step, as you can always go over it again with another coat. With the first coat application, you can make shorter brush strokes and just focus on getting all areas covered. Let each coat dry at least two hours.
Since my table was black, I decided to put not one, but two more coats on the table. During your last coat of Wood’n Primer, work in smaller plank sized sections and apply the product with long brush strokes. Remember, you’re creating the look of wood grain which is continuous.
I will warn you during this phase, it’s going to look worse before it looks better. Trust the process and keep going.
Step 4: Grain It
This step is totally optional and I think it’s really to each their own. The kits come with two graining tools, which are large rubber stamps that mirror the look of wood grain. I’m opting not to do this, as I’d like a smooth looking finish and also feel there’s enough grain from the brush strokes, but if you do want to do this you’ll apply a thin coat of your Wood’n Stain in plank sized sections. Pull the graining tool through while the coat is still wet. If you mess up, just go over it again!
Step 5: Wood’n Stain
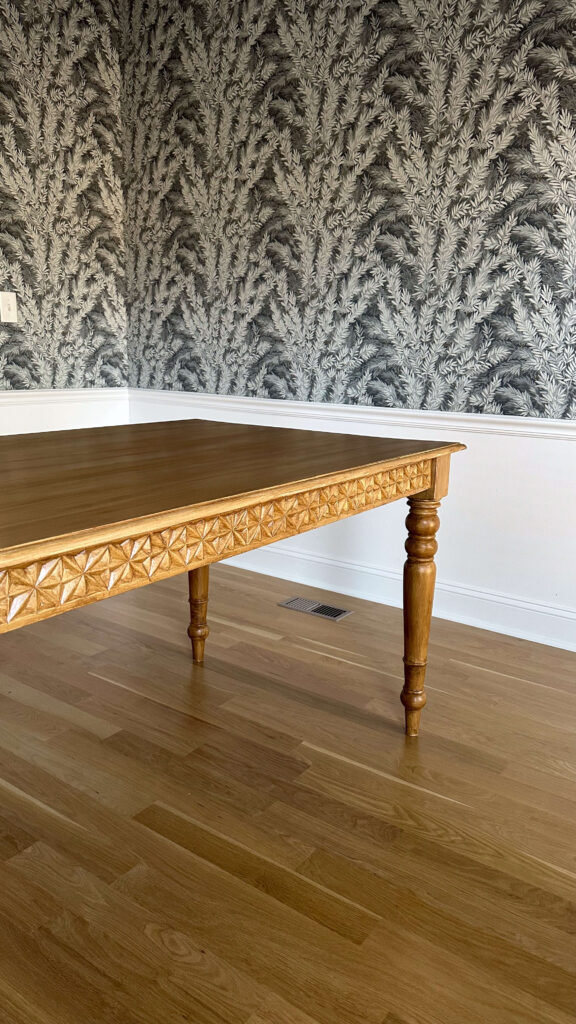
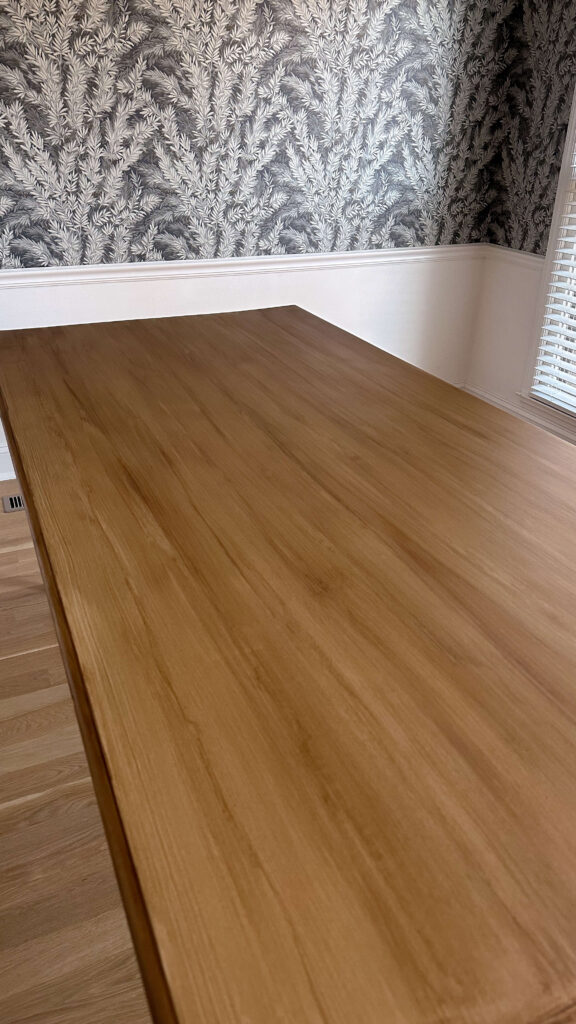
Using the same brush as my primer, the next step was to apply my Wood’n Stain in pecan finish. How many coats you decide to apply is truly up to you and the look you’re going for, but it can be anywhere from 1-3 coats. Each coat of Wood’n Stain will give you a deeper finish. For me personally, I decided to do two coats of the Pecan Wood’n Stain on the entire table and then one additional coat of the Gel Stain in Pecan just on the top of the table.
Just like the Primer, make your final coat in long brush strokes in the same direction for a seamless grain look. After using both the Wood’n Stain and the Gel Stain, I will share I prefer the Wood’n Stain. I found the Gel to be very runny and difficult to manage. If you have the option, I’d recommend finding a kit or purchasing the Wood’n Stain specifically. It goes on just a touch thicker.
An important note for those that have used other stains before: you do not wipe this stain like others. You simply apply it and let it dry for 2 hours in between coats.
Step 6: Seal It
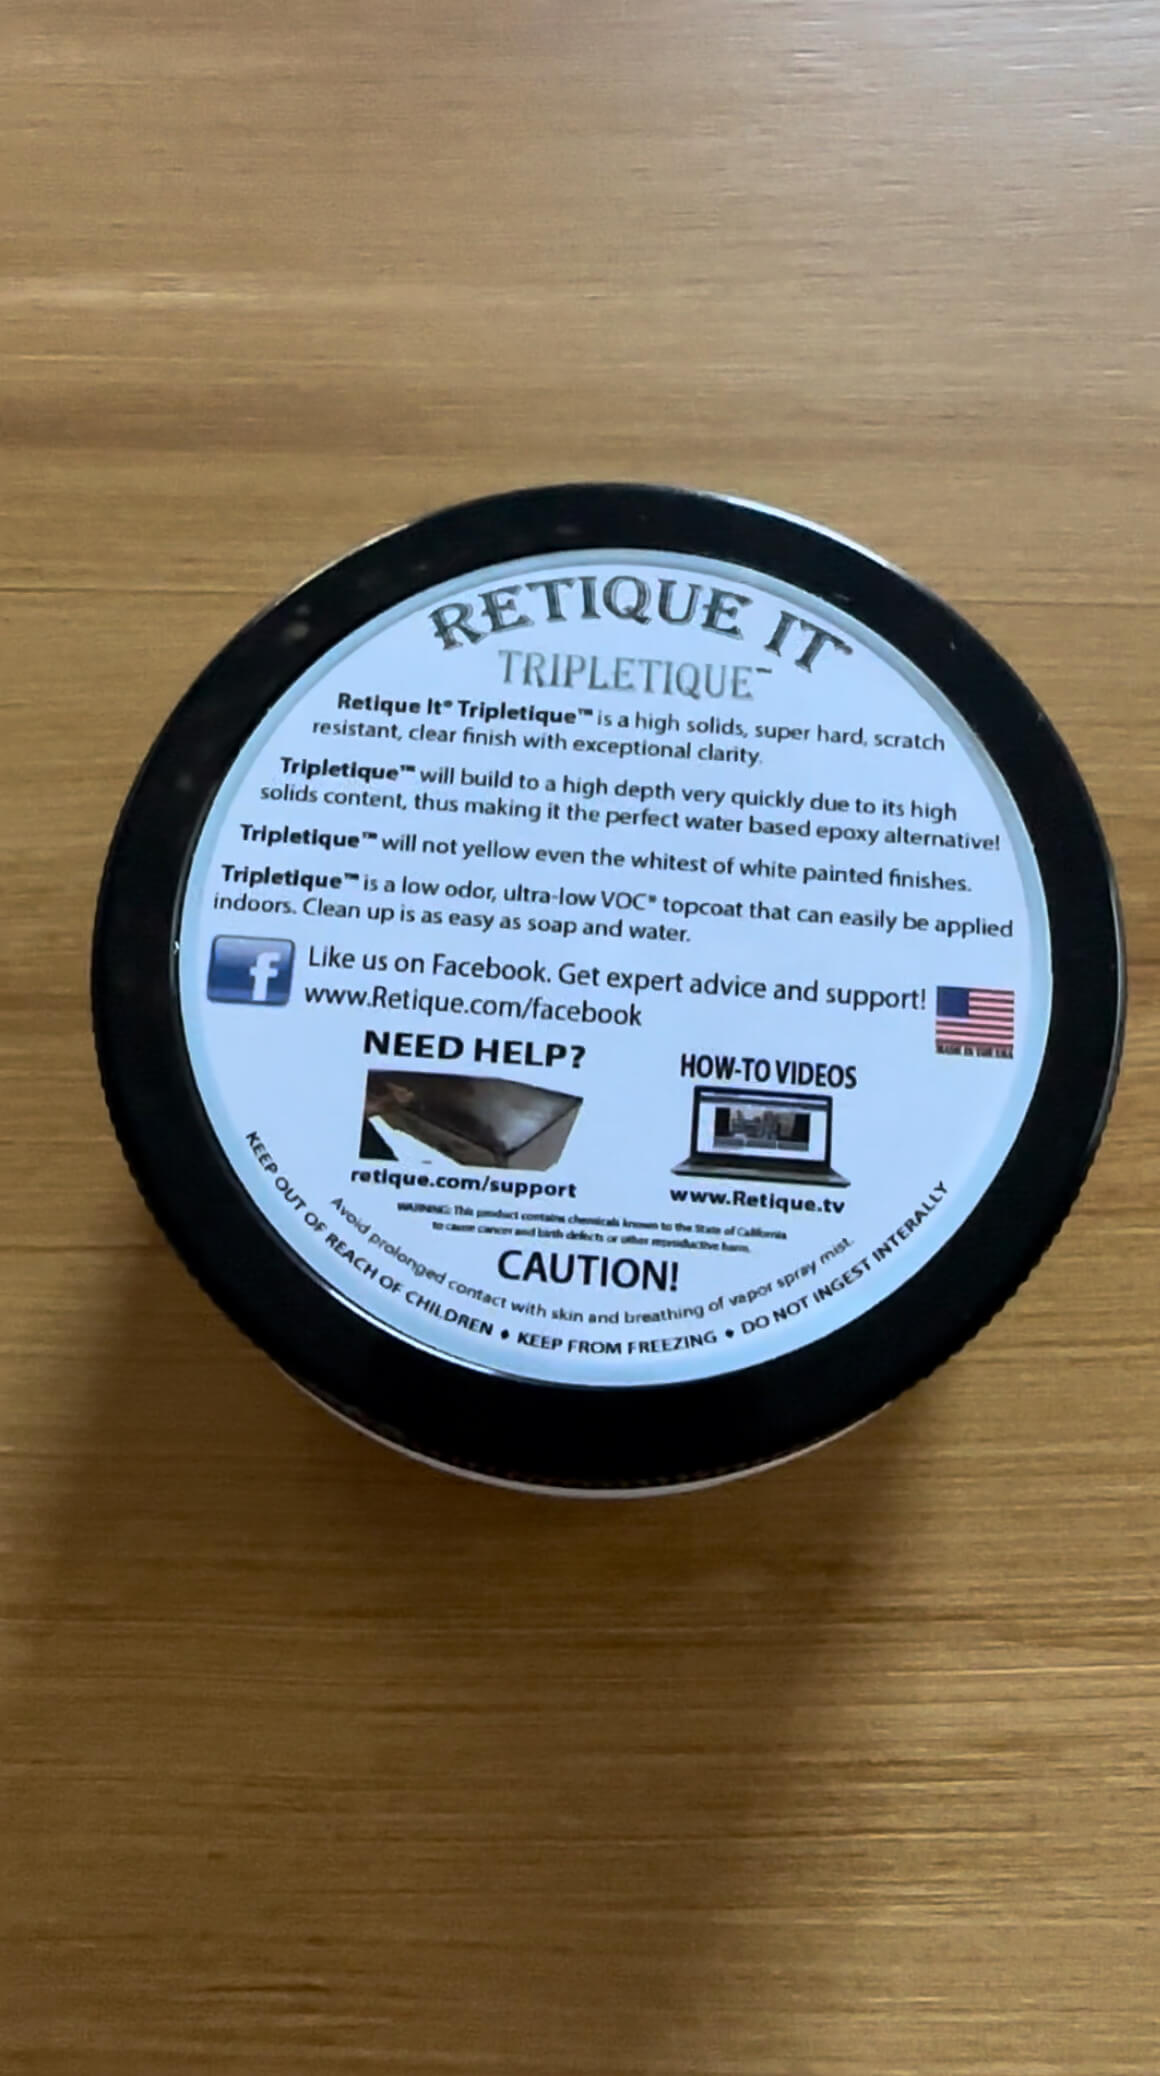
We’re almost done! We just did all of this beautiful work, so now it’s time to protect your surface by sealing it. My kit came with a jar of Tripletique which is a waterbased epoxy alternative. The instructions state to stir this, not shake it, and apply thin layers until the entire container is finished. Drying time between coats is again 2 hours.
Conclusion
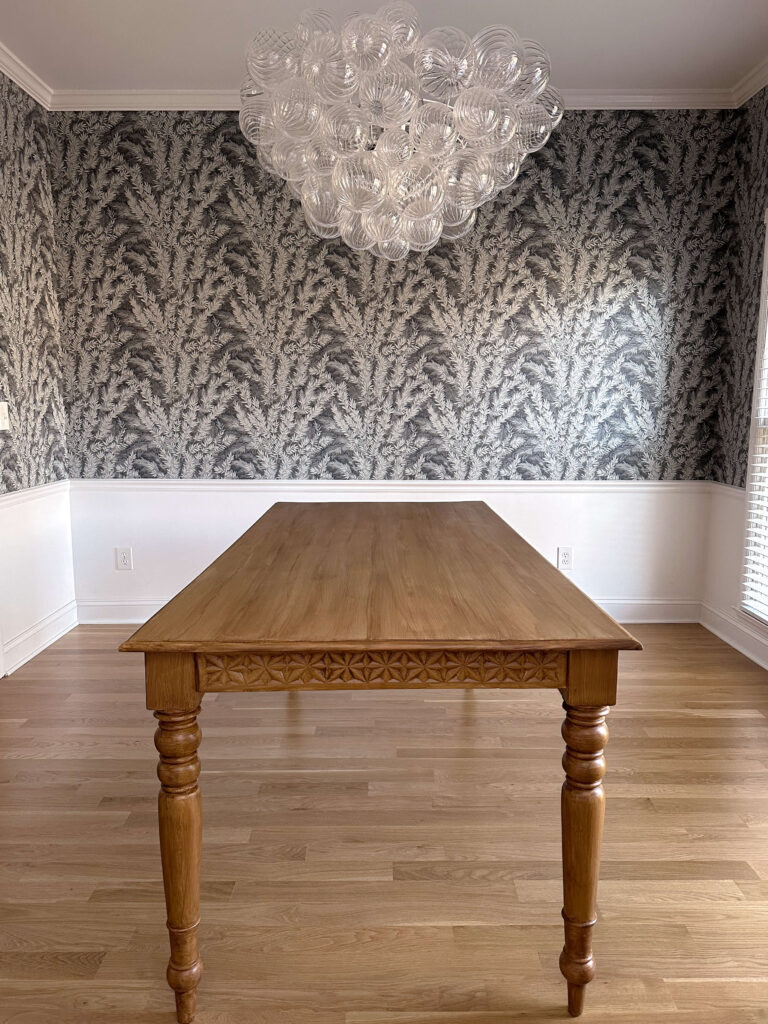
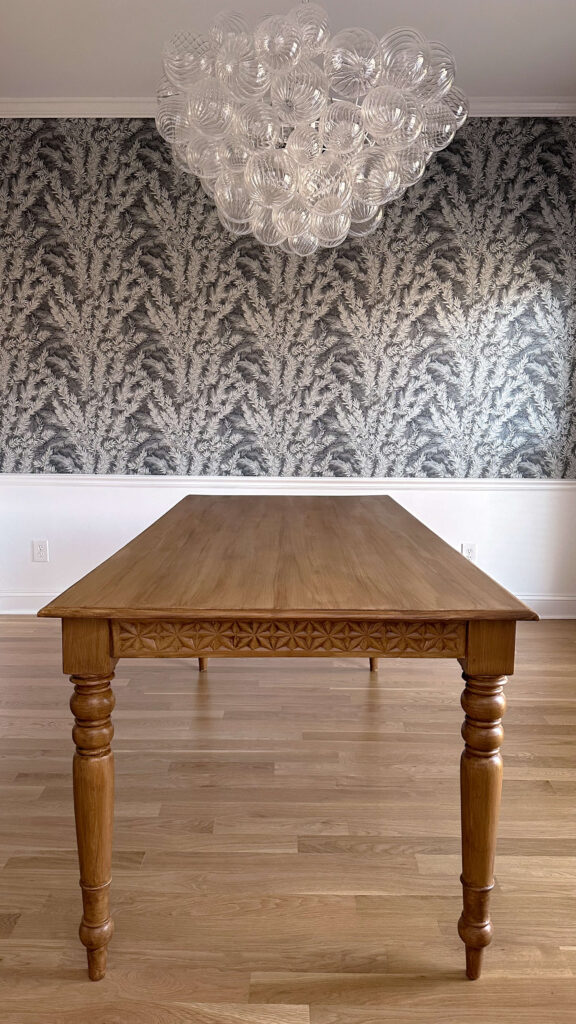
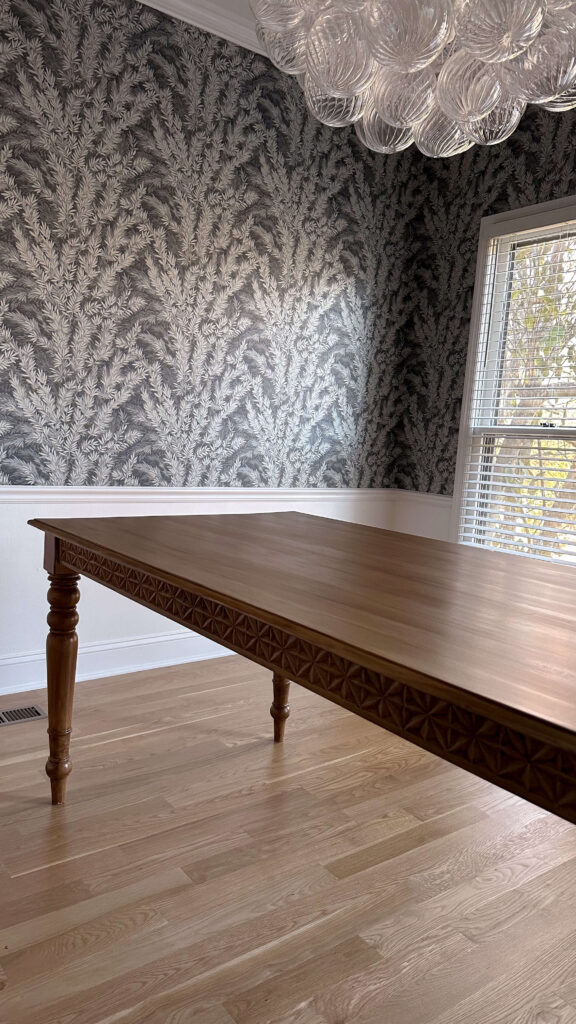
While I was initially hesitant about how to transform a black dining room table to a wood finish, I couldn’t be happier with the results. My old black dining room table is now transformed into a brand new pecan table. It cost me less than $100 and was a project I was able to complete inside of a weekend.
I would definitely recommend Retique It and feel it’s a product for any level of DIY experience. Just take some time to watch the tutorials in advance, or practice on an old piece of wood or furniture if you’re unsure. What do you think? Would you try this project? If you have questions drop them below in the comments section!

Before
After
Sources:
Retique It Table Top kit (pecan)
*this post is not sponsored. This is an honest review of a product I purchased myself and would recommend to others.


Hi there, Awesome job on this project! It looks great. I used the same products on bedroom furniture and was very pleased with the finished product. I’m attempting to refinish my mom’s kitchen table and my question for you is after you used the Tripletique is the table now protected enough to use without a tablecloth?
Thank you so much! Great question and yes, the Tripletique has held up wonderful since I did this project 2 years ago. I did as many coats as possible until I ran out of the product (I think it was 4) and have had zero issues – so scratches, chips, spotting, etc. I think you should be good to go!