This post is sponsored by Dremel. All opinions and project decisions are my own.
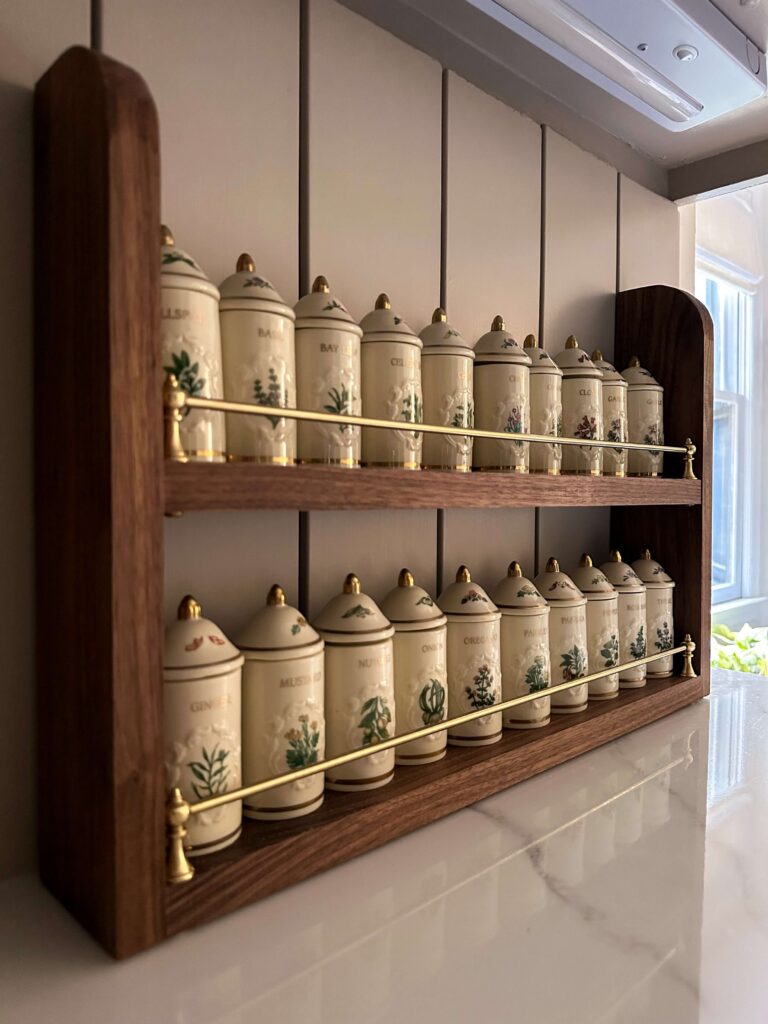
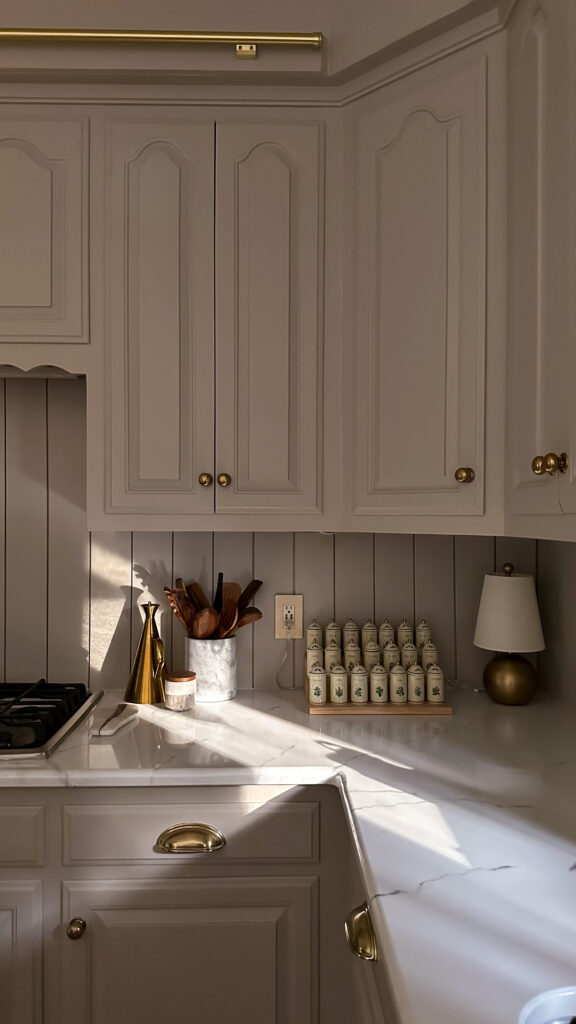
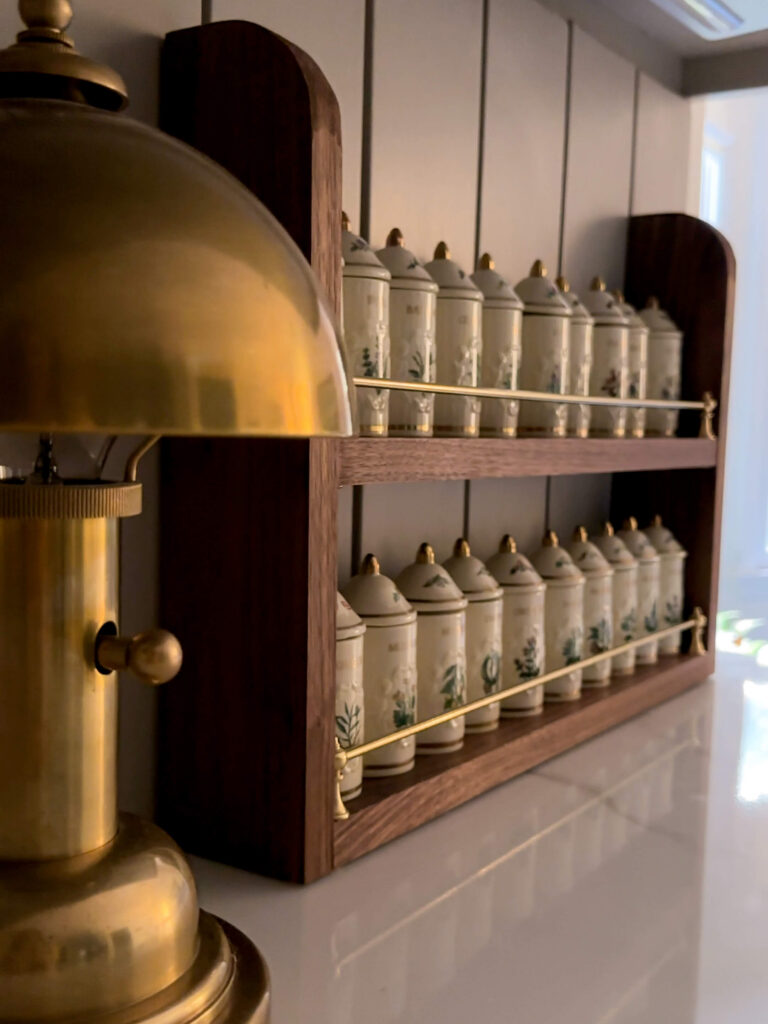
If you’ve been following along for a while, you know I have a deep love for hunting down vintage pieces and one of my most prized finds is my Lenox Spice Garden set. I searched for months before finally tracking one down at a somewhat reasonable price on Facebook Marketplace, and it felt like Christmas when it came time to unbox it.
That’s what led me to build this DIY walnut spice rack, completely custom, built right in my kitchen using the Dremel Portable Saw Station, and more charming than anything I could have found in a store. Today I’m walking you through how I built it step by step so you can build one for yourself too!
What Is the Lenox Spice Garden Set?
If you’re not familiar, the Lenox Spice Garden collection is a vintage fine porcelain spice jar set hand-painted with herbs and florals. They’re incredibly collectible and have had a serious resurgence in popularity. Full sets can run anywhere from several hundred dollars up.
Everything felt a little crammed and the previous spice stadium came out a little further than I would’ve liked.
Mine had been living on a tiered spice stadium from Williams-Sonoma, which is pretty in its own right, but it takes up a lot of counter space and sits right next to an electrical outlet. Every time someone walks near that outlet, I hold my breath. The jars are precious to me, and I needed a safer, more intentional display solution. So I decided to build one myself.
Why I Chose Walnut
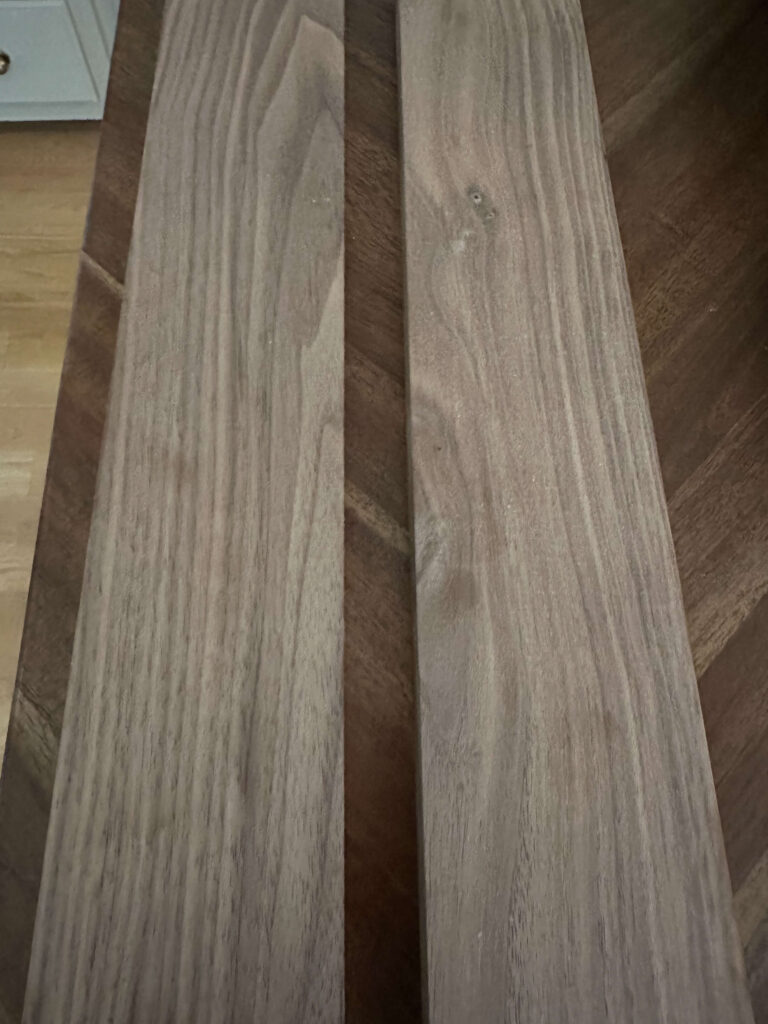
The wood choice for this DIY walnut spice rack was non-negotiable for me. I have a walnut island top in my kitchen, and I wanted the rack to feel like it belonged, not like a project I threw together. Walnut has this warm, rich grain that photographs beautifully and holds up its appearance over time. It felt like the right match for a vintage ceramic set that already has so much character.
If you’re taking this project on yourself, you could use another wood type and stain to your liking. Walnut is on the pricier side, but this is also a smaller project, so the cost stays manageable. Totally a personal preference!
Why I Built This with the Dremel System
I’ll be upfront: this was my first time using any Dremel product. And I’m not exaggerating when I say it changed how I think about DIY builds entirely.
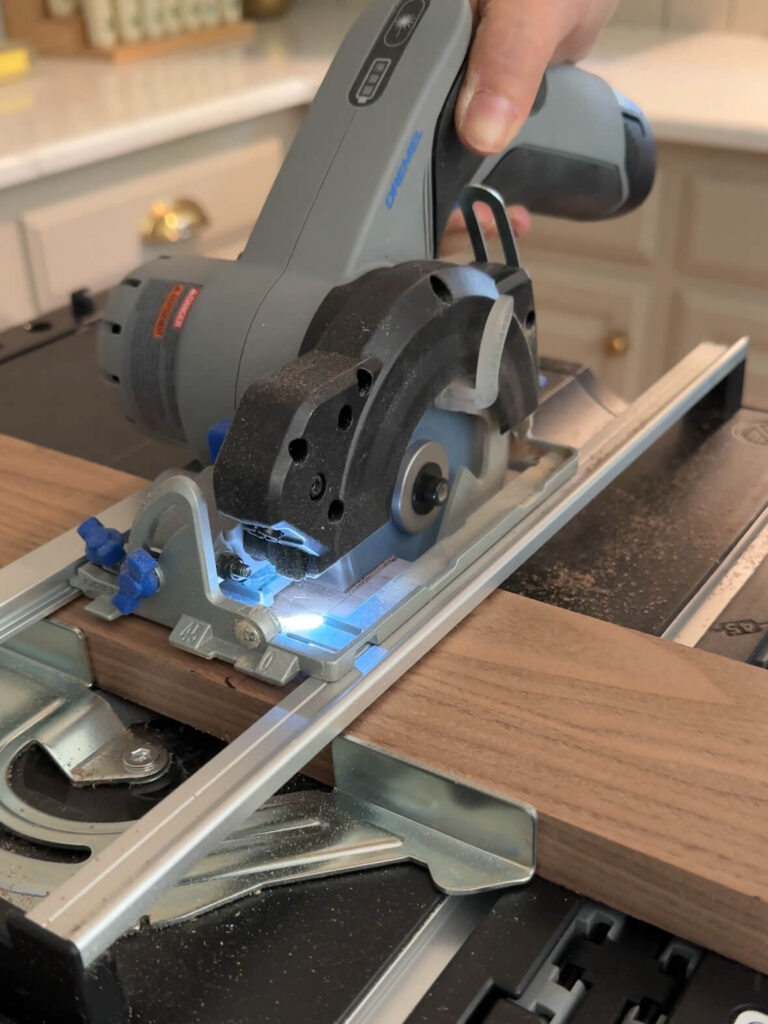
My workshop is in my garage, which because my house is built into a bank, is actually down a full flight of stairs from my kitchen. For a project this custom, that matters. I had originally planned to build three shelves, but while measuring in my kitchen I realized three shelves would be too tall for the clearance between my counter and cabinets. Having the Dremel Portable Saw Station set up right in my kitchen meant I could catch that before making a single cut and pivot to two shelves without wasting any material or making unnecessary trips up and down the stairs. Every decision on this build was thoughtful and intentional because I wasn’t rushed or working in a vacuum.

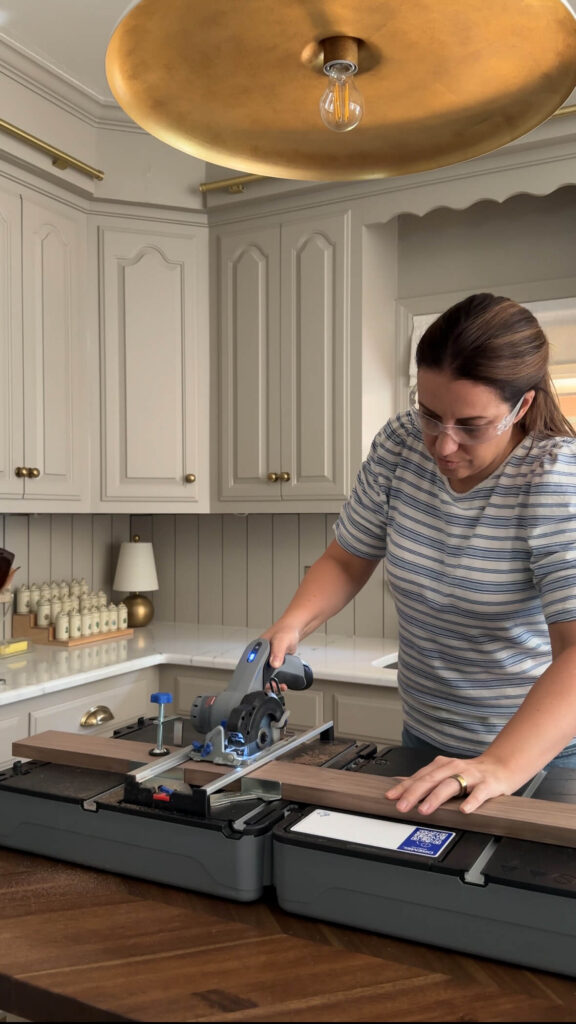
The Portable Saw Station handled all my straight cuts cleanly and with confidence. The Dremel Screwdriver made quick, precise work of drilling the pilot holes for the brass finials on each shelf. And the Dremel Tool with a sanding attachment genuinely saved this project. I used it to sand and even out the arched tops on each side piece after cutting them with my jigsaw. I’m still working on my jigsaw skills, and the arches weren’t perfectly symmetrical after the initial cuts. The Dremel got them there.
The whole system works smarter, not harder. Coming from someone who bought her first power tool just two years ago, I mean that sincerely. If the Dremel Portable Saw Station had existed then, it’s what I would have started with. It’s portable, beginner-friendly, and versatile enough to grow with you as your projects get more ambitious.
Full Supply List
Materials:
- 2 walnut boards, 3″ × 48″
- 2 thin brass rods
- 4 end cap finials
- Wood glue
- Danish Oil
- Clamps
- Rags
- Brackets for wall (optional)
Tools:
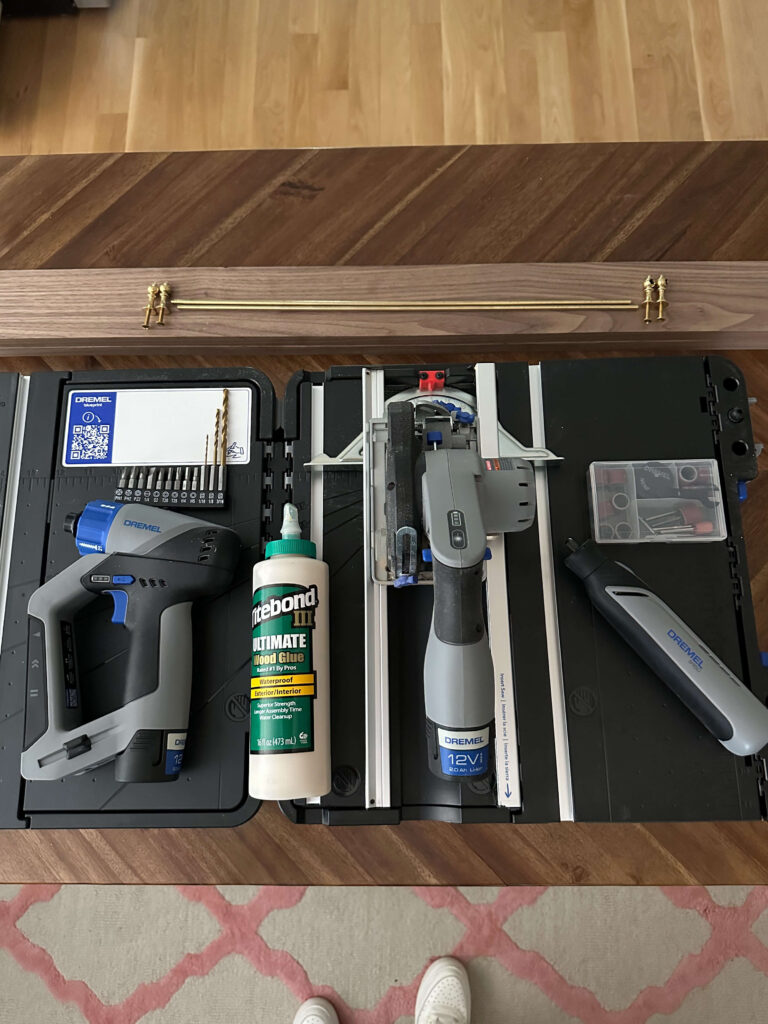
- Dremel Portable Saw Station
- Dremel Screwdriver
- Dremel Tool with sanding attachment
- Tape measure
- Safety glasses
- Jigsaw (only needed if you’re cutting curves)
Everything you need for this project!
How I Built a DIY Walnut Spice Rack: Step by Step
Step 1: Figure Out Your Measurements
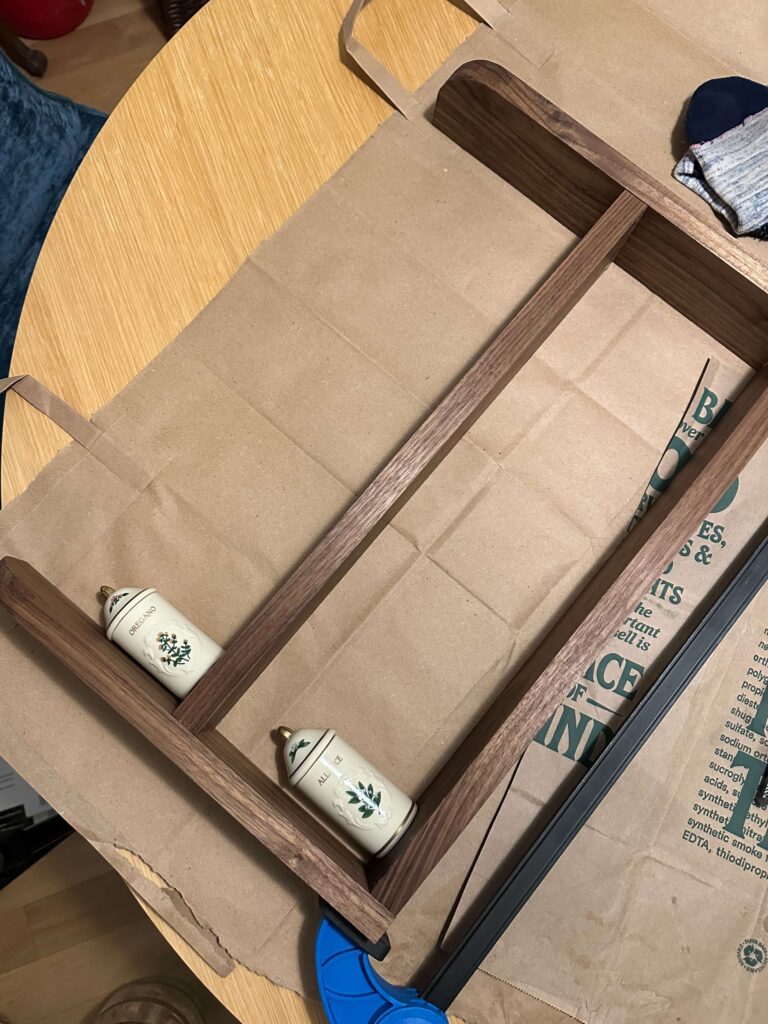
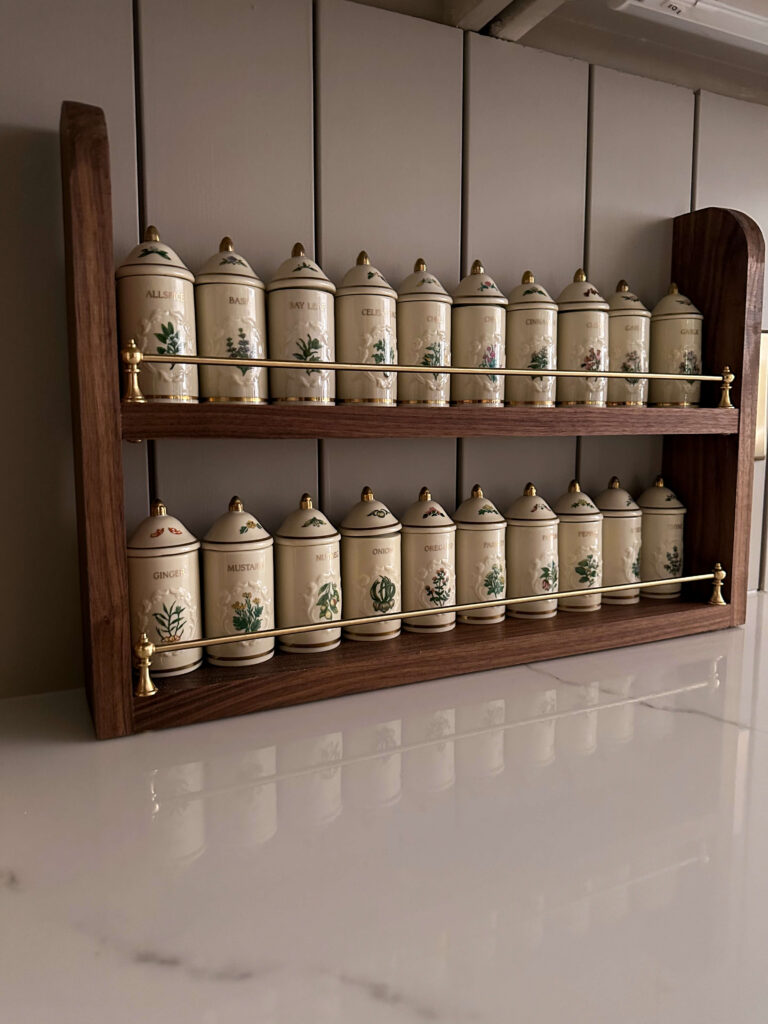
I have 24 Lenox Spice Garden jars and display 20 of them. Depending on your space, you may want three shelves, but for my needs I opted for two. The measurements below will fit ten jars on each shelf neatly.
My final dimensions:
- Shelf boards: 18¼ inches long
- Side pieces: 13½ inches tall
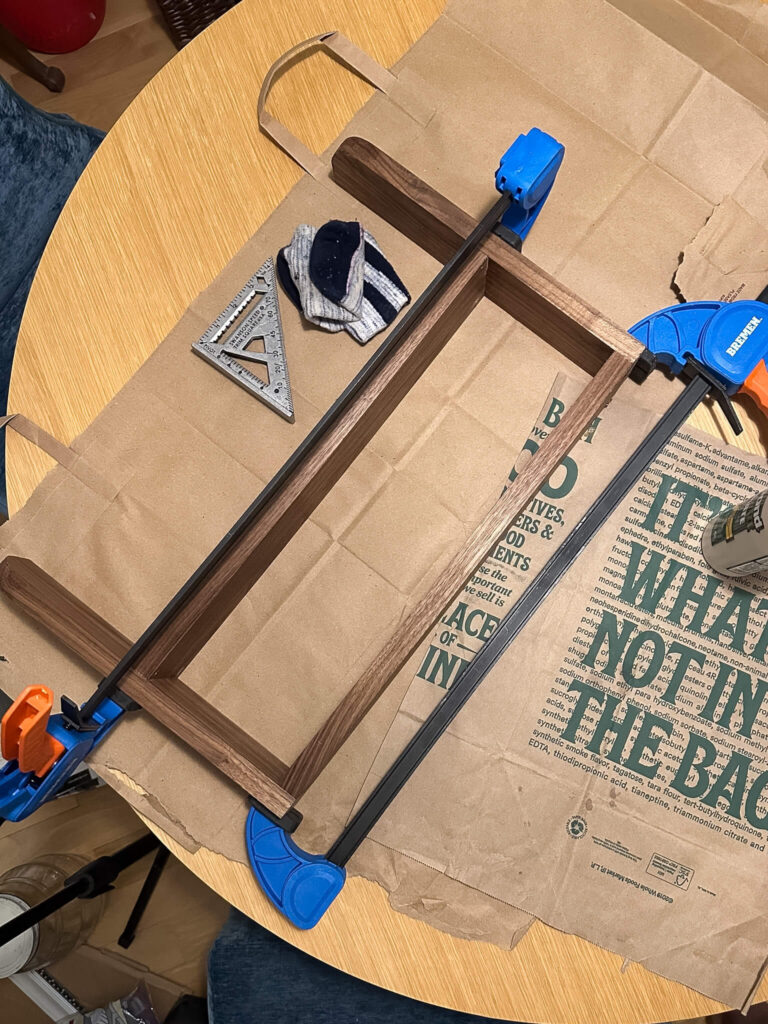
Step 2: Make Your Cuts
I used the Dremel Portable Saw Station to make clean, straight cuts on all four boards. If you want to add a little extra detail to your version, this tool can also handle mitered cuts or beveled edges. I kept mine straight and simple to let the walnut and brass do the talking.
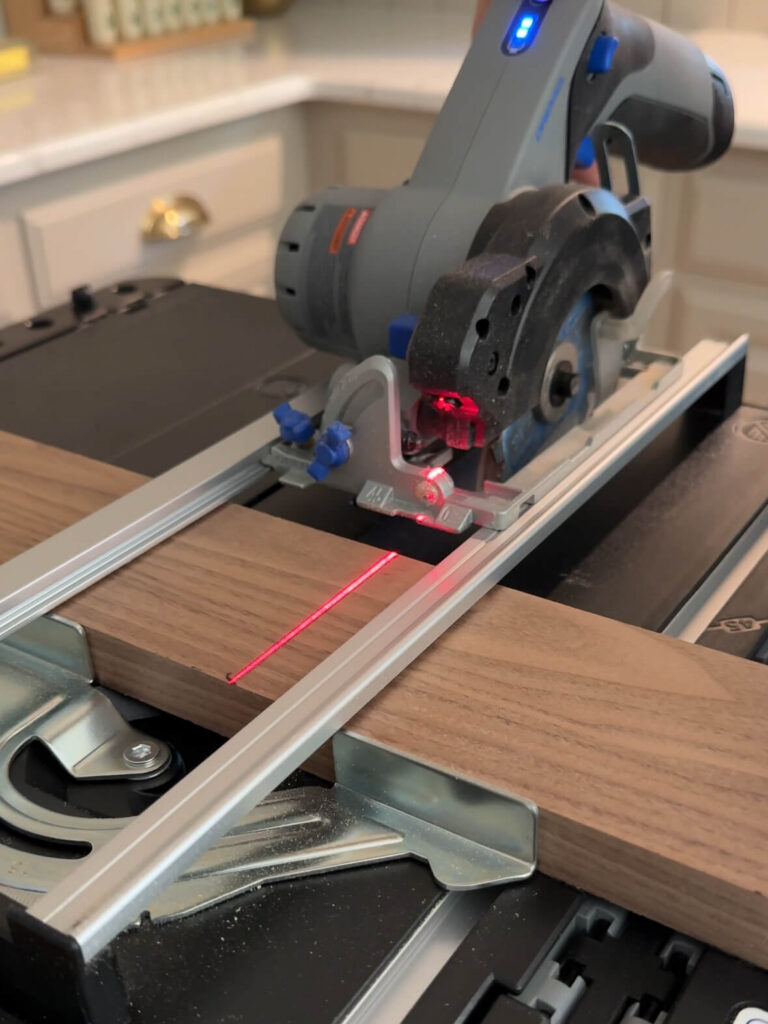
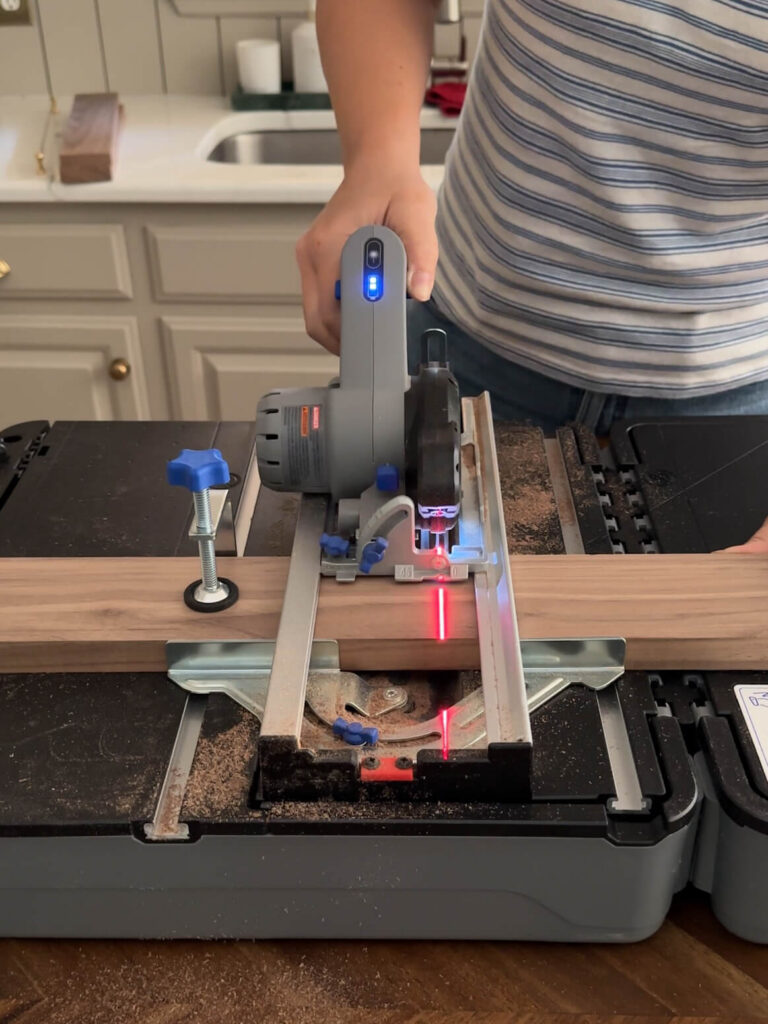
Cutting made simple right in the kitchen thanks to the Dremel Portable Saw Station!
Step 3: Shape the Side Pieces
This is my favorite design detail on the whole rack. Once the side pieces were cut, I traced a curve along the top of each one using a small bowl as a guide, then cut along that line with my jigsaw. I’ll be the first to admit my jigsaw skills are still a work in progress! After the initial cuts, I used the Dremel Tool with a sanding attachment to smooth and round out the tops and make both sides uniform. It literally saved the day!
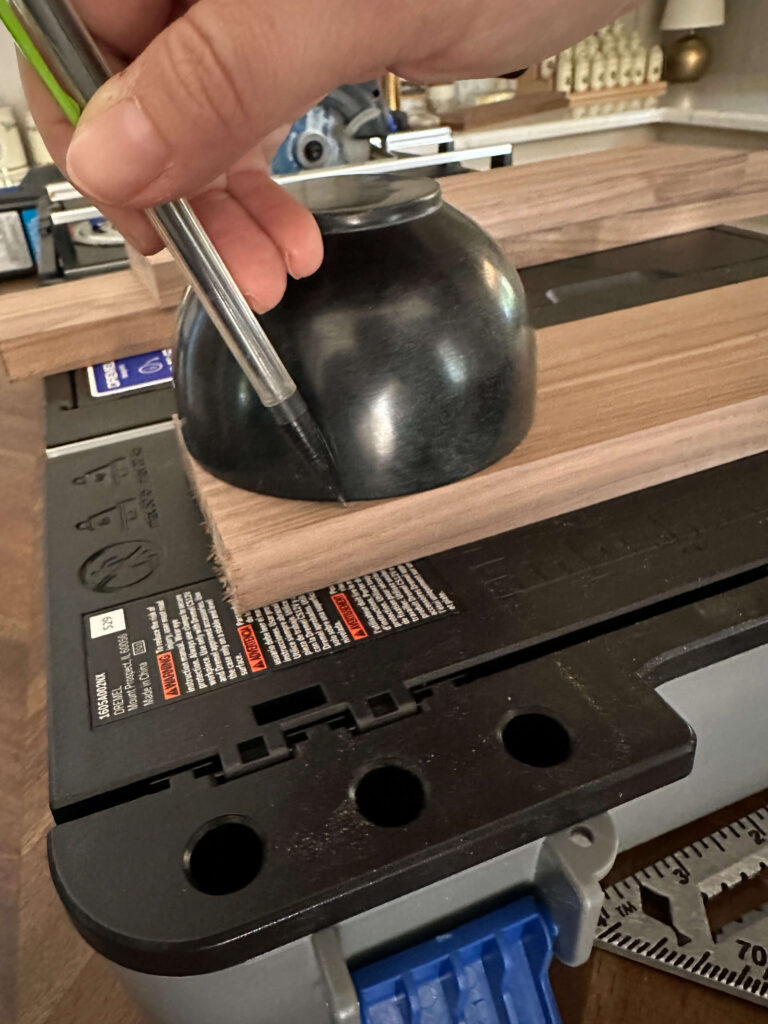

This Dremel saved my arches! It was so much easier to get matching rounded arches thanks to this!
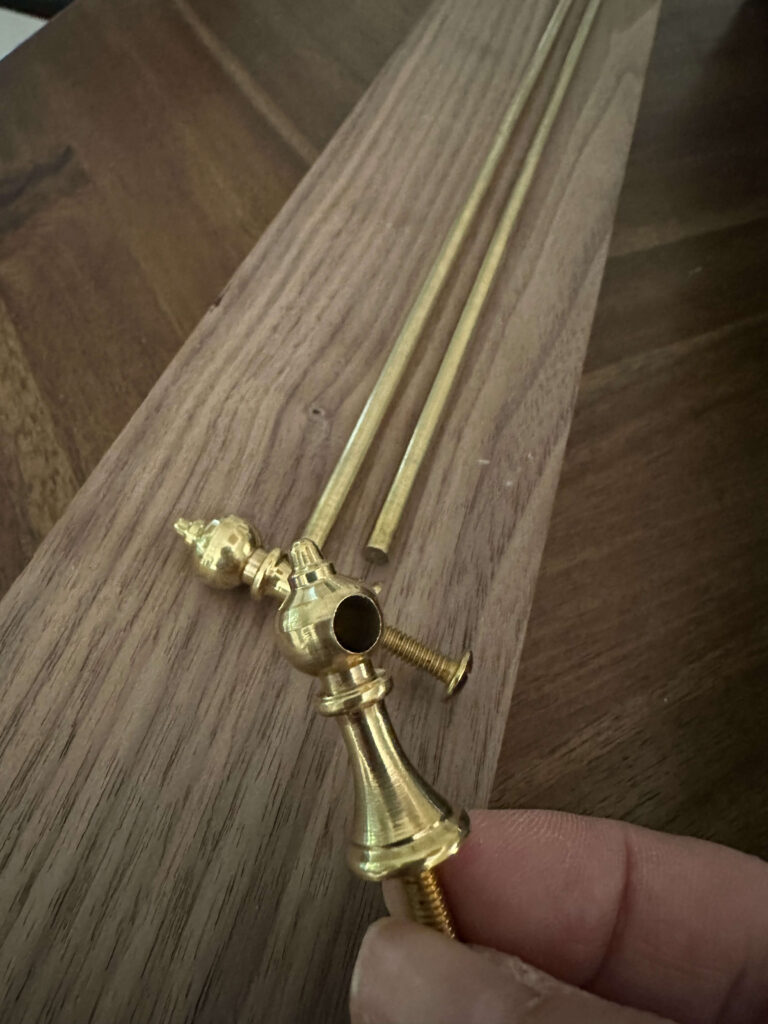
Step 4: Plan the Brass Rod Placement
Before committing to anything, I assembled the brass finials and rods and laid them on the shelves to find the right placement. Once I was happy with the positioning, I marked my spots and drilled pilot holes using the Dremel Screwdriver. Note that you’ll want to drill your pilot holes before assembly since the spacing gets a bit tight. We’ll come back to install the finials and rod after the shelves are glued up.
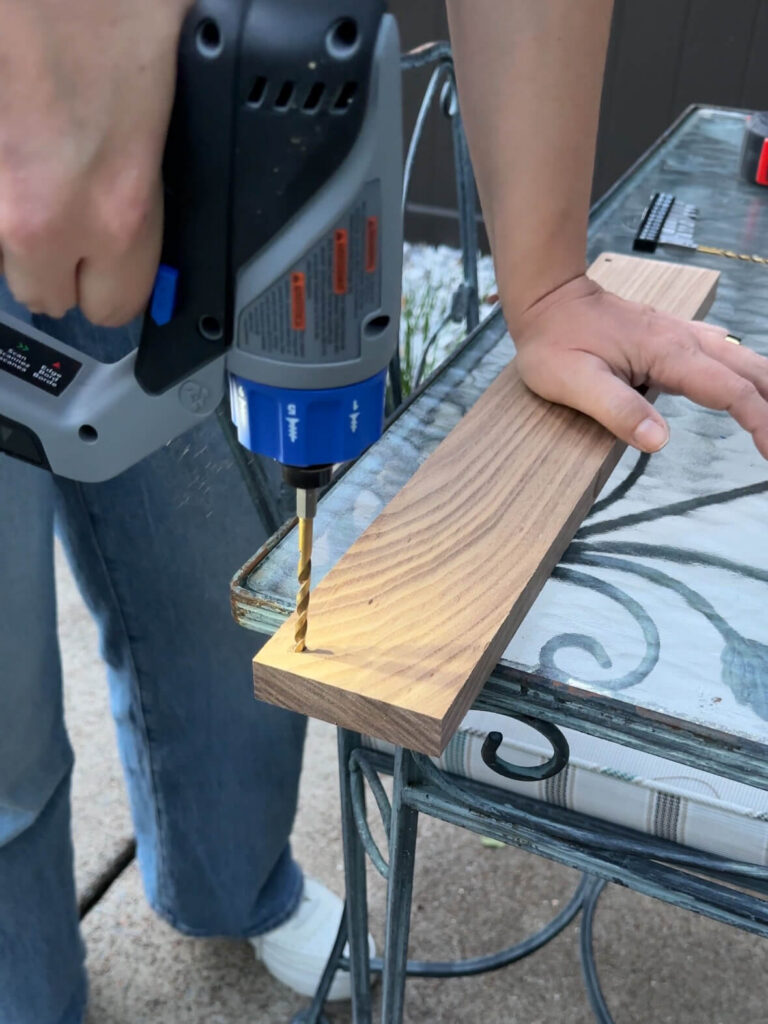
Drill your pilot holes before assembling, otherwise you likely won’t have room to
Step 5: Apply the Finish
Before assembly, I finished all four board pieces with Danish oil. Walnut is so naturally beautiful that I didn’t want to cover it up, but I did want to deepen the grain a little and give it some protection. I did a lot of research before landing on Danish oil and it was absolutely the right call. I could not get over how beautiful the walnut grain looked after just one pass. I applied it with an old sock, wiped it on, and let it set for 12 hours.
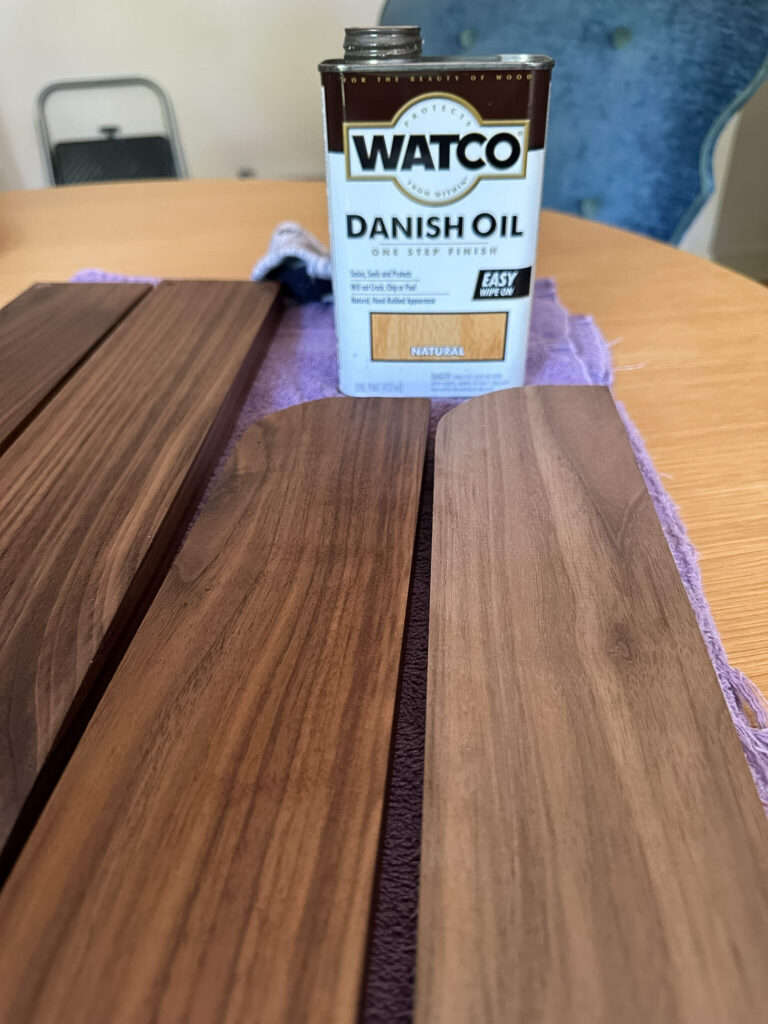
You can see the difference with and without the Danish Oil. It brought out the beauty of the grain!
A couple of alternatives if you’re working on a similar project: food-grade mineral oil is a great easy option (just plan to reapply periodically), or you could go with a wood wax or matte polyurethane if you want more durability.
Step 6: Assemble the Rack
Once the finish was dry, I applied wood glue to the ends of the bottom shelf board and clamped everything together. I used a couple of my spice jars to plan placement and then marked, glued and clamped my top shelf in place. Everything stayed clamped in place overnight before I touched it again.
Make sure you have clamps so your wood glue gets fully cured. I just eyeballed the placement of the top shelf based on the jar height and it worked out great!
Because this is a smaller shelf, I didn’t feel the need to add brad nails for extra reinforcement since wood glue is incredibly strong on its own. That said, it’s always an option if you want the added peace of mind.
Step 7: Install the Brass Rods and Finials
To install the brass rods and finials, I found it easiest to insert one screw from underneath into the pilot hole, place the finial on top, and screw it into place so you can hold it in the right position as it tightens. From there, insert the brass rod into the finial, slide the second finial onto the other end of the rod, position it over the second pilot hole, and secure it from the bottom with a screwdriver. Repeat for the second shelf and you’re almost done!
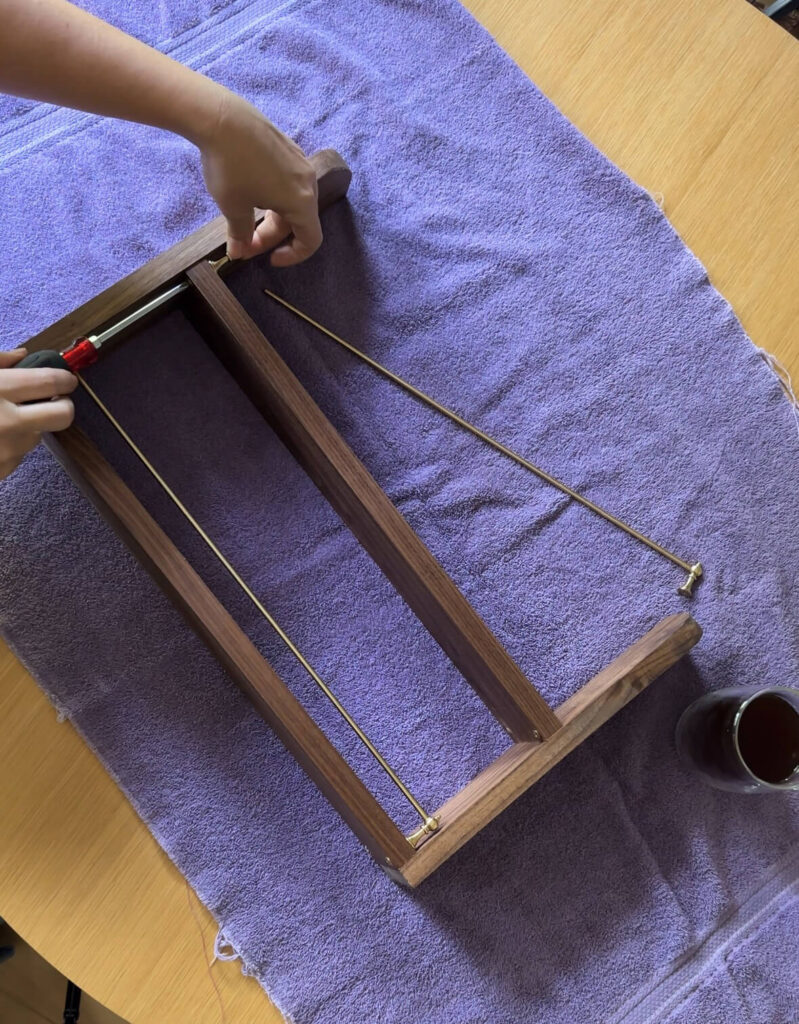
I used a regular screw driver to install the finials as I didn’t want to accidently apply too much force with a drill
There are different types of finials so if you end up building a longer shelf you may need to place one or two in the middle. In that case make sure you’re buying finials that have holes on each side for the rail to slide through. These ones are for the ends only.
Step 8: Mount to the Wall (Optional)
Depending on your backsplash, you may want to mount your spice rack to the wall for extra security. Both command hooks and D-ring hooks would work well here. I’ve placed my shelf in a spot that’s a bit out of the way, so I’m skipping this step for now, but it’s worth considering based on your setup.
The Finished Result
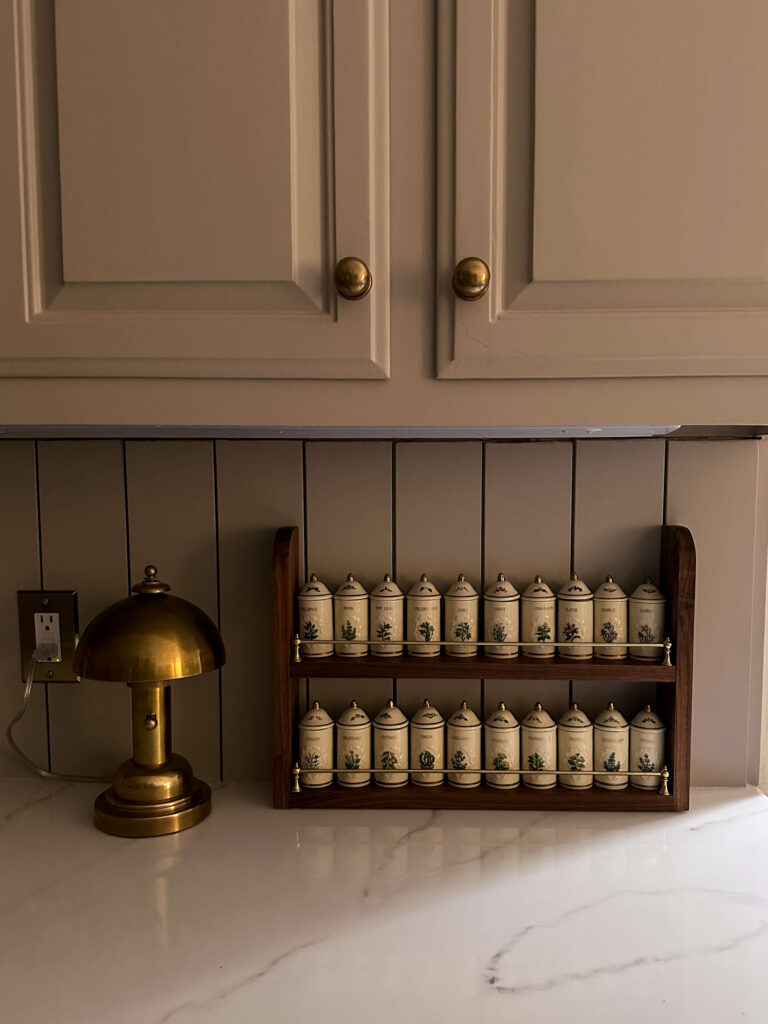
I am so proud of how this turned out! The walnut and brass combination feels warm and elevated, and it fits my kitchen in a way that a store-bought rack never would have. My Lenox Spice Garden jars finally have a home that feels as special as they are.
The best part? I built it right where it was going to live! I could check proportions, test placement, and make decisions in real time all because the Dremel Portable Saw Station made it easy to work in a small space without hauling everything to a garage or workshop.
If you’ve been on the hunt for your Lenox Spice Garden set (or Spice Village — same idea, slightly different era), or if you already have one and are looking for a display solution, I really hope this inspires you to just build something. And remember, you don’t have to have it all figured out before you start, you just have to start!
Supply List for Your DIY Walnut Spice Rack
- Walnut boards, 3″ × 48″ (×2)
- Thin brass rods (2)
- Brass end cap finials (4)
- Dremel Portable Saw Station
- Dremel Screwdriver
- Dremel Tool + sanding attachment
- Danish oil
- Wood glue
- Clamps
- Old rag for applying finish
- Measuring tape
- Safety glasses
- Jigsaw (only if you’re cutting curves)
Have questions about the build? Drop them in the comments — I’d love to help!
Related Woodworking Posts:
How to Measure, Cut and Install Crown Molding
Designing Box Molding for the Home Office
How I Designed Stacked Picture Frame Molding in my Primary Bedroom